MS EWS OAuth2 Authentication (deprecated)
This authentication method is still supported by Imagicle UCX Suite release, and it relays on EWS-based OAuth2 authentication against MS Office 365 email service.
Requirements
To enable Imagicle UCX Suite to handle outbound email notifications and to handle email-to-fax service, leveraging EWS-based OAuth2 authentication, you must configure an application on Azure Web Portal, taking note of Application ID, Directory ID and Client Secret data, needed later on while configuring this authentication method on Imagicle UCX Suite. Please find below the procedure.
Azure web portal configurations
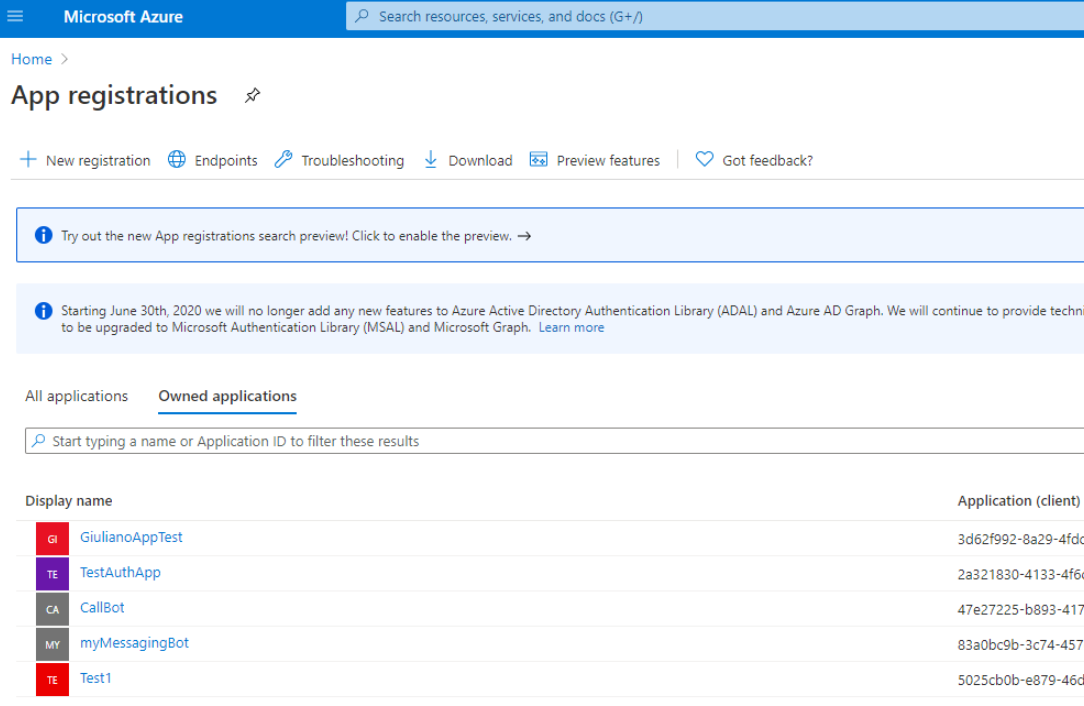
Please access to Azure portal and go to "App Registrations":
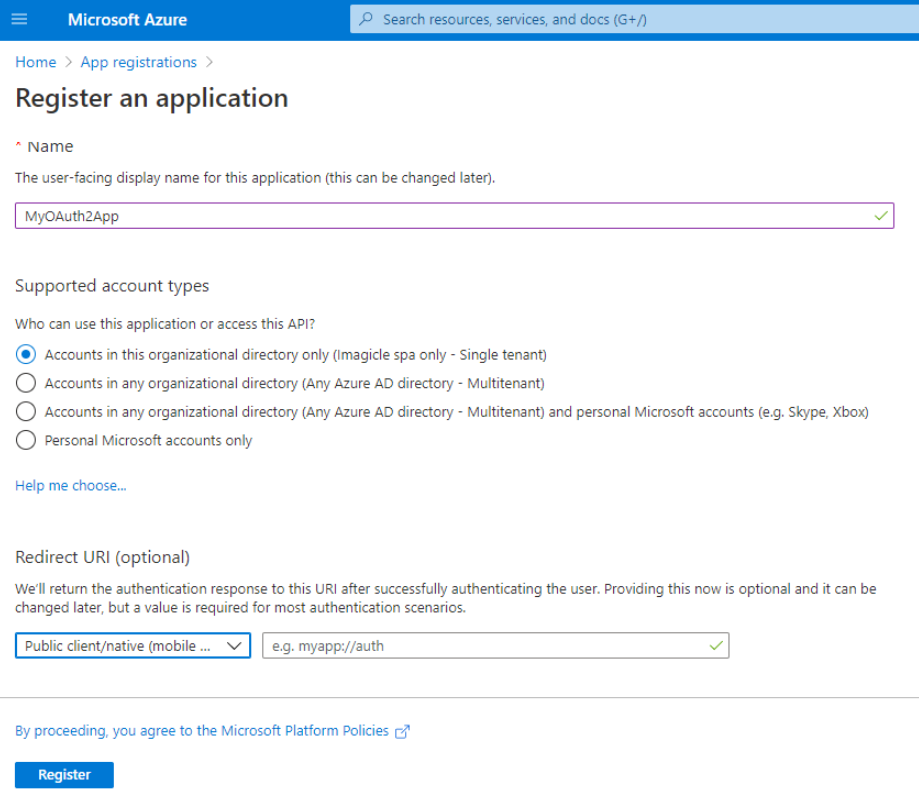
Click on "New registration" and choose a name like "MyOAuth2App". Then select "Accounts in this organizational directory only" and hit "Register"
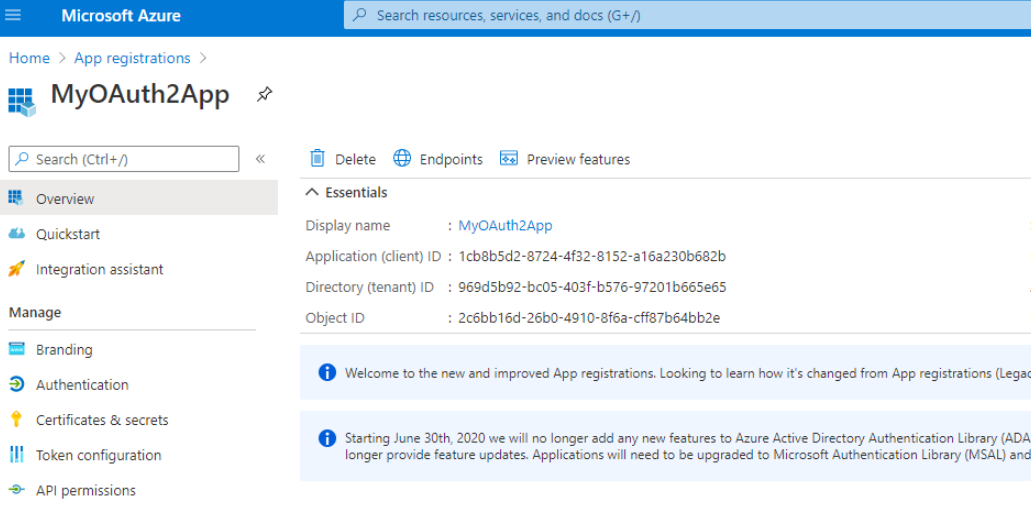
The following window appears, including Application ID and Directory ID. Please copy both data, for later usage.
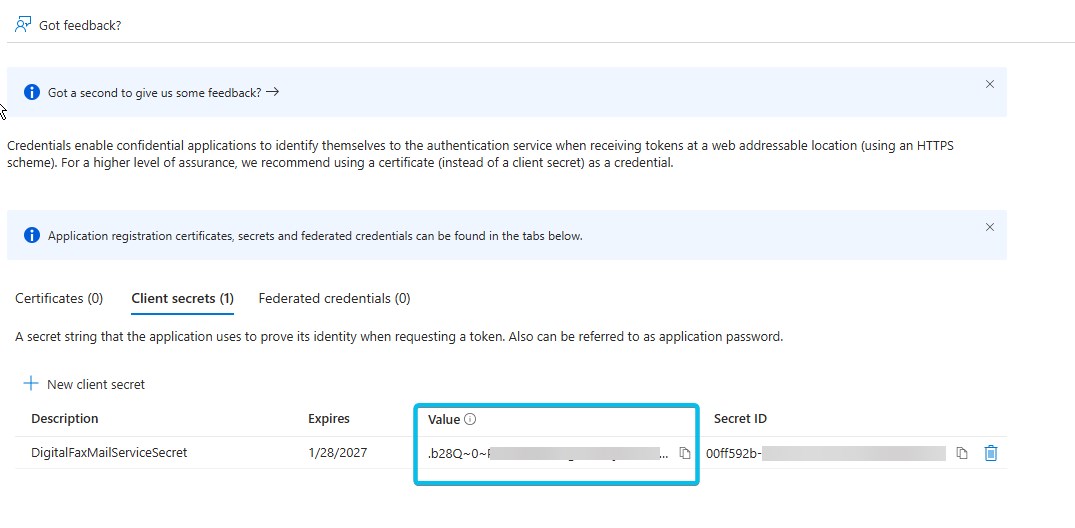
Now please click on "Certificates & secrets" option, included in left pane, and add a new "client secret" with the name of your choice and a long expiration period.

Once added, you'll get some data associated to it. Please copy "Value" field for later usage. Copy the field immediately after having created the client secret, because it will be automatically hidden after few minutes, for security reasons.
Now click on "Add permissions" and select "API’s my organization users". Then search for "Office 365 Exchange online".
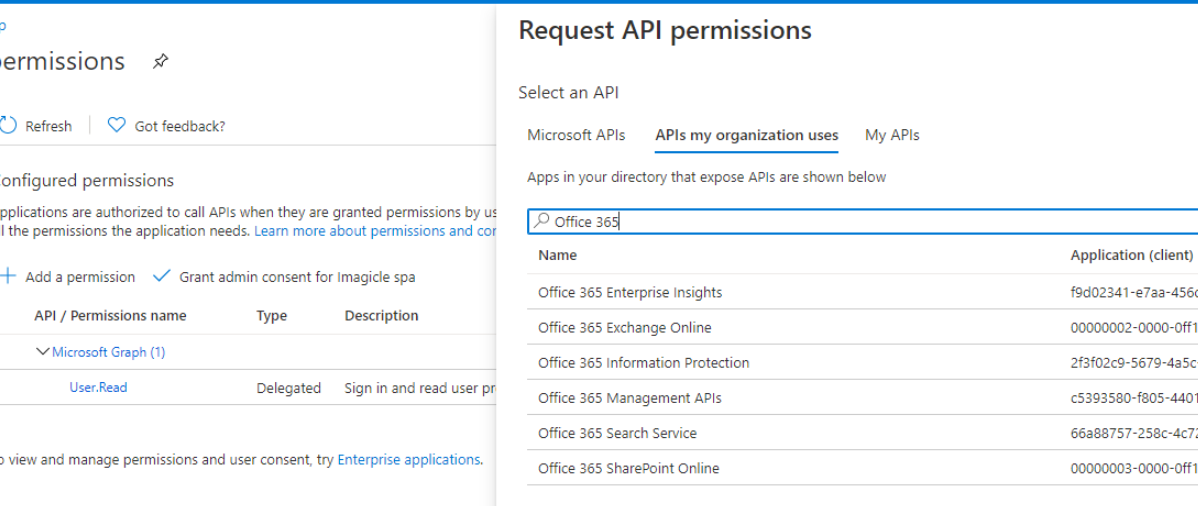
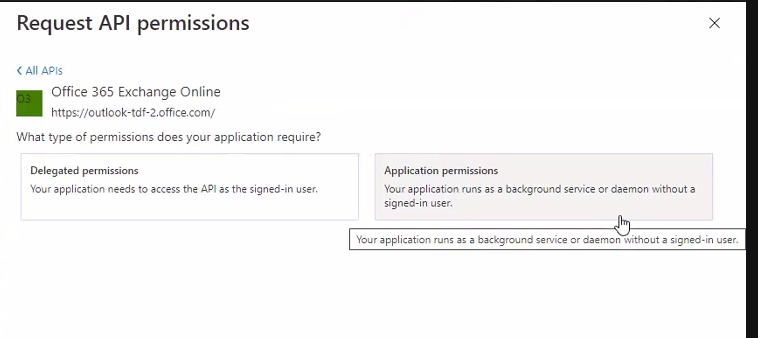
Select "Office 365 Exhange online" and then select "Application Permissions"
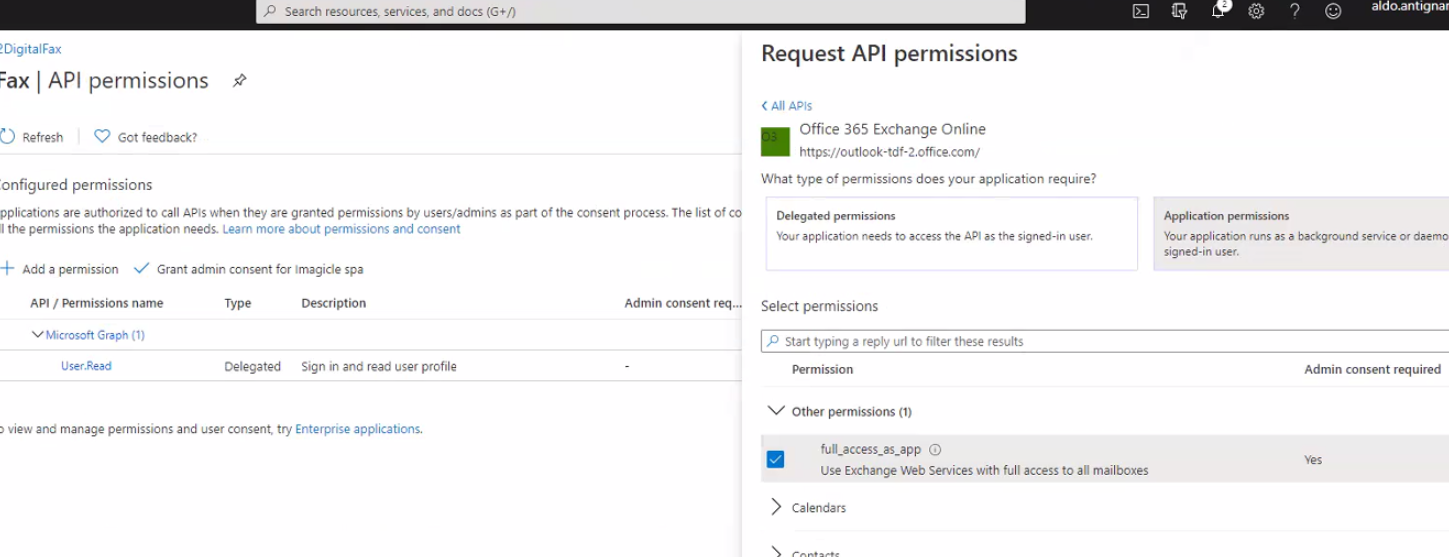
From the list of available permission levels, please select "full_access_as_app" from "Other permissions" category. This is where EWS integration is accomplished:
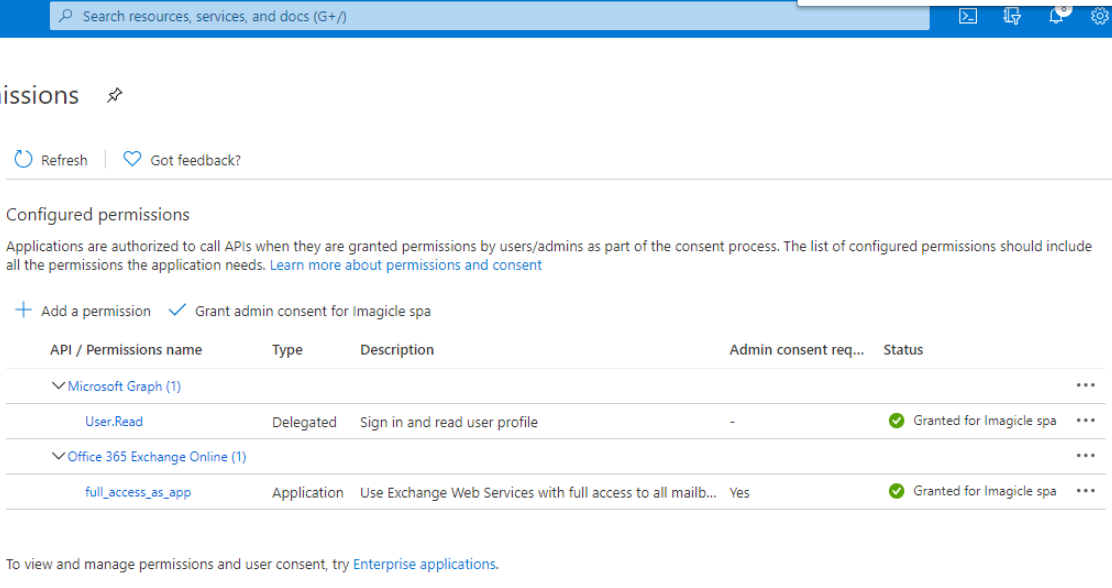
Once permission has been assigned, you must authorize it for your organization, by clicking on "Grant admin consent for <company_name>".
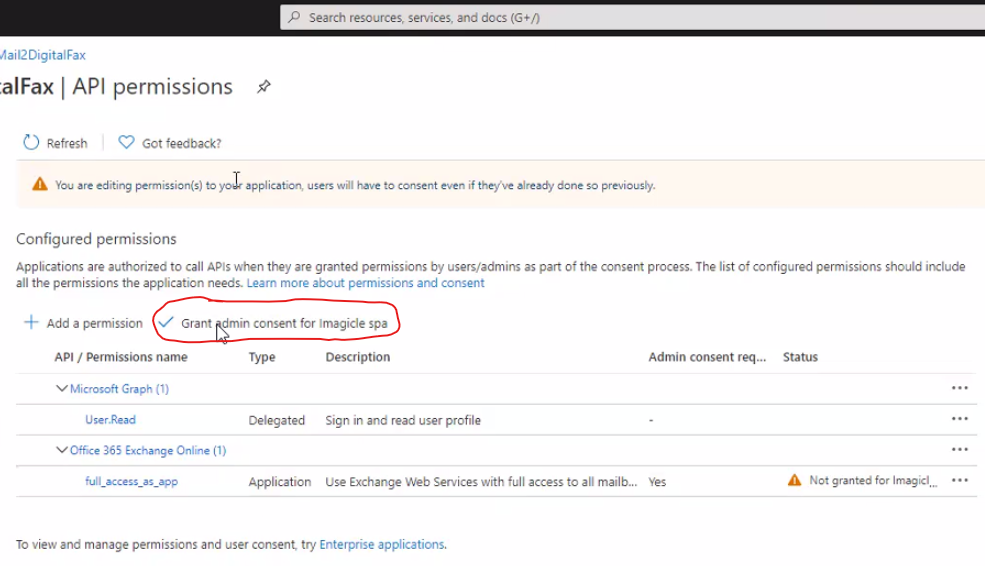
This is the resulting page.
Optional configurations to restrict EWS Application to a mailbox set (Imagicle Digital Fax only)
Above described API Permission level privileges allows the application to access all EWS API on all organization mailboxes.
However, it’s possible to optionally apply an advanced configuration on Microsoft Office 365 to restrict the application to access only a specific mailbox.
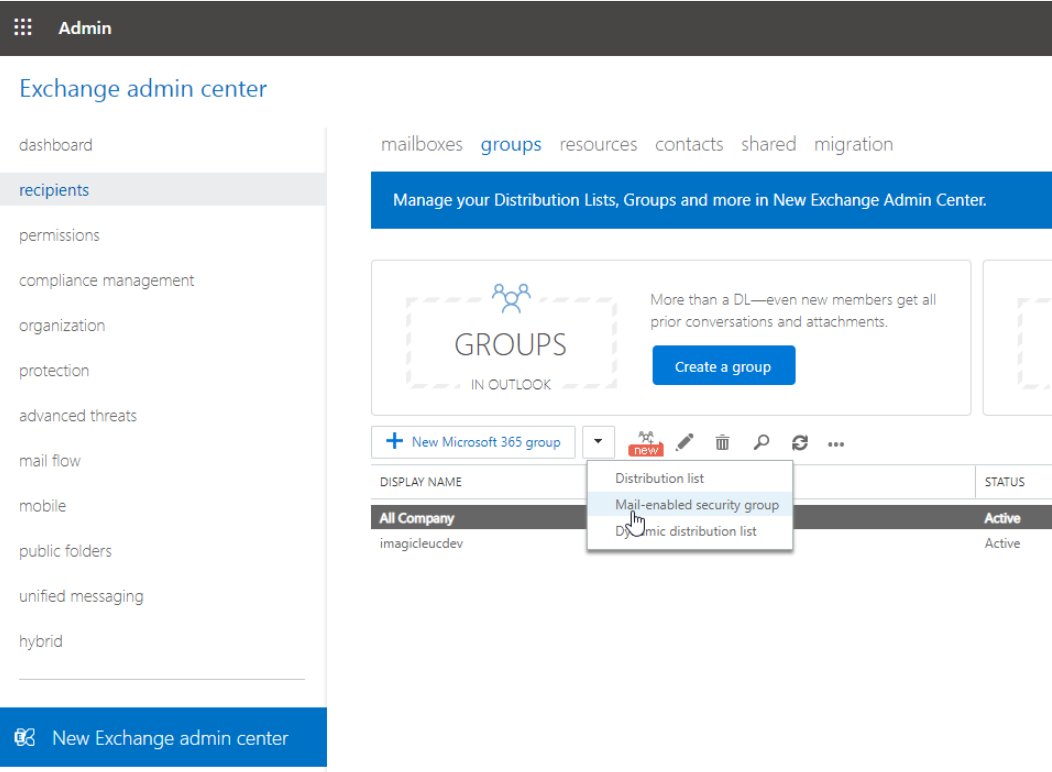
This is accomplished by accessing Exchange Online Administration Portal and create a new mail-enabled security group: Go to Recipients → Groups → New mail-enabled security group
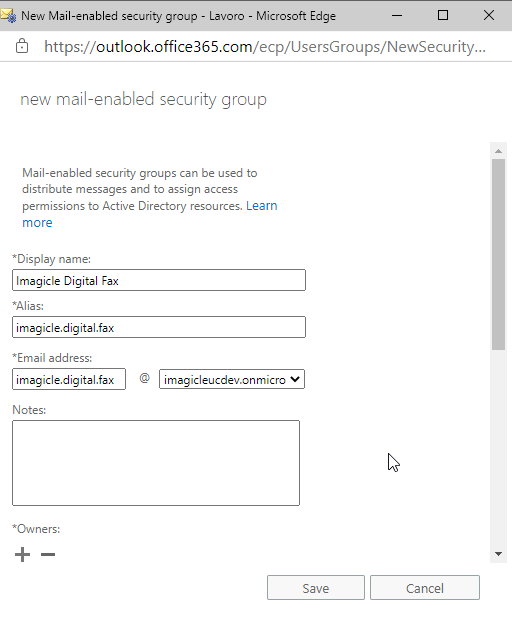
Fill the form with a name and an alias. Those will be used later as a target of an Application Policy.
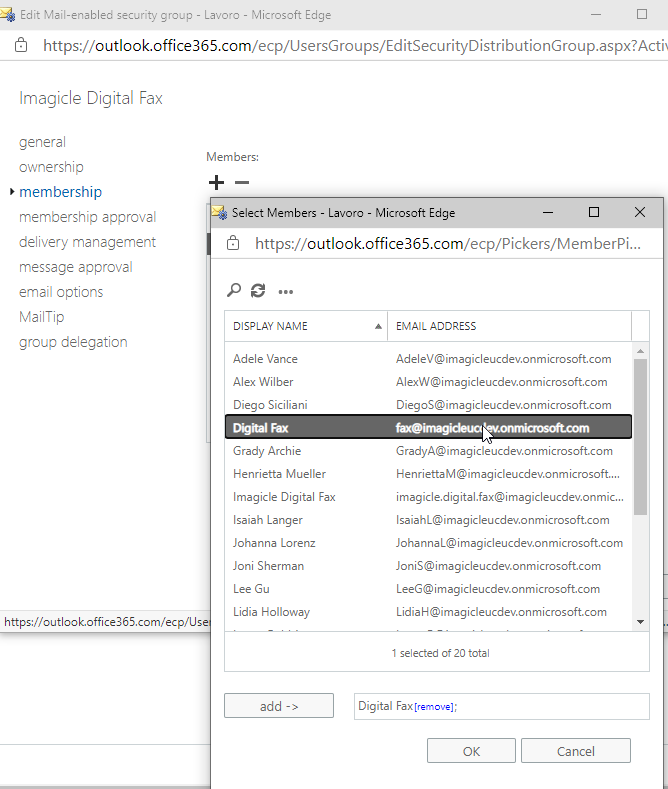
Save form and edit the newly created group, go to membership, add a member, search for the mailbox to be granted to Digital Fax and add it:
Connect to Exchange Online PowerShell and create an Application Access Policy to allow Digital Fax application to only access the newly created mail security group, by executing the following command, where:
AppId value corresponds to the application “Client ID” value created within Azure app registration portal
PolicySecurityGroupId corresponds to "Display Name" of the previously create security group
New-ApplicationAccessPolicy -AccessRight RestrictAccess -AppId <AppId> -PolicyScopeGroupId "Imagicle Digital Fax" -Description "Restrict Imagicle Digital Fax accessible mailboxes"Output should be:
RunspaceId : 2d08b315-81dd-4140-8a28-4a49431fb44dScopeName : Imagicle Digital FaxScopeIdentity : Imagicle Digital FaxIdentity : 8f8ccdec-23bd-4452-bdb3-becc0c415a99\da34af4b-b01f-47e4-bfac-2f9fc3f1383e:S-1-5-21-2724517575-989916663-4003715733-16076635;697c4a2-f812-4072-a10f-4455db66025eAppId : da34aq4b-b01f-47e4-bfac-2f9fc3f1383eScopeIdentityRaw : S-1-5-21-2724537575-989916663-4003715733-16076635;697c48d2-f812-4072-a10f-4455db66025eDescription : Restrict Imagicle Digital Fax accessible mailboxesAccessRight : RestrictAccessShardType : AllIsValid : TrueObjectState : Unchanged
Verify the rule, to check if the application can properly access the needed mailbox by executing the following command:
Test-ApplicationAccessPolicy -Identity <mail2fax address> -AppId <clientId>Output should be:
RunspaceId : 2e08b315-81dd-4143-8a28-4a49431fa44d AppId : da34ee4b-b01f-44e4-bfac-2f9fc3f1383e Mailbox : fax MailboxId : c82eee91-a3e0-43f0-9a43-03e7ec7b1e96 MailboxSid : S-1-5-21-2722357575-989916663-4003711733-159675946 AccessCheckResult : Granted
Then please verify the application can't access any other mailbox, by executing the following command:
Test-ApplicationAccessPolicy -Identity <any other mail address> -AppId <clientId>In this case, output should be similar to below sample:
RunspaceId : 2d08b235-81dd-4140-8a28-4a49431fa44d AppId : da34af4e-b01f-47e4-beec-2f9fc3f1383e Mailbox : fax MailboxId : c82eee91-a3e0-43f0-9a43-03c7ec7b1e96 MailboxSid : S-1-5-21-272451125-989916663-4003715733-15450946 AccessCheckResult : Denied
