Product Configuration
This KB article gives an high level overview about accessing and configuring Imagicle Auto Attendant, focuses on Administrators managing the whole application.
User permissions
To create or modify an IVR service, you must be an Administrator (Complete Management). This will give you full control over the application.
You can set user permissions form the Admin ⇒ User Management page.
Adding a new IVR service
You can add a new IVR service from the Services web page, by clicking on “Add a new IVR service”. The service can be created via a Wizard or starting from a template.
The IVR Service name and the Pilot number must be unique for the whole system. Since Advanced Queuing and Auto Attendant are sharing same SIP Trunk, the number and the name must be also different from ACD queue names and pilot numbers.
Usually you define one IVR service (with one pilot number) for each site in your organization, or for each PSTN public number.
For complex scenarios, you can define more than one IVR service and cascade them, transferring the call from the first service to the other services' pilot numbers.
Behaviors and the Main Behavior
Behaviors define how the call is treated after being answered. Behaviors can play audio files, wait for DTMF tones, drop or transfer the calls, and so on.
The first behavior you add to the service becomes the Main Behavior, executed when the call comes in and it is answered by AutoAtt engine.
The following basic behaviors are available:
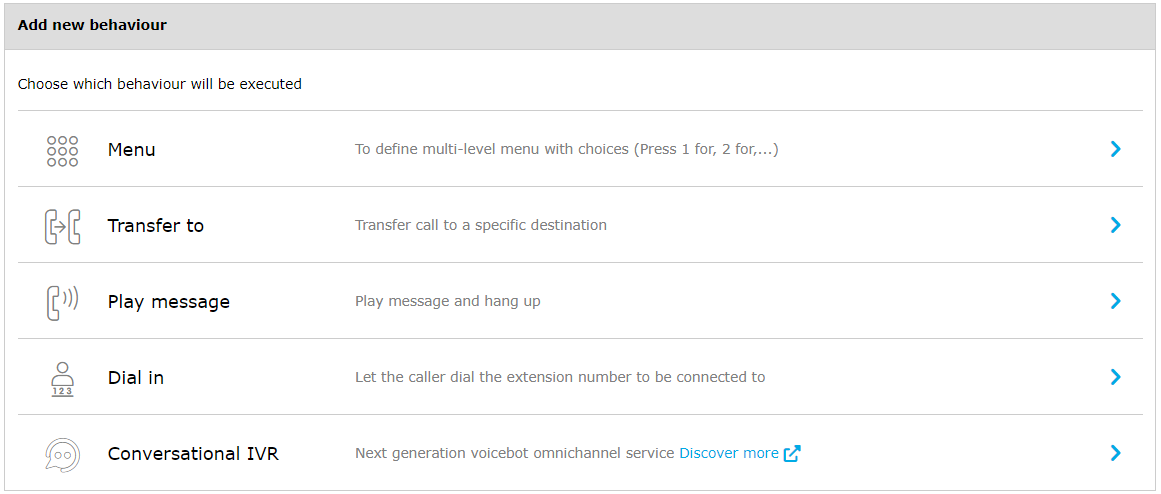
Menu
Through the Menu behavior, you can easily create menus and submenus with DTMF selections. You design the call flow through the web interface, specifying what happens when the caller party hits a digit on the phone, how many times to repeat the intro message on timeout and so on.
Each option (i.e. DTMF) can lead to a sub menu. The timeout and invalid selection options are inherited by the sub menus, but they can be overridden if needed.
Transfer to
All Auto Attendant call transfers are blind type. They fail instantly if the destination is invalid or cannot be reached. In this case, the caller hears no ringback.
If the destination can be reached, the caller hears the ringback tone from the Calling Platform.
For each transfer you can define a message to be played before initiating the transfer, the number of retries, and messages to be played in case of failure.
After the configured number of retries, you can choose to drop the call or trigger another behavior.
If the Calling Platform in use allows it, the call can be transferred to internal numbers/SIP URI, to a third-party answering groups or ACD, to a voice mail system or to any PSTN number.
Play message
This behavior allows to simply play a voice prompts, previously created in MP3 or WAV format and uploaded from web portal.
Dial in
Dial-in behavior invites caller party to enter the digit of the internal number/extension to be connected to. You can define the minimum and maximum number of digits to be collected, a timeout, and if the caller must hit "#" to terminate digits collection.
Conversational IVR
This behavior allows to trigger a Voice Virtual Agent script created in Smartflows (relevant license required) or an AI Virtual Receptionist service. Please remember that interacting with Cloud-based Imagicle AI applications might require to setup a new web server URL, as explained here.
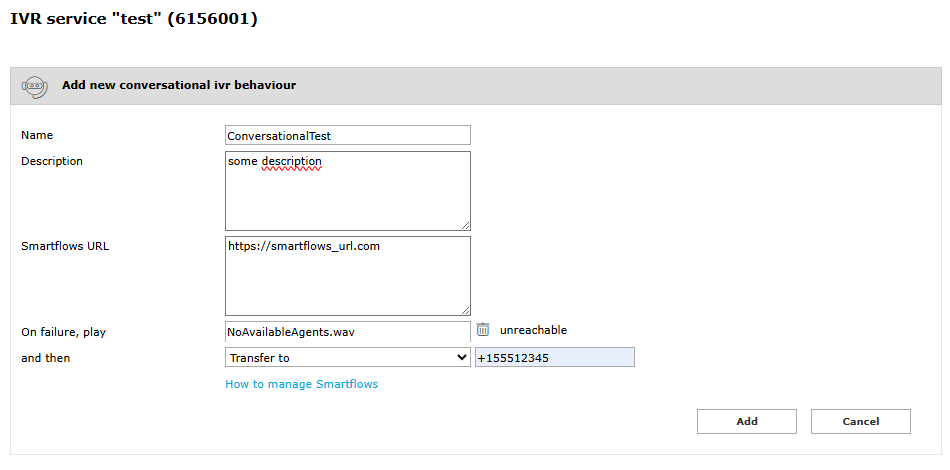
Other than adding the Smartflows URL coming from Voice Virtual Agent or AI Virtual Receptionist, you can also upload a voice prompt to be played back upon Cloud connection failure. After the prompt, you can decide to drop the call or overflow it to an internal or external number.
To trigger a Voice Virtual Agent or the Virtual receptionist, both in Imagicle Cloud, the Imagicle UCX on-prem Suite must reach Internet. More details here.
Audio prompts
You can easily add and audio prompt into any Auto Attendant behavior by clicking on the textbox close to the message label. It is a best practice to add the transcript of the audio content.
Audio files can be recorded in .MP3 or Wav formats, and they are automatically converted to PCM 8KHz 16-bit mono.
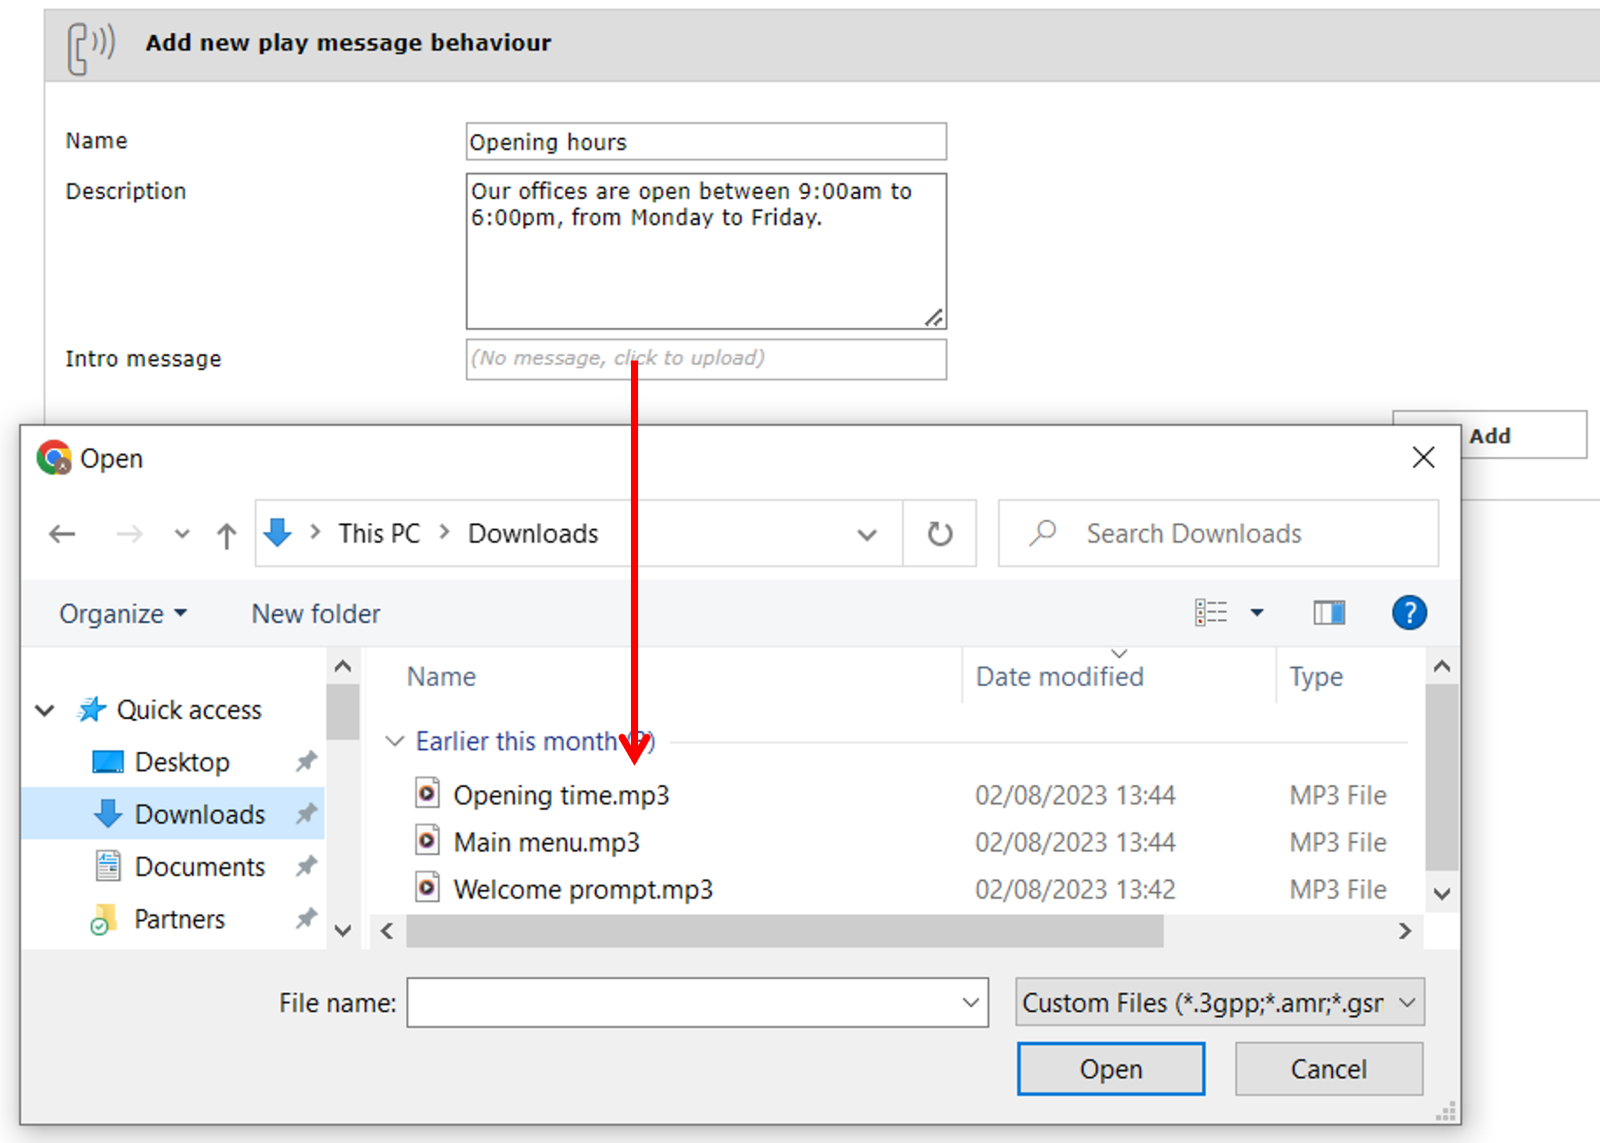
To check the audio prompt quality after conversion, save the behavior, then click on the play icon, then on the download icon. Play the file locally on your PC.
All the audio messages are optional. To delete the message, click on the trash icon.
Note: please download and backup any audio file before removing it from an existing IVR service, because it is permanently deleted from the server.
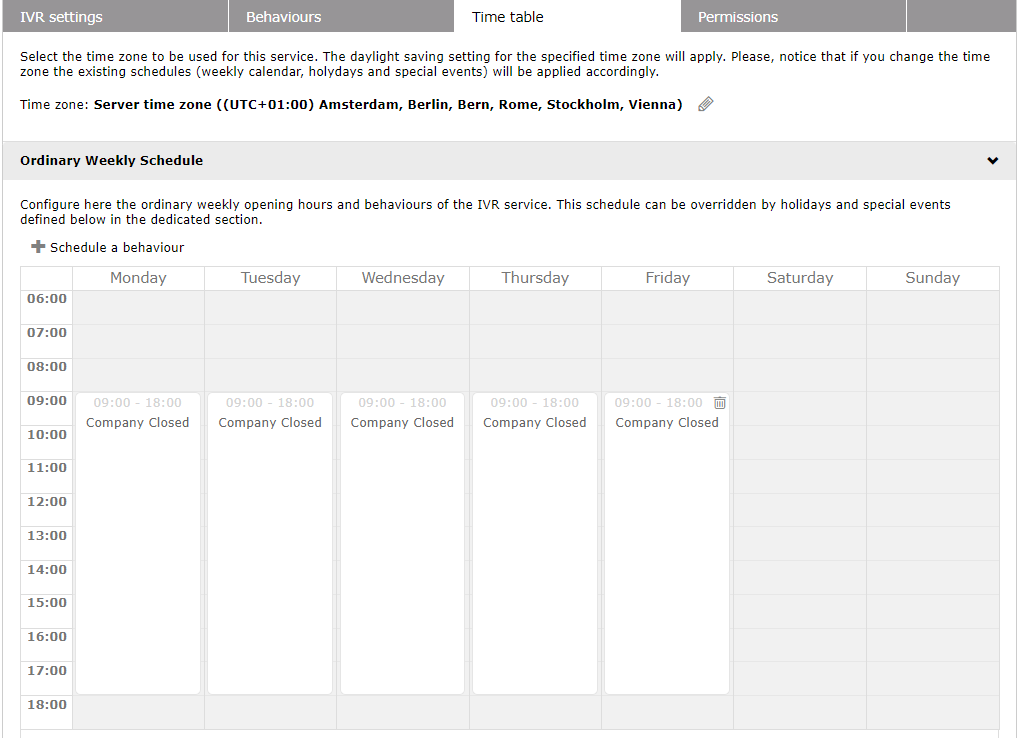
Scheduling behaviors
The timetable allows you to change the behavior to be executed, based on the date and time when the call hits to the relevant IVR Services.
For example, you can define a “day” behavior and a “night” behavior. Select the Night behavior as default, pressing the “Outside of defined schedules, execute the following behavior” button on the bottom of the timetable.
Then add a new scheduled behavior for the working hours, selecting the “day” behavior.
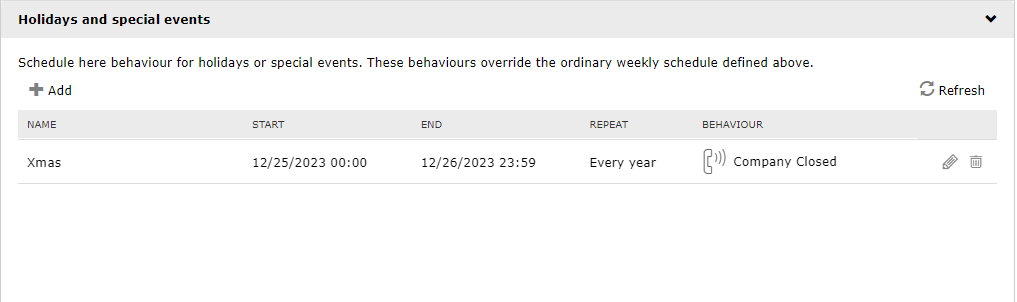
The holiday and special events allows you to override the normal schedule, executing different behaviors.
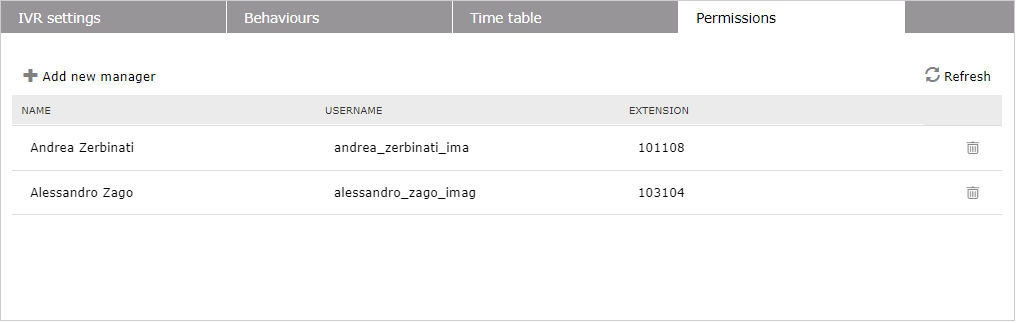
IVR Managers
When you edit an existing IVR Service as administrator, you can assign one or more IVR Managers from "Permissions" tab.
Each IVR Manager associated to an IVR Service has the following capabilities:
Change overflow treatment
Edit Auto Attendant behaviors and relevant voice prompts
Amend weekly timetable, by choosing opening/closing time
Configure holidays
Add more IVR Managers
Run Auto Attendant reports, except "Busy Channels"
Modifying an existing IVR service
You can safely edit any an existing IVR service without the need to restart the service. If you apply changes, calls currently connected to the IVR service will retain the old behavior. The changes apply to new calls.
Other IVR service settings
When you edit an existing IVR service, you can define an additional behavior, which is triggered when the maximum number of concurrent calls is exceeded (“overflow”). To understand how Auto Attendant license relates to Advanced Queuing licensed channels, please read the product description.
Data Retention
From IVR "Settings" tab, it is possible to specify maximum lifetime (in days) of historical data. Older data is automatically deleted. Set it to zero (0) to disable automatic deletion. Please, notice that this setting might impact on the database size.
Starting the service
Since Advanced Queuing and Auto Attendant share the same service, you can start and stop the service from Advanced Queuing's Manage Service page. Stopping Advanced Queuing service stops all the queues, as well as all IVR services.