SSO against Active Directory Federation Services (AD FS)
This article describes how to configure your Active Directory Federation Services (ADFS) to enable Imagicle users to login to web portal, gadgets and Attendant Console with Single Sign-on based on SAML protocol.
This procedure has been tested with ADFS 3.0.
Prerequisites
In order to successfully configure your ADFS, you should have the following data:
User Pool ID
Redirect URI
More details are available here.
Procedure
Connect to the Windows Server instance where you have installed ADFS as an Administrator via RDP
Open the ADFS console
Go to "Trust Relationships" > "Relying Party Trusts" > "Add relying party trusts". This will start a wizard
On the Welcome tab select "Claims aware", then click "Next"
On the Data Source tab select "Enter data about the relying part manually", then click "Next"
On the Display Name tab set "Imagicle UCS" as "Display name" (or whatever you prefer), then click "Next"
On the Configure Certificate tab do not configure anything and click "Next"
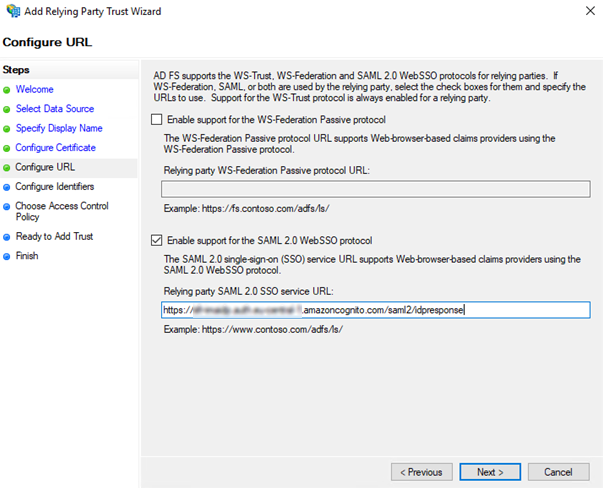
On the Configure URL tab select "Enable support for the SAML 2.0 WebSSO protocol" and set the Redirect URI as a "Relying party SAML 2.0 SSO service URL", then click "Next"
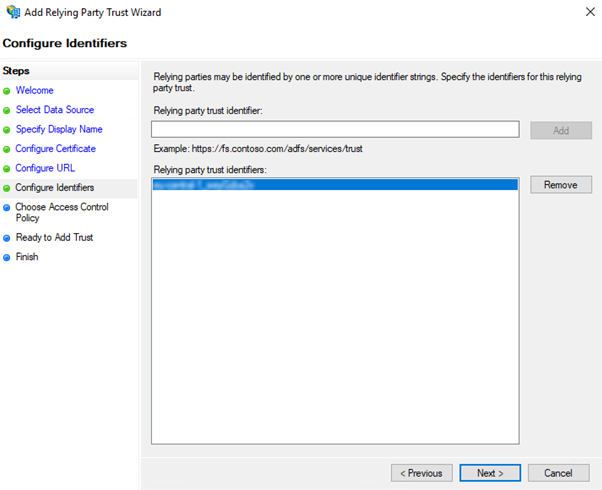
On the Configure Identifiers tab add the User Pool ID as a "Relying party trust identifier". It must be in the format urn:amazon:cognito:sp:<User Pool ID> (e.g., urn:amazon:cognito:sp:eu-central-1_xxxxxxxxx). Then click "Next"
On the Access Control Policy select "Permit everyone", then click "Next"
On the Ready to Add Trust do not change anything and click "Next"
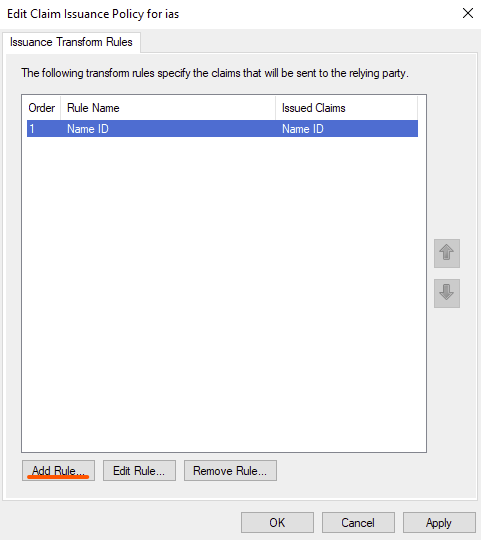
On the Finish tab enable "Configure claims issuance policy for this application", then click "Close"
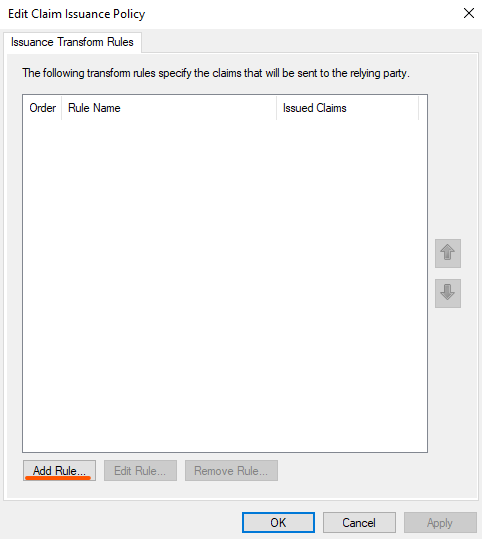
On the Edit Claim Issuance Policy click on "Add Rule"
On the Add Transform Claim Rule Wizard select "Send LDAP Attributes as Claims" as a "Claim rule template", then click "Next"
On the Configure Claim Rule:
set "Name ID" as a "Claim rule name"
set "Active Directory" as an "Attribute store"
On the Mapping of LDAP attributes:
set "SAM-Account-Name" as an "LDAP Attribute”
set "Name ID" as an "Outgoing Claim Type"
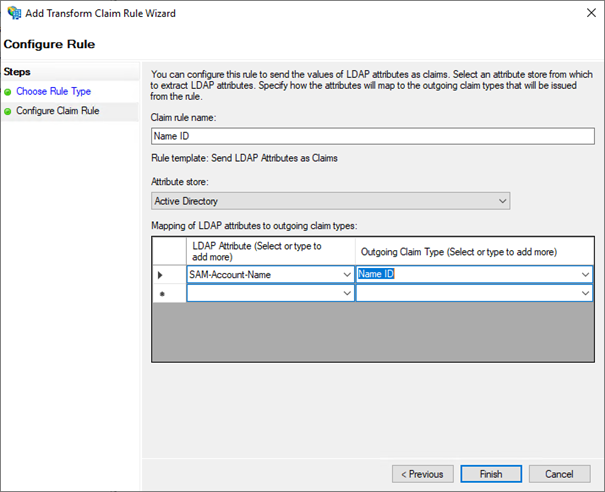
then click on "Finish"
Click again on "Add rule"
On the Add Transform Claim Rule Wizard select "Send LDAP Attributes as Claims" as a "Claim rule template", then click "Next"
On the Configure Claim Rule:
set "E-Mail" as a "Claim rule name"
set "Active Directory" as an "Attribute store"
On the Mapping of LDAP attributes:
set "E-Mail-Addresses" as an "LDAP Attribute"
set "E-Mail Address" as an "Outgoing Claim Type"
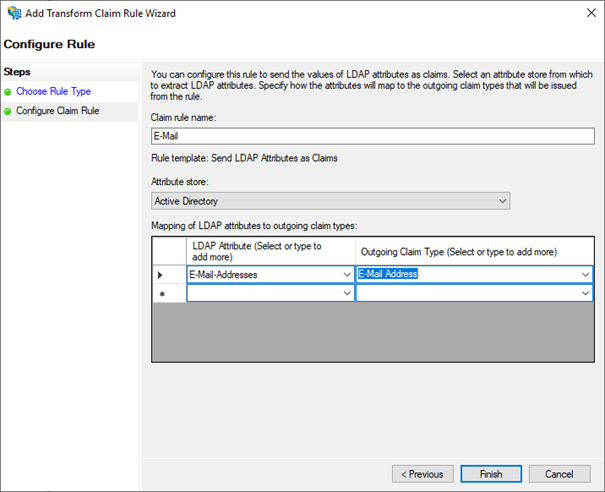
then click on "Finish"
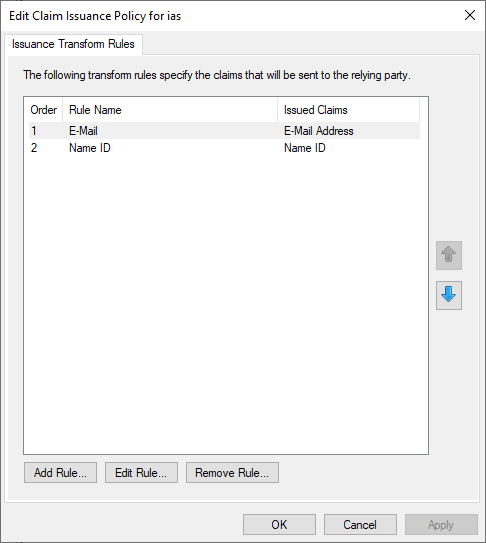
Click now on "OK" to complete the configuration
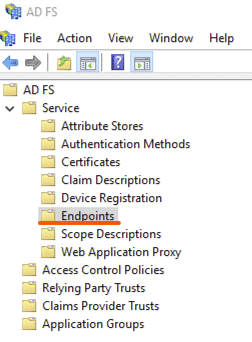
Last thing to do is download the Federation Metadata xml file. This can be found by clicking on "AD FS" > "Service" > "Endpoints" then locate the URL path in the "Metadata" section. The path is typically /FederationMetadata/2007-06/FederationMetadata.xml as shown below:
To download the file, load the URL in the browser on the server (e.g., https://<hostname>/FederationMetadata/2007-06/FederationMetadata.xml)
Please send downloaded file to Imagicle Team to complete the SSO federation.