SSO against Google Workspace
This article describes how to configure your Google Workspace to enable Imagicle users to login to web portal, gadgets and Attendant Console with Single Sign-on using the Google credentials.
Procedure for OpenID-based Google SSO
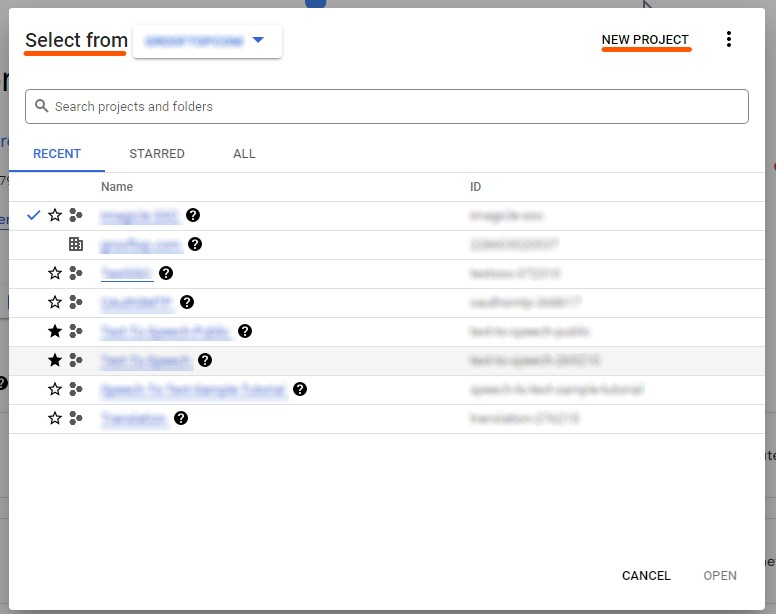
Login to Google Cloud Console as Administrator
Select the top menu

Select the domain of your organization and then New Project
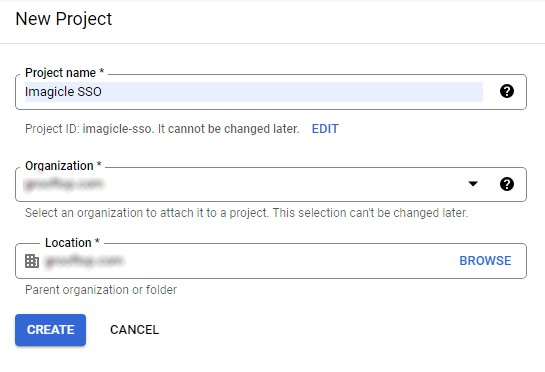
Enter a Project Name (e.g., "Imagicle SSO") and then click on Create
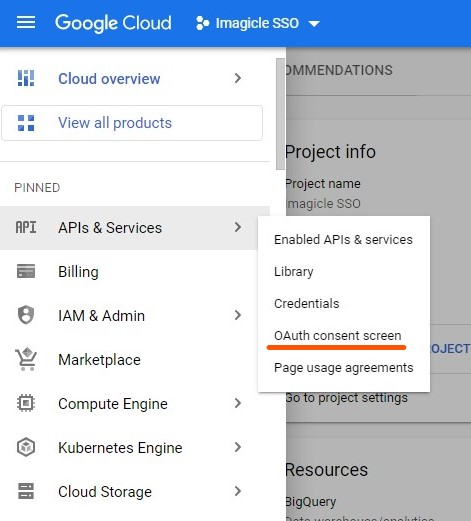
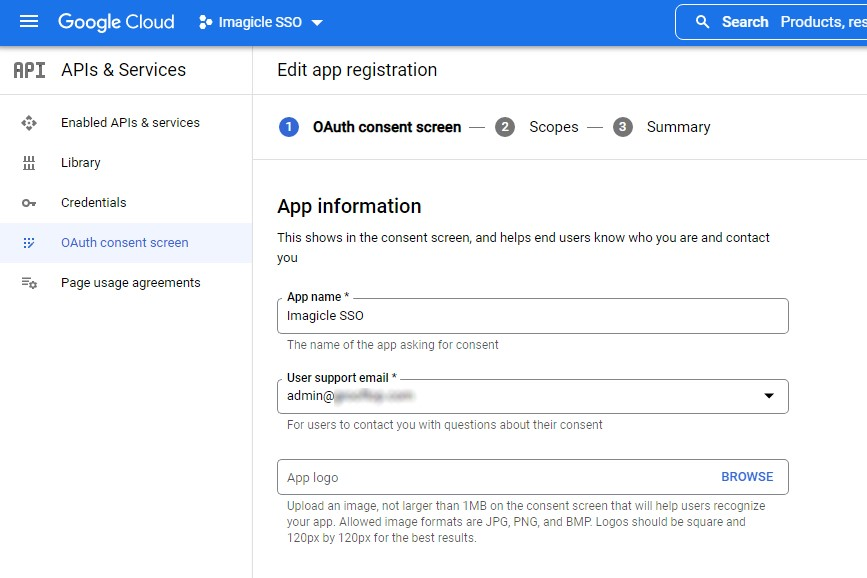
Open the newly created project and select from the left menu APIs & Services > OAuth consent screen
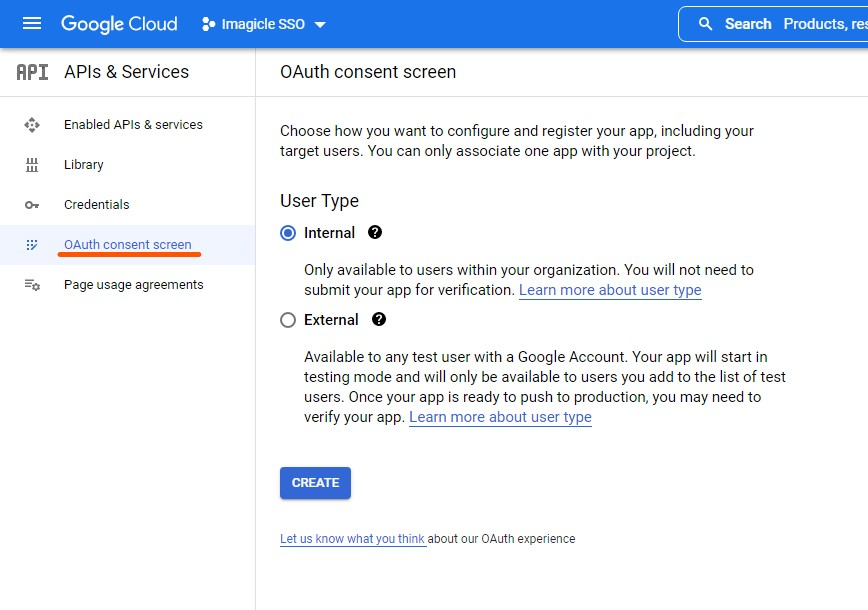
Select Internal and then click on Create
Set the following fields:
App name (e.g., Imagicle SSO)
User support email: you can set your admin email
Authorized domain: add the amazoncognito.com domain
Developer contact information: set the Email addresses adding for example the admin email
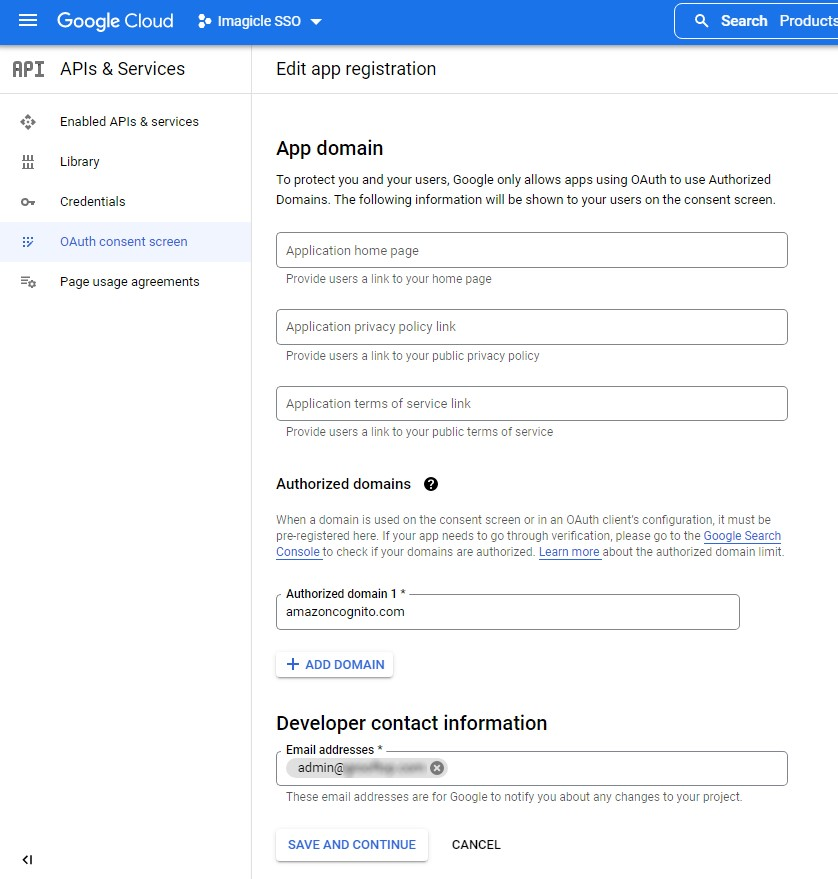
then click on Save and continue
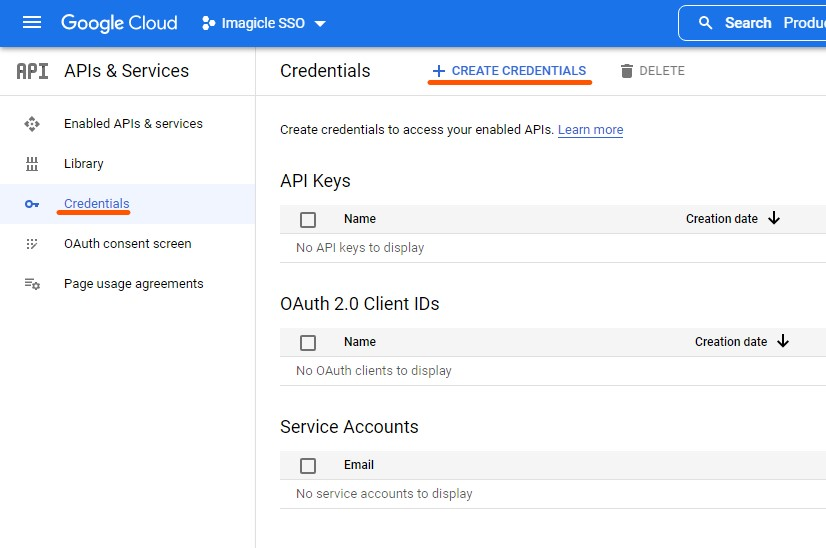
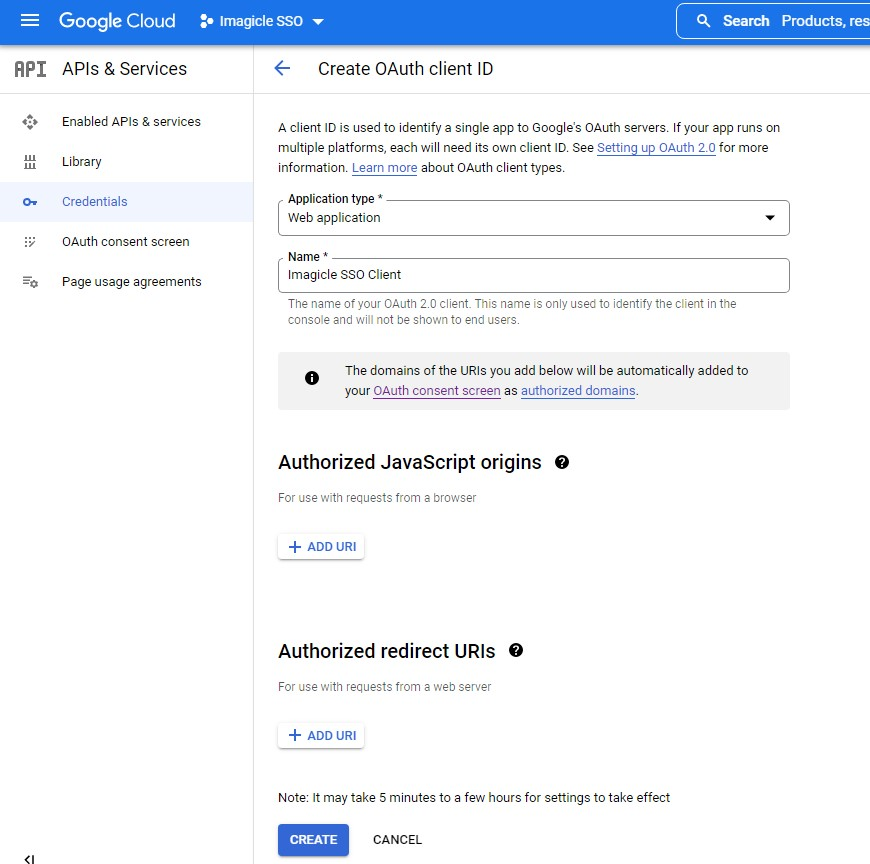
Click on Credentials and then on Create credentials
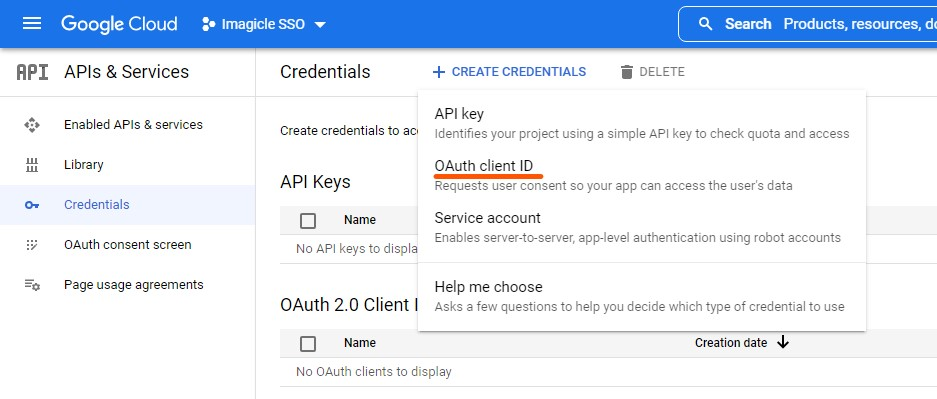
Select OAuth client ID
Set the following values and then click on Create:
Application type: Web application
Name: (e.g., Imagicle SSO Client)
A popup appears, showing the Client ID and Client Secret, please click on Download JSON
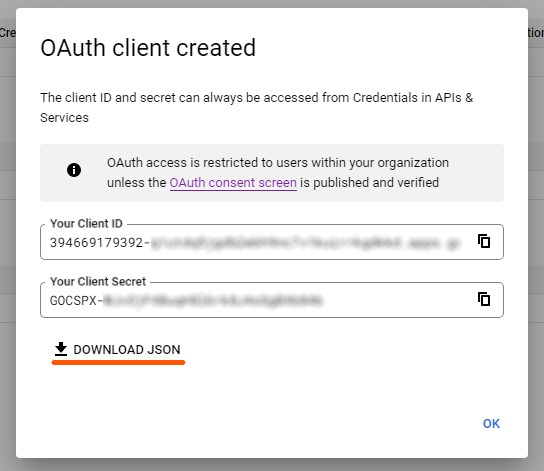
Send the JSON file to the Imagicle Team, since it is required to complete the configuration. This step may require some days.
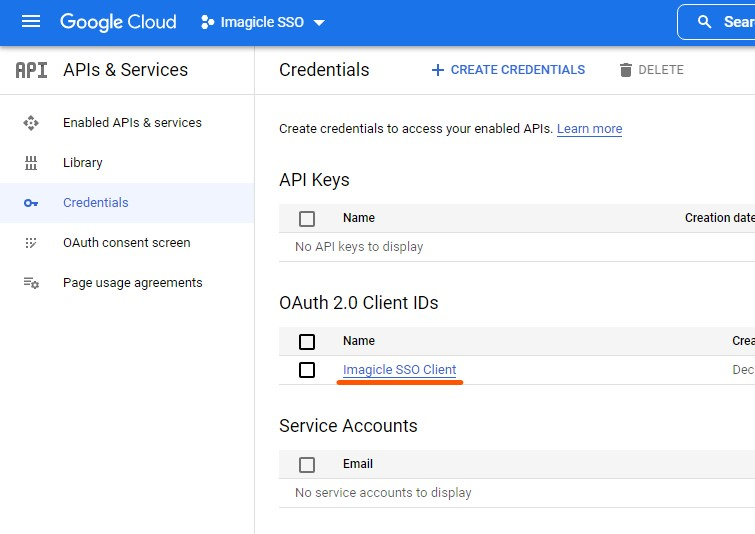
Once the configuration is done, Imagicle sends you back the User Pool Domain that you have to configure on Google to complete the federation. Click on Credentials and then on the OAuth 2.0 Client ID created previously (e.g., Imagicle SSO Client)
Set the following fields: click on Save
Authorized JavaScript origins: add a new URI with the following value:
https://<User_Pool_Domain_provided_by_Imagicle>(e.g., https://acme-imaidp.auth.eu-central-1.amazoncognito.com)Authorized redirect URIs: add a new URI with the following value:
https://<User_Pool_Domain_provided_by_Imagicle>/oauth2/idpresponse(e.g., https://acme-imaidp.auth.eu-central-1.amazoncognito.com/oauth2/idpresponse)
Federation is now completed.
Procedure for SAML-based Google SSO
Login to Google Admin Console with an account having Super Administrator privileges.
Go to Menu ⇒ Apps ⇒ Web and mobile apps.
Click Add App ⇒ Add custom SAML app.
On the App Details page:
Enter the name of the custom app, like "Imagicle SSO"
Upload an app icon. The app icon appears on the Web and mobile apps list, on the app settings page, and in the app launcher. If you don't upload an icon, an icon is created using the first two letters of the app name. See below:

Click Continue.
On the Google Identity Provider details page, get the setup information needed by Imagicle by selecting "Download the IDP metadata". This file should be sent to Imagicle team.
Click Continue.
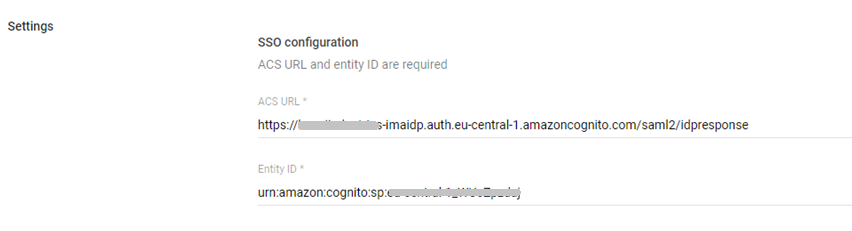
In the Service Provider Details window, you should enter the following parameters, provided by Imagicle:
ACS URL: The Imagicle Assertion Consumer Service URL is responsible for receiving the SAML response and it must start with https://
Entity ID: This is a globally unique name that Imagicle gives you.
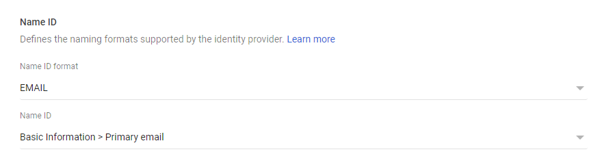
Name ID format: EMAIL (default)
Name ID: Primary email (default)
Click Continue.
On the Attribute mapping page, please add the following App attribute URL:

Click Finish.
Enabling users for SSO
Go back to Menu ⇒ Apps ⇒ Web and mobile apps.
Select The Imagicle SAML app.
Click User access.
To turn a service on or off for everyone in your organization, just click On for everyone and then click Save.
Please ensure that the email addresses your users use to sign in to Imagicle apps match the email addresses they use to sign in to their Google domain.
Changes can take up to 24 hours but typically happen more quickly.