SSO against Microsoft Entra ID (MS-Azure Active Directory)
This article describes how to configure your Microsoft Entra ID (Microsoft Azure Active Directory) to enable Imagicle users to login to web portal, gadgets and Attendant Console with Single Sign-on using the Azure credentials.
Instructions are provided for both SAML and OpenID Connect SSO protocols.
Prerequisites
In order to successfully configure your Azure AD, you should have the following data:
User Pool ID (SAML only)
Redirect URI
More details are available here.
Procedure for SAML-based SSO
Login to Azure web portal as Administrator
Select Azure Active Directory

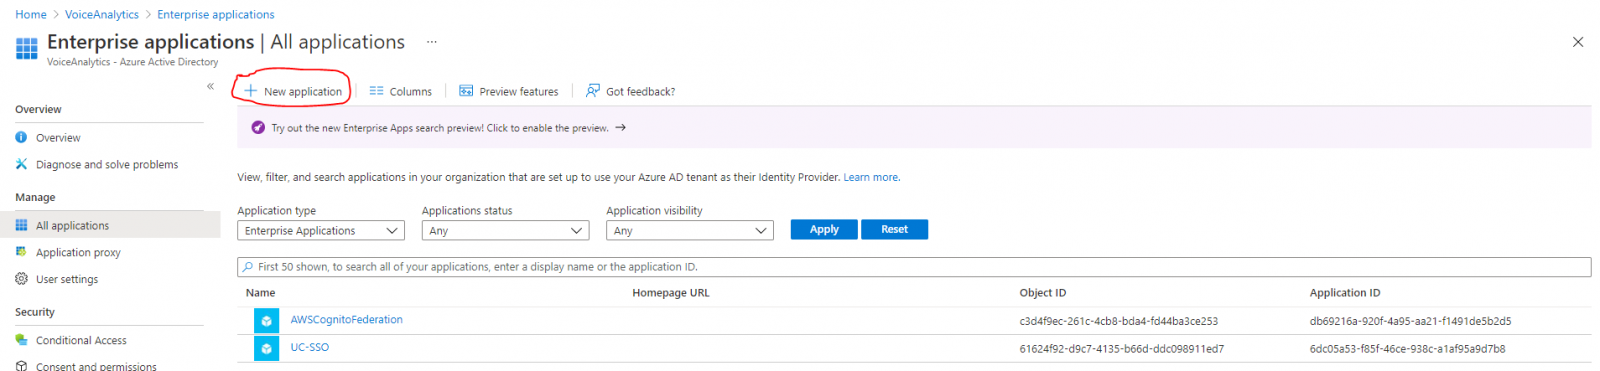
Select “Enterprise Applications” from the left menu panel
Click on “New Application” on the top command bar
Click on “Create your own application”
Insert a name and select the option “Integrate any other application you don't find in the gallery (Non-gallery)”
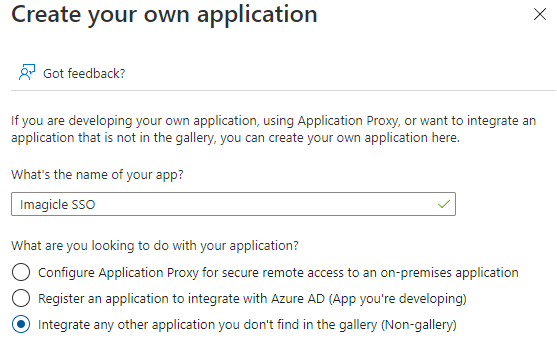
Hit "Create" and wait for the app creation
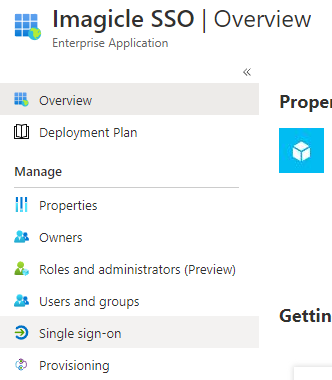
Once the app creation is accomplished, you are redirected to the app properties
Select “Single Sign-on” from the left menu panel
Select “SAML” sign-on method
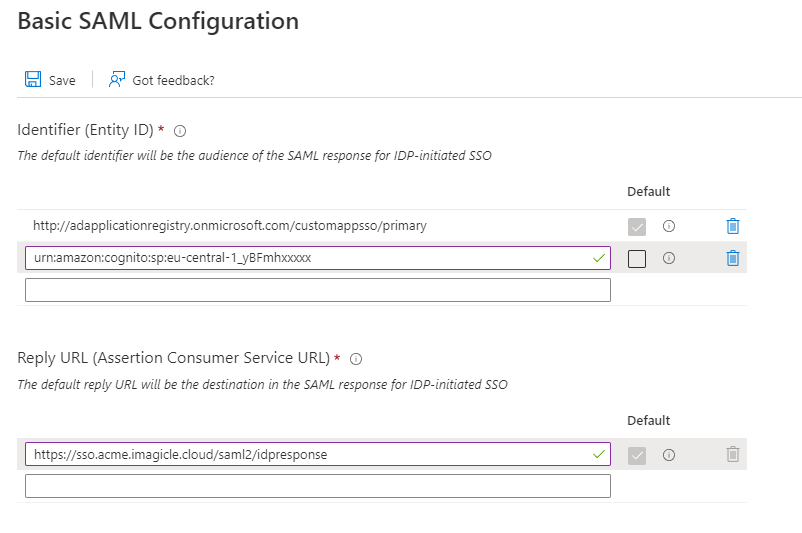
Within “Basic SAML configuration” section, click “Edit” link
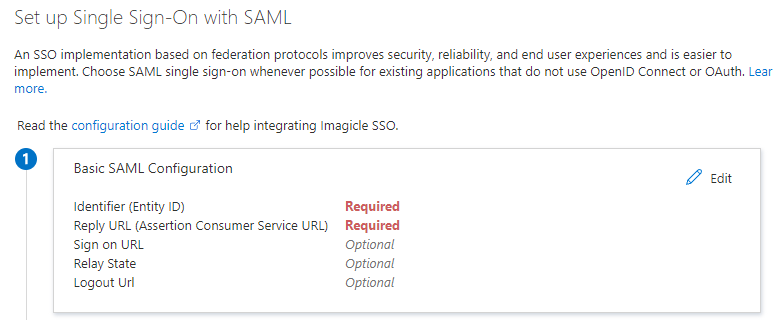
In Identifier (Entity ID) field, please enter the User Pool ID
In Reply URL field, please enter the Redirect URI
In "User Attribute & Claims" section, please set the "Emailaddress" attribute to user.mail
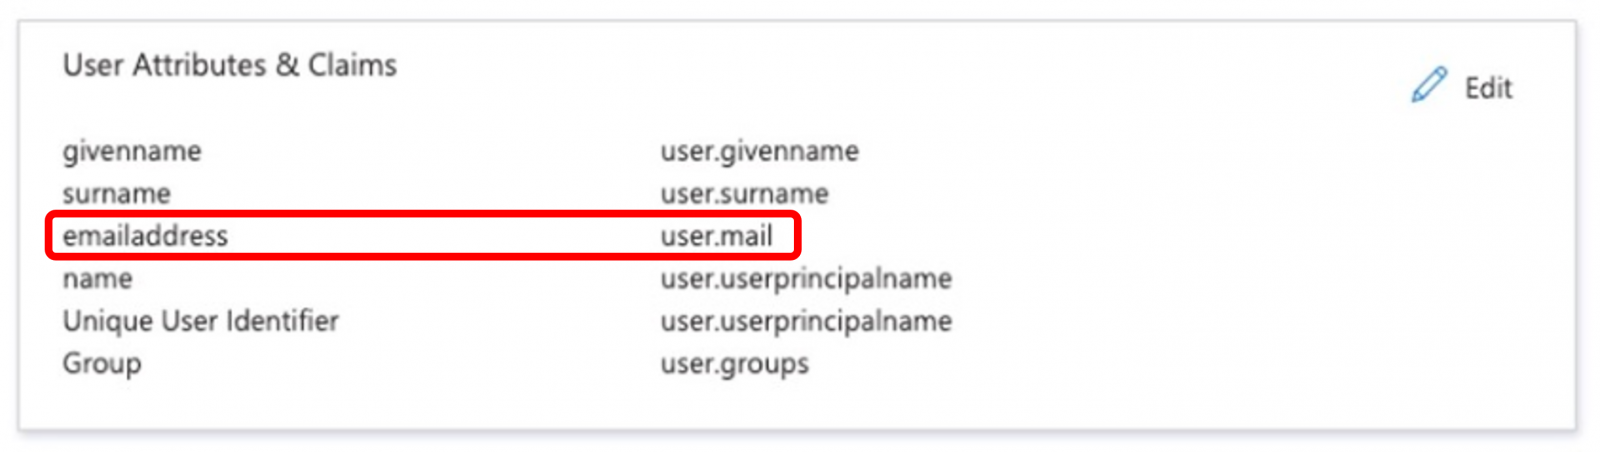
Hit Save. See below sample:
From “SAML Signing Certificate” section, please download “Federation Metadata XML”:
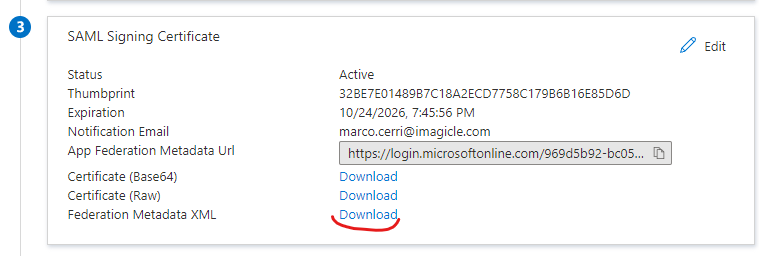
Send the file to Imagicle Team to complete the SSO federation.
Enable users and groups to Single Sign-on authentication to Imagicle Apps
Open the Enterprise application above created in step #5
Select "Users and Groups” on the left menu panel
Click on “Add user/group“ item on the top command bar
Select all the users or groups you want to grant the access through SSO
Procedure for OpenID-based SSO
Login to Azure web portal as Administrator
Select Azure Active Directory

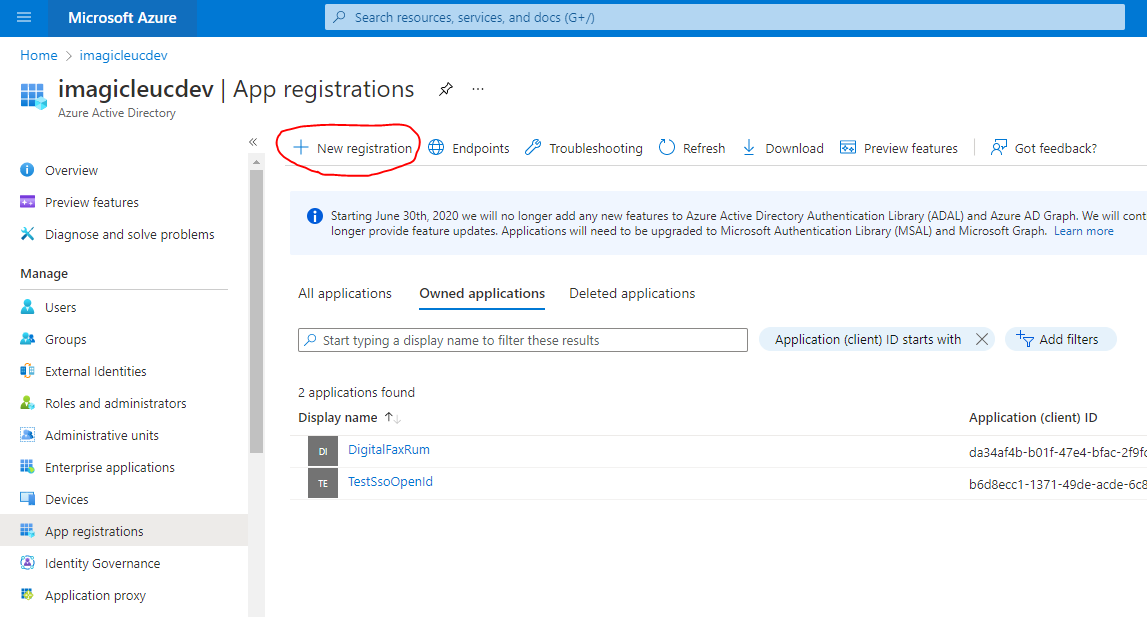
Select App registrations item in the left menu panel
Click on New registration button
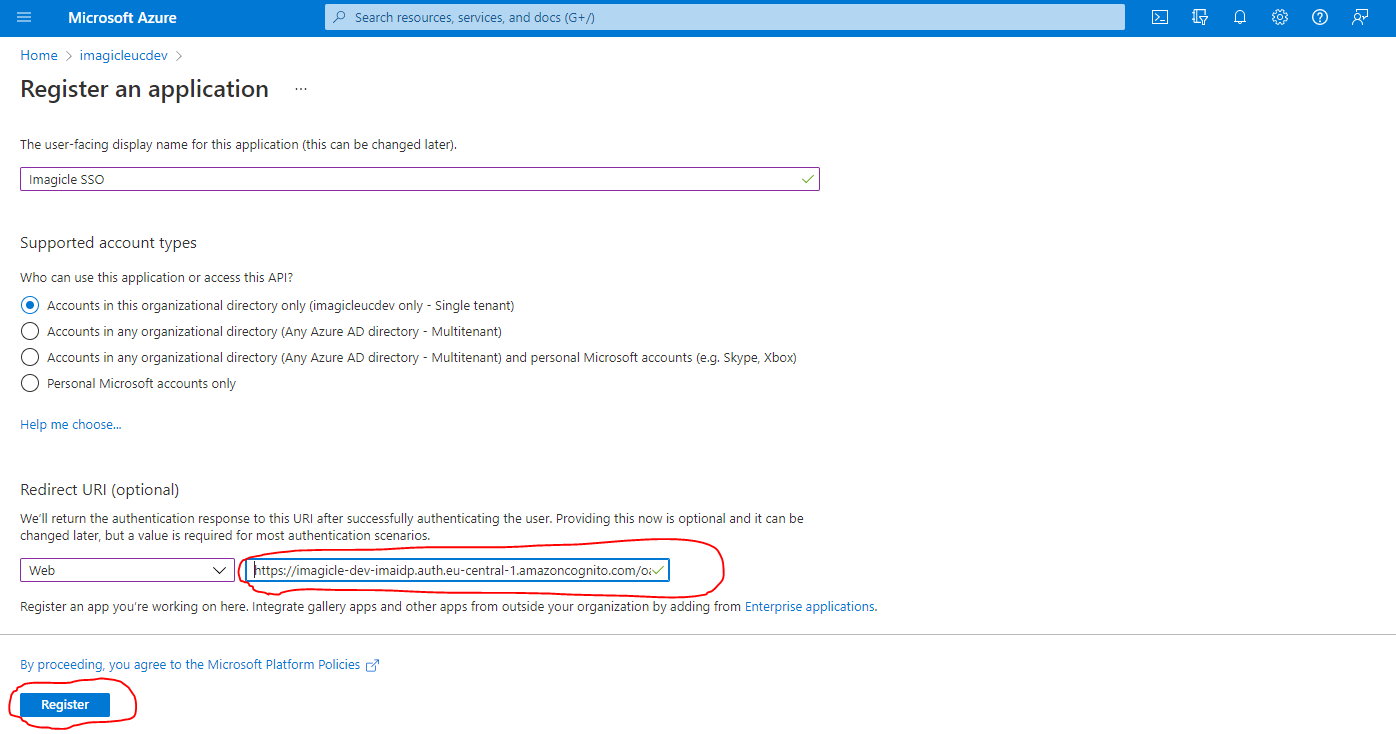
Fill the mask field as following screenshot (Redirect URI provided by Imagicle) and click on Register button:
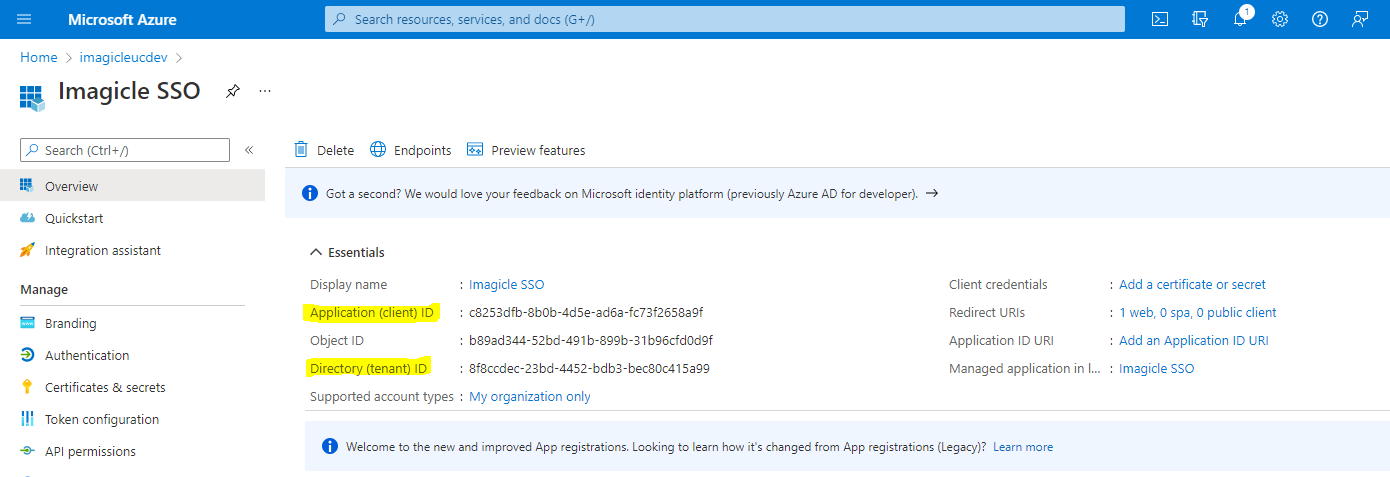
After app registration is accomplished, please take note of Client ID and Tenant ID values.
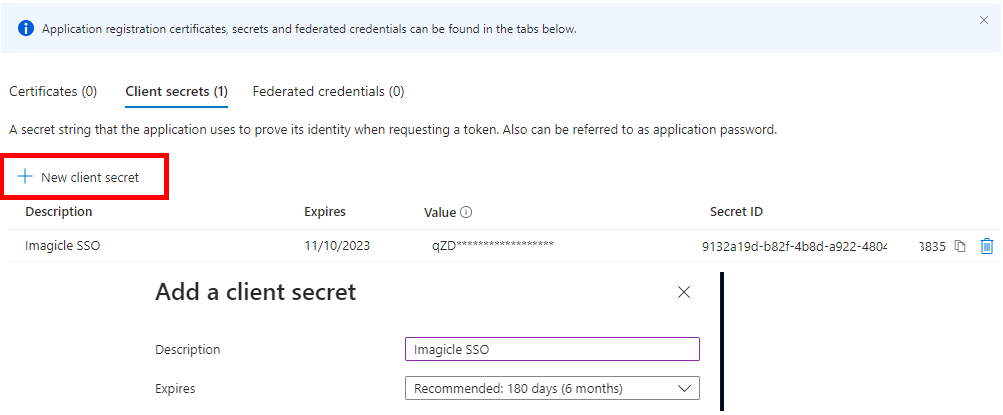
Now click on "Certificates and secrets" and then on "Client secrets"

Create a new client secret with a description and set an expiration (at the expiration, this procedure must be done again, so put an expiration as long as possible)
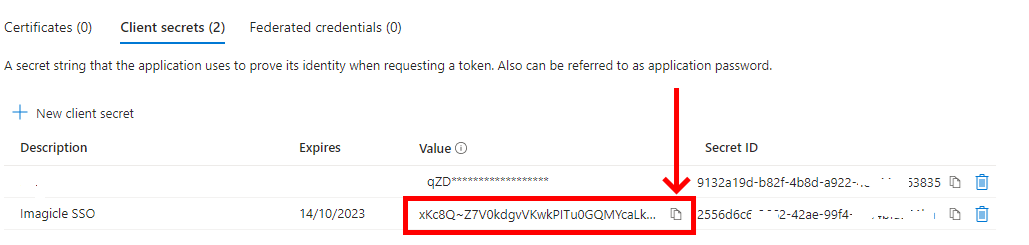
After the creation, copy and save the Client Secret Value, highlighted in the below screenshot sample. This must be saved immediately, otherwise, it can't be recovered later and the secret would need to be created from scratch.
Send to Imagicle Team the following data:
Client ID: previously noted in step #6
Client Secret Value: previously noted in step #8
Issuer URL:
https://login.microsoftonline.com/<app-tenant-id>/v2.0(Tenant ID noted on step #6)