The AIR can also schedule appointments by leveraging the integration with Cal.com, a scheduling platform that facilitates the management of bookings and appointments. Cal.com allows the publication of availability and the automatic scheduling of meetings. It integrates with major calendar systems such as MS O365, MS Exchange, Google, Apple Calendar, and many others.
In practice, the administrator can choose either to use Cal.com as the primary calendar system or to connect Cal.com with an existing calendar (among the supported ones), giving it visibility into people’s or resources’ availability. Cal.com does not write to external calendars, it only has read access in order to check availability.
In turn, the AIR integrates with Cal.com through APIs to retrieve existing events, check available time slots, and schedule new appointments.
Unlike the previous features (call transfers and answering questions), the booking functionality follows an agentic approach, where the administrator is free to define how the AIR should interact with users.
Agentic approach means that the AIR does not simply follow a fixed, pre-defined script, as it does for other features like call transfers or answering questions.
Instead, it actively guides the conversation and takes the necessary steps to achieve the goal, booking an appointment.
To enable this behavior, the administrator should write some Instructions (or keep the default), which is the text that describes how the AIR should act during the conversation.
For example, the prompt can instruct the AIR to:
-
ask for the necessary details (date, time, type of appointment)
-
suggest available time slots
-
confirm the user’s choice
-
finalize the booking and send a confirmation message
Cal.com configuration
To use the booking feature, a valid Cal.com account is required. The available pricing plans can be found on Cal.com website, choose the one that best fits your needs.
For testing or simple scenarios, the Individual (free) plan is sufficient. For more complex cases, for example, when multiple resources (people or services) need to be managed, it is necessary to use at least the Teams plan.
Let’s go through the steps to set up a minimal configuration that can then be used with the AIR, assuming an Individual (free) account is being used and the scenario is a law firm:
-
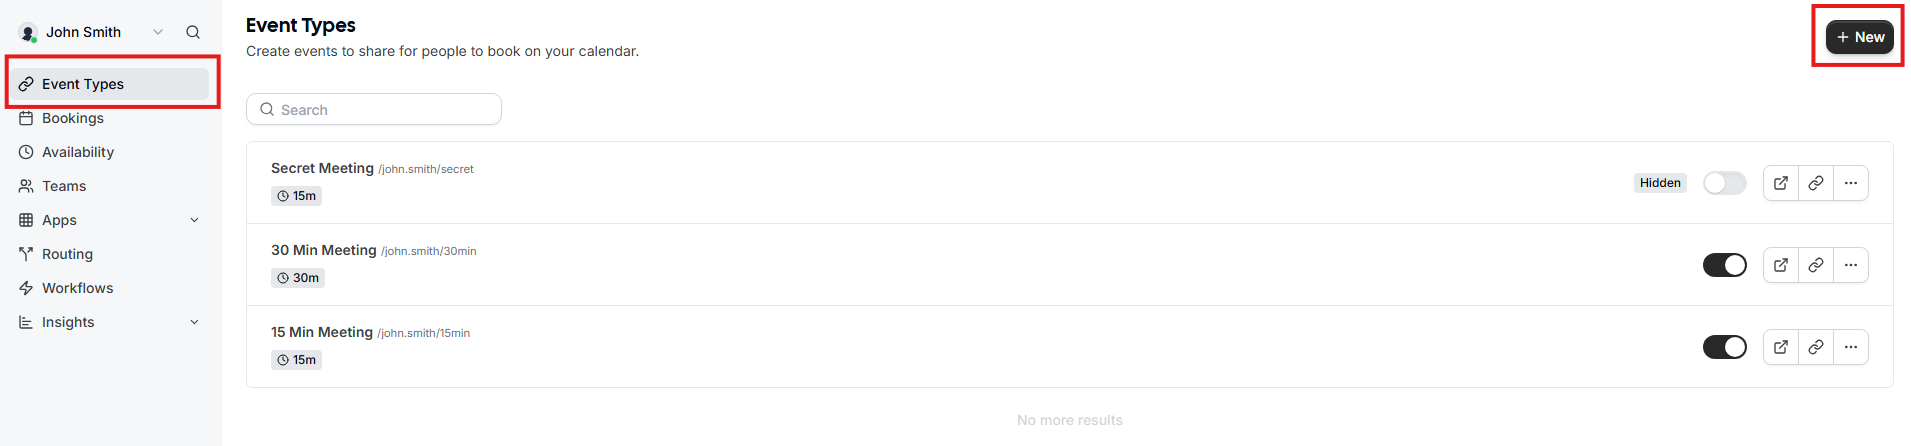
create Event Types: first, create events that match the specific scenario:
-
click “Event Types”
-
then click “New”
-
-
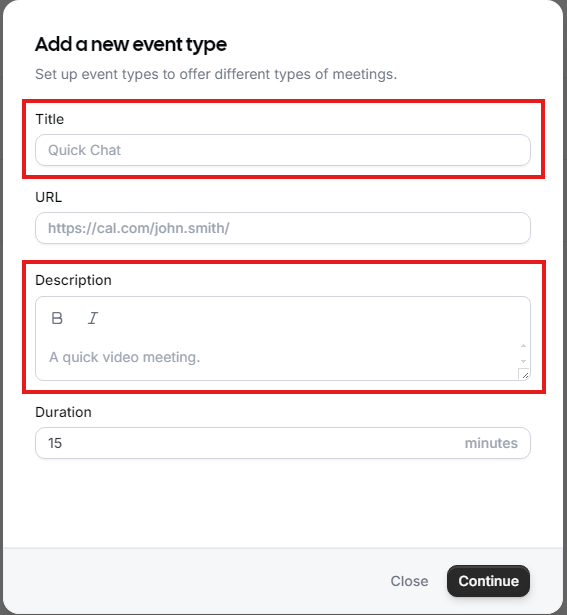
configure the event details:
-
enter a Title and, if needed, a Description for the event
-
adjust the Duration if necessary
-
All this information are used by the AIR during the conversation.
For example, two event types could be configured as follows:
** Event Type 1 **
Title: “Initial Consultation”
Description: “A first meeting with a lawyer to discuss your legal issue, understand your options, and decide whether to proceed with legal representation.”
** Event Type 2 **
Title: “Case Review Meeting”
Description: “A follow-up meeting to go over the details of an ongoing case, review documents, and plan the next steps.”
Once an Event Type has been created, the default Location (Cal Video) can be removed, since it is not used by the AIR. Instead, enter the actual location where the event takes place, for example, the office address in our law firm scenario. Anyway, the Location field is optional and can be left empty.
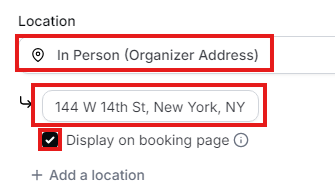
Only locations of type “In Person (Organizer Address)” with “Display on booking page” enabled are considered by the AIR. Any other location, with a different configuration, are ignored.
It is possible to add multiple locations but, during booking, the user can’t choose which location to attend. For this reason, it is recommended to create separate Event Types for each location.
The AIR considers only the following information from an Event Type:
-
Title (*)
-
Description
-
Duration (*)
-
Location (only “In Person (Organizer Address)” is supported)
-
Availability (*)
(*) mandatory field
Any other information is ignored.
-
eventually, the setup is like below sample:
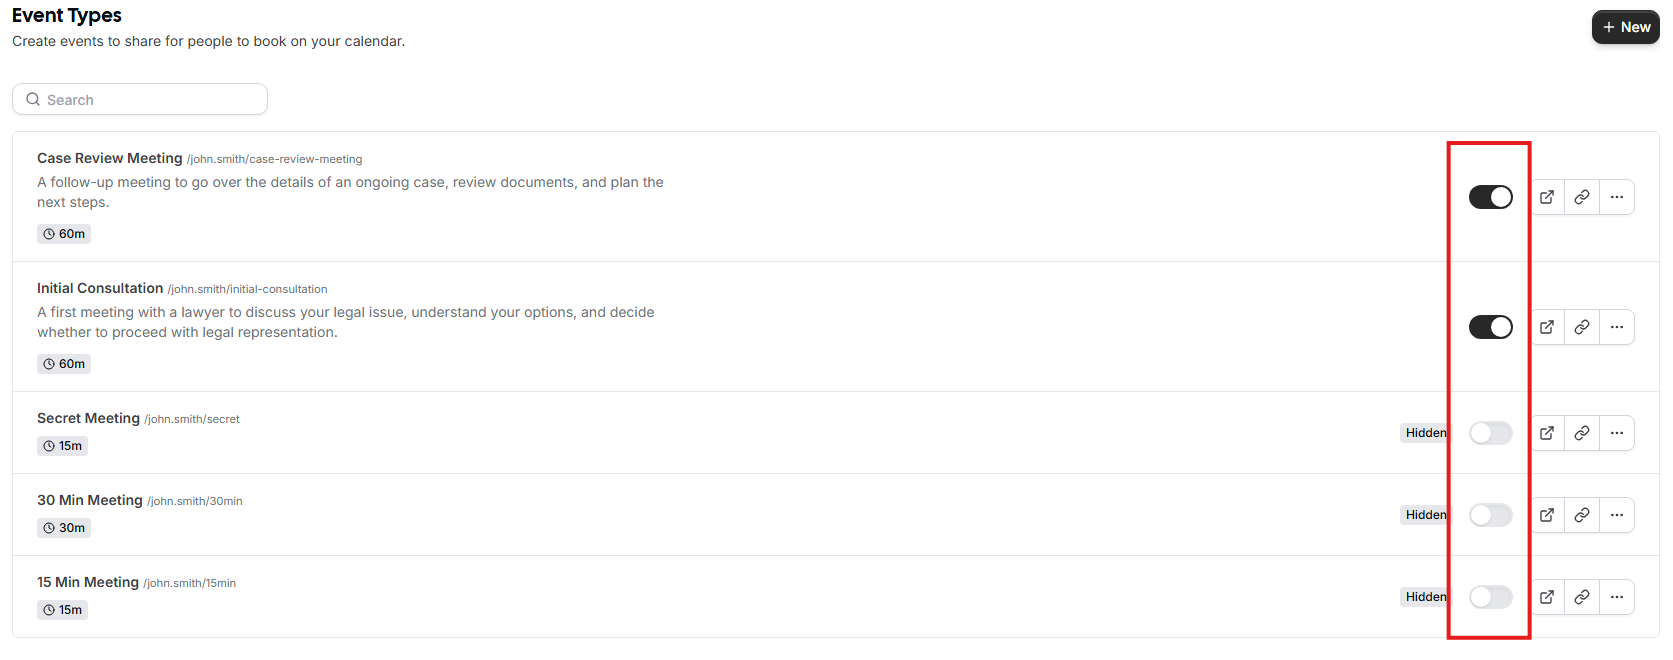
Only visible events are available for selection in the AIR, so it is recommended to hide any event that is not needed
-
now that we have created some Event Types, we need to generate an API Key, which is configured on the AIR web portal and allows interaction with Cal.com. Click on “Settings” and then on “API Keys”:
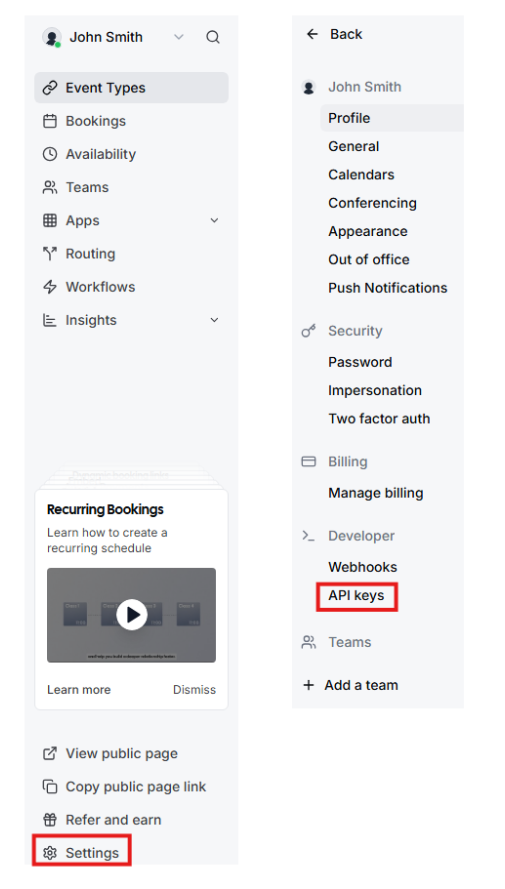
-
select “New”, then complete the configuration as shown below, press “Save”, and copy the generated API key:
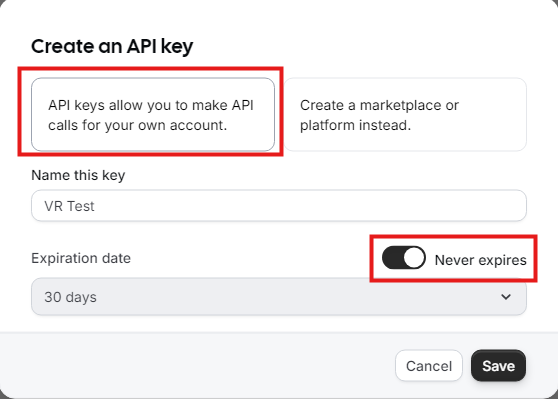
It is not mandatory to set the “Expiration date” to “Never expires”, but it is highly recommended, since if the API key expires, the AIR won’t be able to interact with Cal.com, potentially causing a service disruption until it is updated with a new one.
-
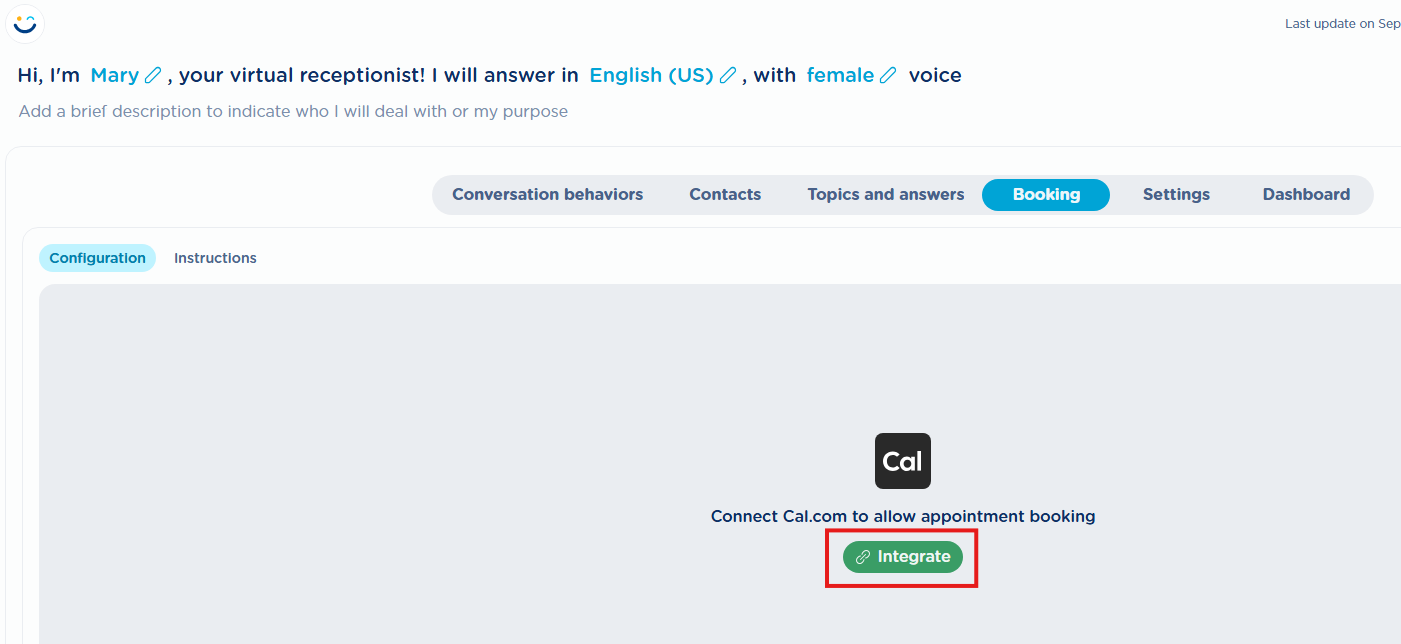
at this point, we are ready to complete the integration from the AIR web portal.
Click “Integrate,” enter the API Key created on Cal.com in the popup that appears, and click “Integrate” again to confirm:
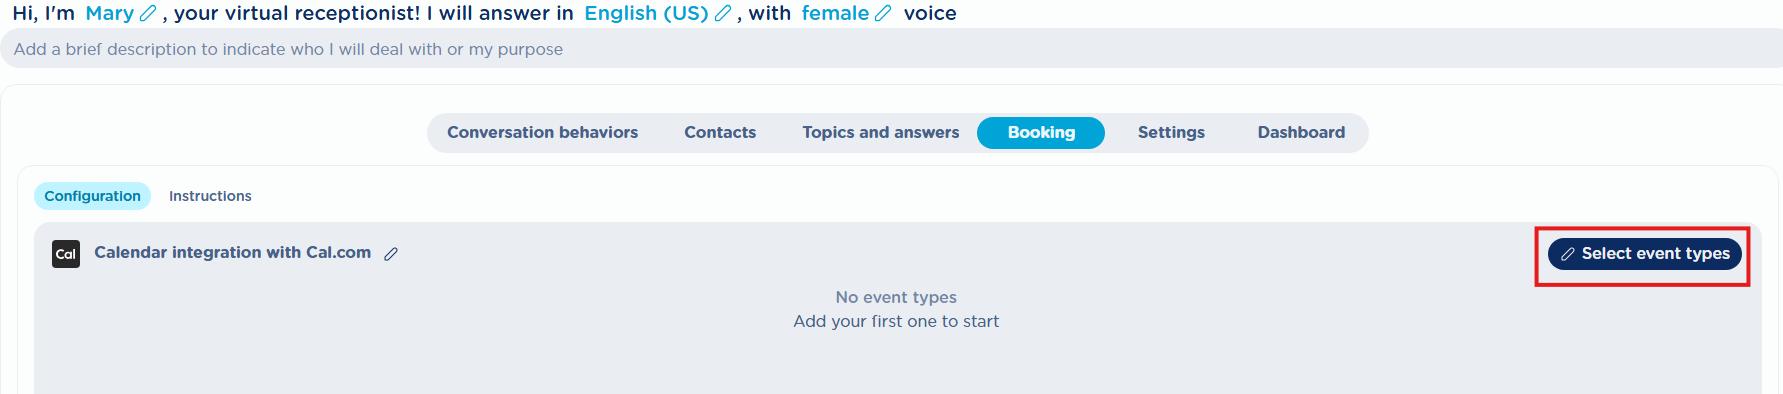
-
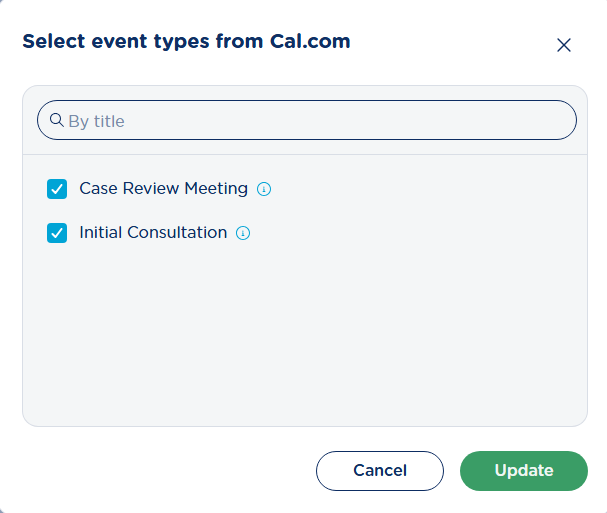
if everything was completed successfully, the popup disappears and we have the option to select the Event Types that we want to make available to this AIR. Click on “Select event types”:
-
from the popup that opens, we can select the Event Types and click “Update” to confirm:
-
at this point, we can see the list of Event Types associated with this AIR:

If you want to modify the list, simply select “Select event types” and change the selected events.
If an Event Type is removed from Cal.com, it does not automatically disappear from the AIR, and this could cause issues for users, as it would still appear bookable, but the operation would fail since it no longer exists on Cal.com.
Therefore, it is important to remember that if you delete an event from Cal.com, you must go to the AIRs that use it, click “Select event types” and simply press “Update” without making any other changes.
This action allows the AIR to refresh the events available on Cal.com and remove those that are no longer available.
The same applies to updates to an Event Type on Cal.com, since changes are not automatically detected by the AIR.
In particular, updates to these fields:
-
Title
-
Description
-
Location (only “In Person (Organizer Address)” is supported)
If any of these fields are updated, in order for the changes to be propagated to the AIR, you need to follow the same procedure as in the cancellation case explained above.
-
the integration is complete, the AIR is now able to manage appointments for the selected events.
AI-based Instructions (Agentic Prompt)
Inside the Booking panel, there is also an “Instructions” tab, where you can find the prompt used by the AIR to handle the booking process. As mentioned earlier, the administrator can modify these instructions to make them fit their specific scenario.
Thanks to the agentic approach, it is possible to describe, in natural language, how the AIR should manage this part of the conversation.
By default, you can find some generic instructions (not tied to any particular scenario). These are a good starting point and serve as a useful example of how they should be written. The administrator is encouraged to make any changes they consider necessary in order to deliver a user experience that is customized to their specific scenario.
Even though the default Instructions are written in English, it is possible to rewrite them using another language. In fact, thanks to AI, the AIR system can process instructions written in any other languages.
In the Booking flow, the AIR can perform these three actions using the integration with Cal.com:
-
Search for available slots: this allows returning a list of the first available time slots to the caller
-
Pre-book a slot: this temporarily blocks the selected slot for 5 minutes, making it unavailable to others. During this time, the AIR typically collects the information needed for the booking from the caller. The required information could be:
-
first and last name
-
phone number
-
-
Confirm the booking: this finalizes and confirms the reservation of the selected slot
In the default instructions, there is a line that says “Use default timezone for booking”. This information is important because it tells the AIR which time zone to use when scheduling appointments.
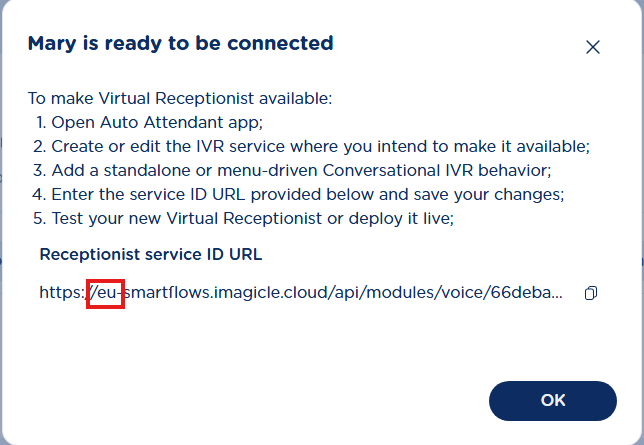
The default time zone being referenced is the one of the region associated with your Imagicle tenant. To find out which region you are using, simply check the FQDN of the URL you get by clicking “Connect”. This is the same URL you configure in the Auto Attendant to integrate the AIR with your UCX Suite.
For example, in the image below, you can see that the region is “eu”:
Here is the table with the default time zones for each region:
|
Region |
Default time zone |
|---|---|
|
eu |
Europe/Berlin |
|
us |
America/New_York |
|
others |
UTC |
So, if your country already uses the default time zone, you can simply leave that line as it is. However, if you want to use a different time zone, you just need to specify it.
For example, if you want to use the Sydney time zone, you can write: “Use Australia/Sydney timezone for booking”.
It is recommended to use the IANA format for time zone names.
It is also possible to specify a different time zone for each Event Type, if needed.
You simply need to include the event title and the corresponding time zone in the Instructions.
Example
** Event Type 1 (London)**
Title: “Basic consulting”
** Event Type 2 (Singapore)**
Title: “Advanced consulting”
We can describe the two time zones in the Instructions as follows:
-
Use the following time zones:
-
event “Basic consulting”, use Europe/London
-
event “Advanced consulting”, use Asia/Singapore
Cal.com advanced configurations - Workflows
As explained earlier, the AIR can book appointments but cannot modify or delete an existing appointment. So how can we handle these two operations?
There are several possible workarounds, here are two examples:
-
Handling outside of Cal.com: in the AIR Instructions, we can specify that once the booking is completed, the AIR should inform the caller that if they wish to modify or cancel the appointment, they must call a specific phone number to speak with a human agent who applies the requested changes.
This can be implemented, for example, by configuring Advanced Queueing queues dedicated to this purpose, which can be reached via a dedicated DID, through an Auto Attendant, or even through the AIR itself, if properly configured -
Sending SMS via Cal.com Workflows: on Cal.com, it is possible to configure one or more Workflows associated with one or more events. A workflow can contain one or more actions that are triggered when certain events occur for the selected Event Type.
In our case, we want the caller to receive an SMS with the booking details and links to modify or cancel it on their own. Here’s how:-
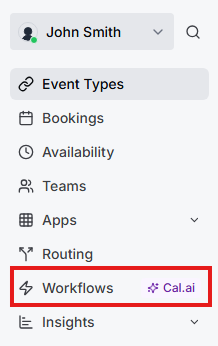
click on “Workflows”, then select “Create a workflow” and “Start from scratch”:
-
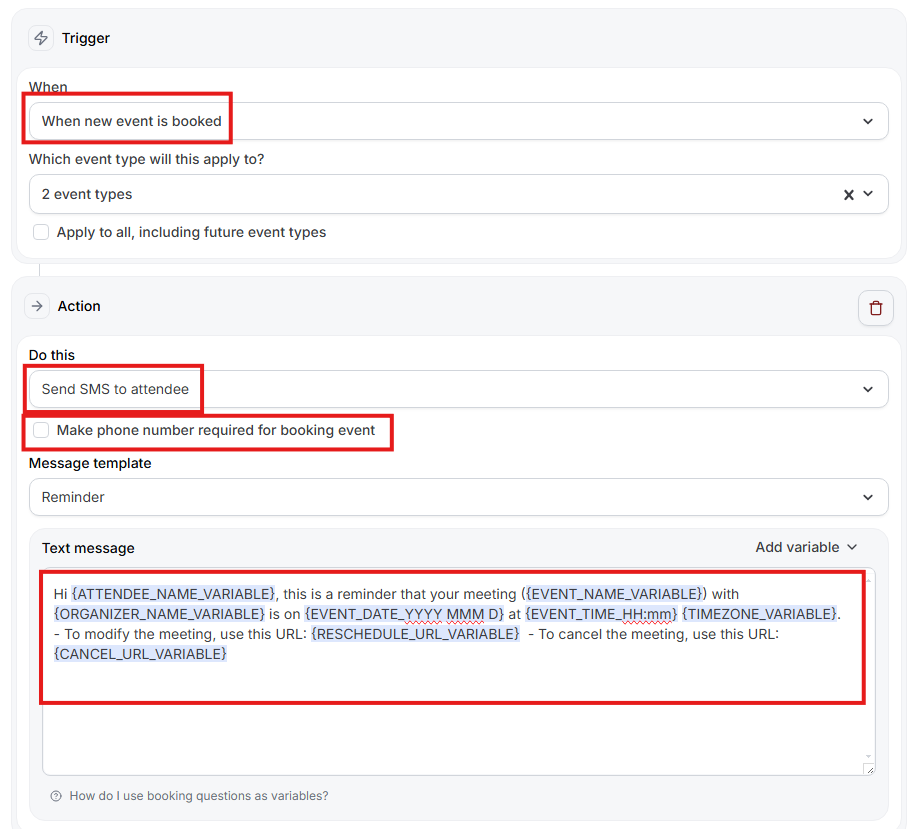
configure the workflow as shown below. Specifically:
-
When → select “When new event is booked”
-
Which event type applies to? → select the event types to which this workflow should apply
-
Action → select “Send SMS to attendee”
-
Make phone number required for booking event → if this option is enabled, the phone number must be collected, otherwise the booking confirmation fails.
⚠️ Important: Cal.com expects the phone number to be in E.164 format, otherwise it is considered invalid. Since most people don’t usually provide their phone number in E.164 format, it is recommended to include specific instructions for the AIR so it asks for the number in this format. Alternatively, if you expect calls only from a single country, you can instruct the AIR to automatically add the country prefix if it’s missing.
For example, you could include these instructions:
“The provided phone number is used to send booking notifications. Please inform the user that they will receive these notifications. Since notifications require a phone number with an international prefix, ask the user which country the phone number is from so the correct prefix can be applied automatically. If the phone number already includes an international prefix, there’s no need to mention this to the user.”
-
-
Text message → this is the content of the message, including placeholders that Cal.com automatically populates. For example:
”Hi {ATTENDEE_NAME_VARIABLE}, this is a reminder that your meeting ({EVENT_NAME_VARIABLE}) with {ORGANIZER_NAME_VARIABLE} is on {EVENT_DATE_YYYY MMM D} at {EVENT_TIME_HH:mm} {TIMEZONE_VARIABLE}. - To modify the meeting, use this URL: {RESCHEDULE_URL_VARIABLE} - To cancel the meeting, use this URL: {CANCEL_URL_VARIABLE}”
-
-
Once the workflow is saved, it becomes active immediately, no further action is required.
Sending SMS messages is not free, so depending on your subscription with Cal.com, you may need to add credits or pay additional fees:

Cal.com advanced configurations - Users and Teams
In Cal.com, Users are the individual members of your organization. Each user has their own profile and can connect one or more personal or work calendars (Google Calendar, Outlook, iCloud, etc.). This allows Cal.com to automatically check each user’s real-time availability, block out busy times, and prevent double-bookings. Users can also customize their own booking rules, availability hours, and event types.
Teams are collections of users grouped together under a shared scheduling page. Teams are especially useful for companies or departments that want to coordinate bookings without manually managing everyone’s calendars.
With Teams, you can:
-
give combined availability, meaning only the time slots where all selected team members are free appear (ideal for group calls or interviews)
-
automate meeting distribution by using round-robin scheduling, which fairly assigns incoming bookings to available team members, balancing workloads
-
manage team-wide settings such as booking rules, event types, and availability in one place
The configuration of multiple Users and Teams requires a paid Cal.com plan.
How to enable “Forced booking” feature
Forced booking is a mode that, when enabled, makes the AIR immediately jump to the booking workflow without waiting for any user input.
In this mode:
-
the welcome message (the one defined in the “I start the conversation” section of the GUI) is completely skipped
-
control passes directly to the booking workflow
-
the system does not wait for the caller to say anything before initiating booking workflow
-
if additional features are enabled (e.g., call transfers and answering questions), the user can still access them later
-
forced booking applies only to the first entry of the call session
-
after the initial entry, forced booking is no longer applied, allowing the user to interact with other features normally
-
forced booking is not applied when the AIR takes back a call not answered by a contact
Forced booking is considered active when both this conditions are satisfied:
-
at least one Cal.com event has been enabled under “Configuration“
-
the message under the section “Then I specify whether I can…” is empty
When these conditions are met, the system treats the configuration as forced booking.