One-shot users import from CSV files
Importing from CSV files and Bulk Editing
To quickly to modify the same property of a group of users (bulk editing), you can export them to a CSV or to a Microsoft Excel XML file, modify them and import back in the UCX Suite users' database.
To import all users or a group of users from scratch, you just download a CSV template file from the web interface, fill it with the values, and upload it to the UCX Suite users' database.
Procedure to bulk import users
Select the “Import users from CSV” link.
Click the “Template.csv” link and save the file to a temporary folder.
Open the file with a CSV editor. For example, you can use Microsoft Excel™.
Fill all the mandatory fields columns, based on the application you need
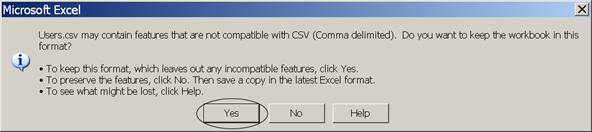
Save the file. If asked to preserve CSV format, press “Yes”.
Return to the “Import Users” page, click “Browse…” to select the file and the press “Import”. If you are loading a huge number of users, you may have to wait some minutes
Press the “Import” button. If you are loading a huge number of users, you may have to wait for some minute.
A green icon means that all the users have been imported. A yellow icon means that some users have been skip. A red icon means that an error occurred.
Reports
When the Import process is completed, the "Show reports" link is displayed. All the details can be found in the report file. If a user or a specific column content has been skipped, you'll find the information you need to identify the CSV file row and fix it. Click on the "Download" icon to the left to open the report as a text file.
Preliminary concepts
A user is considered new if it has an unknown username. If the username already exists, the other fields will be overwritten.
Local password must comply with he following complexity policies:
At least a capital letter
At least a lowercase letter
At least one number
At least one special character
At least 8 characters
If a non-compliant password is entered, the relevant user is skip.
All fields included in the .csv file are overwritten when you import the .csv file in your UCX Suite (including empty fields). If you leave a blank field in the CSV file, it means you want it to be erased.
True/false (boolean) fields are expressed as 1 and 0 in the CSV file
The CSV file fields must actually be separated by semicolon (Excel standard)
Some fields may not be included in the import/export process. They are only modifiable from the User Management of the web interface.
The fields are identified by the column name in the header (first row). Do not change or delete the first row.
When a field is populated, its content is validated. For example, if you fill the email field with something which is not an email, the field is skip and an error is recorded in the report.
Some field values (e.g. the primary extension) should be unique between different columns. It is your responsibility to guarantee this.
CSV File Encoding
When you want to import users which include non-US characters, pay special attention to the file encoding. Supported encodings are:
ANSI
UTF-8 with BOM
Ucs-2 Le / UTF-16 Le
Note: Excel only supports ANSI CSV files. To preserve non-ansi characters you have to save the file as "Unicode text".
Example 1: enable fax for all the users
Make sure you have some users in the users list.
Click the “Export as CSV” button and save the file.
Open the file with Microsoft Excel™. The field format will be preserved.
Write the digit “1” in the “Fax Send Enabled”, “Fax Receive Enabled”, “Fax2Email Enabled”, and “Fax2Email Attach Fax” columns of each user.
Copy the email address from the “E-mail” column to the “Fax2Email Address”.
Select "save as.." and save the file as .CSV.
In the UCX Suite “user Management”, click the “Import Users from CSV” link.
Click “Browse…” to select the file and the press “Import”. If you are loading a huge number of users, you may have to wait for some minute.
Example 2: add voicemail feature for users with primary extension starting by 3
Click “Customize search criteria” to filter the right users.
In the drop down boxes choose “First Extension Number” and “Begins With”. In the textbox enter “3”. Click “Add Condition”
Click the “Export as CSV” button.
Fill the “First Extension Number”, “Voicemail Number”, “Voicemail Address” columns.
Save the file to disk and import the file as in the examples above. The other users, that is the ones excluded by the filter, will remain unchanged.