Enabling XML Phone Service on CUCM/CCME
Cisco Unified CallManager configuration for Contact Manager Directories
XML directories
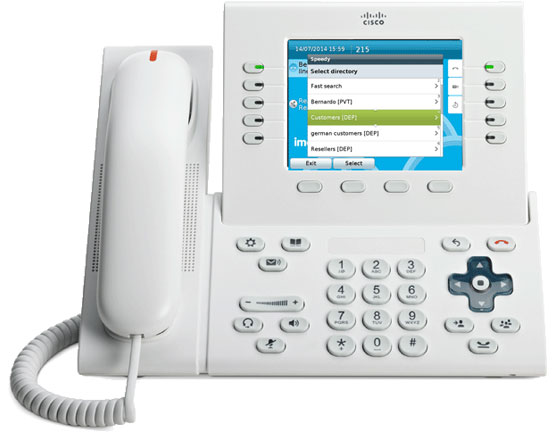
The directories can be browsed, searched and modified directly on the IP Phone (depending on the user's permissions). The IP phone interface is fully customisable and you can choose which fields to show and to search, including up to ten custom fields.
Contact Manager supports Extension Mobility so that users can log to different phones and use their public and personal contacts from there.

Fast Search
Searching for the right contact can be tedious if you have large directories, Contact Manager provides a Fast Search feature within its XML Phone Service, also known as search-as-you-type. Similarly to the T9 technology for mobile phones, the contacts are searched based on the letters printed on the IP phone dial pad. For instance, you can type John pressing 5,6,4,6.
Directory URL configuration via XML service
To configure the access to Imagicle Contact Manager directories, you must add a new Directory type Phone Service. Do not set the Url Directories in the Enterprise parameters.
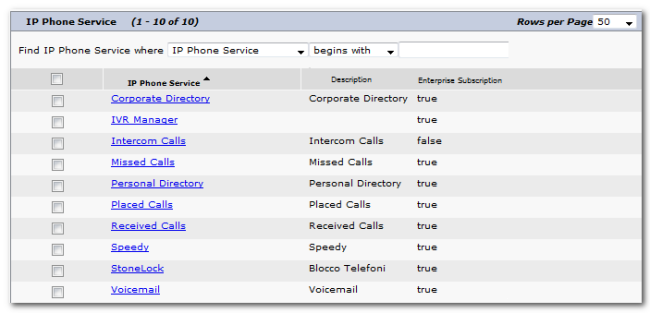
Log into the CallManager administration interface. Select the Device Menu, then Device Settings ⇒ Phone Services.
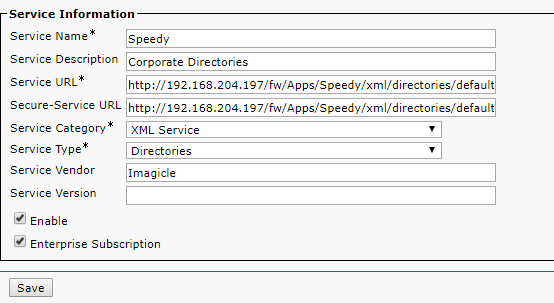
Add a new Service with these properties:
Service Name: Contact Manager
Service Description: Contact Manager
Service Category: XML service
Service URL: http://10.10.10.10/fw/apps/speedy/xml/directories/default.aspx?name=#DEVICENAME# (where 10.10.10.10 is the UCX Suite server ip address)
Service Type: Directories

Always select the "Enable" checkbox.
If you want Contact Manager Directories to be available on all the IP phones, select the "Enterprise Subscription" checkbox too. If you want Contact Manager Directories to be available only on specific devices, leave the checkbox unselected and follow the procedure at the bottom of this section.
Note: to avoid errors, you can copy directory service URL from the Contact Manager "Manage Service" web page in the UCX Suite web interface for admins.
You may want to disable the subscription for other Directory services.

Configure the phones Authentication URL
On CuCM administration web menu, select System ⇒ Enterprise Parameters and set the "URL Authentication" and "Secure URL Authentication" parameters to the following value:
http://[UCX_SUITE_IP]/fw/authenticate.aspEnabling TAPI-based Caller ID and AXL access
To enable AXL access and TAPI-based Caller ID features on Cisco UCM, please follow the procedure available here. Make sure that all phone devices accessing Imagicle directories are monitored by CTI/TAPI.
Enabling the http server on the IP phones
Cisco IP phones firmware include both an IP server and and IP client. They should be both active by default. To check if the IP server is enabled for an IP phone, log onto the CallManager web interface. Then select Device ⇒ Phone and look for the IP phone you want to check.
Left-click the device name to access the Device Information page. Under the "Product Specific Configuration Layout" ensure that "Web Access" is enabled and that the HTTPS Server entry is set to "http and https enabled".


How to subscribe to the Contact Manager XML Service on a specific device
On the CallManager Administration web portal, select Device ⇒ Phone. Look for the phone you want to activate Contact Manager on, and open its configuration. In the "Related Links" dropdown list, select Subscribe/Unsubscribe Services.
Choose the new Contact Manager service you just added and press the Subscribe button.

Cisco Unified CCME configuration for Contact Manager Directories
On this telephony platform, the only following features are supported on the IP Phones:
XML directories
Click to Dial
The Caller ID (i.e Directory Lookup) feature is not supported due to the limitations of the Cisco TSP.
The configuration steps are:
Configure the directories url
Ensure that the HTTP server is enabled on the IP phones
Enable AXL access to CallManager Express
Configuring the directories url
Suppose that 10.10.10.10 is the IP address of Imagicle Application Suite server. In global configuration mode, insert the commands:
(telephony-service)
url directories http://10.10.10.10/fw/apps/Speedy/xml/directories/default.aspx
url authentication http://10.10.10.10/fw/authenticate.asp
For the devices that use a SIP firmware, a slightly different configuration is needed:
voice register global
 url directory http://10.10.10.10/fw/apps/Speedy/xml/directories/default.aspx
 create profile
If you use both SIP and SCC devices, add all the commands above.
Enabling the HTTP server on the phones
To enable Click To Dial on Cisco IP phones with Firmware version 8.xxxx and above you must add the following command:
(telephony-service)
service phone webAccess 0
Then recreate the configuration files (with the create cnf-files command) and restart the phones.
Enabling AXL access To the Router
The Click To Dial feature needs to access the router through AXL.
To enable AXL access to Cisco CallManager Express, please follow the procedure you can find in this KB article.
CallManager and CallManager Express Hybrid Configuration
A single UCX Suite server can provide directories to a CuCM and/or multiple CallManager Express at the same time. This is useful when you have multiple branch offices with phones that are registered locally.
In this scenario, you must:
Configure Contact Manager to work with CallManager as usual. Imagicle AXL Service must point to CallManager to get the list of the registered devices.
Configure all CallManager Express with the above commands. The directories URLs must point to the UCX Suite server.
On the UCX Suite server (user management), add a user for each phone extension in the branch offices. For those users, ensure both the primary extension and the MAC address are set.
Ensure your license covers the additional extensions.
In this scenario, Click-to-Dial will only work for the phones registered to CallManager.
