Create and manage user groups
In the Teammates & Groups section of Smartflows, you can:
review the user list
modify certain user settings
organize users into groups, which can then be linked to departments to facilitate virtual agent-to-human escalation management
Keep in mind that directly adding a user in Smartflows is not allowed. To add a new user in Smartflows, you must first add them to the UCX Platform (UCXP). This action will automatically create the user in Smartflows as well.
Add a teammate and assign a role
First of all, you have to add a new teammate to UCXP:
Click on User Management
Click on Create
Enter all the required user information
Set the role
Assign the application licenses
Click Create to confirm the user’s creation
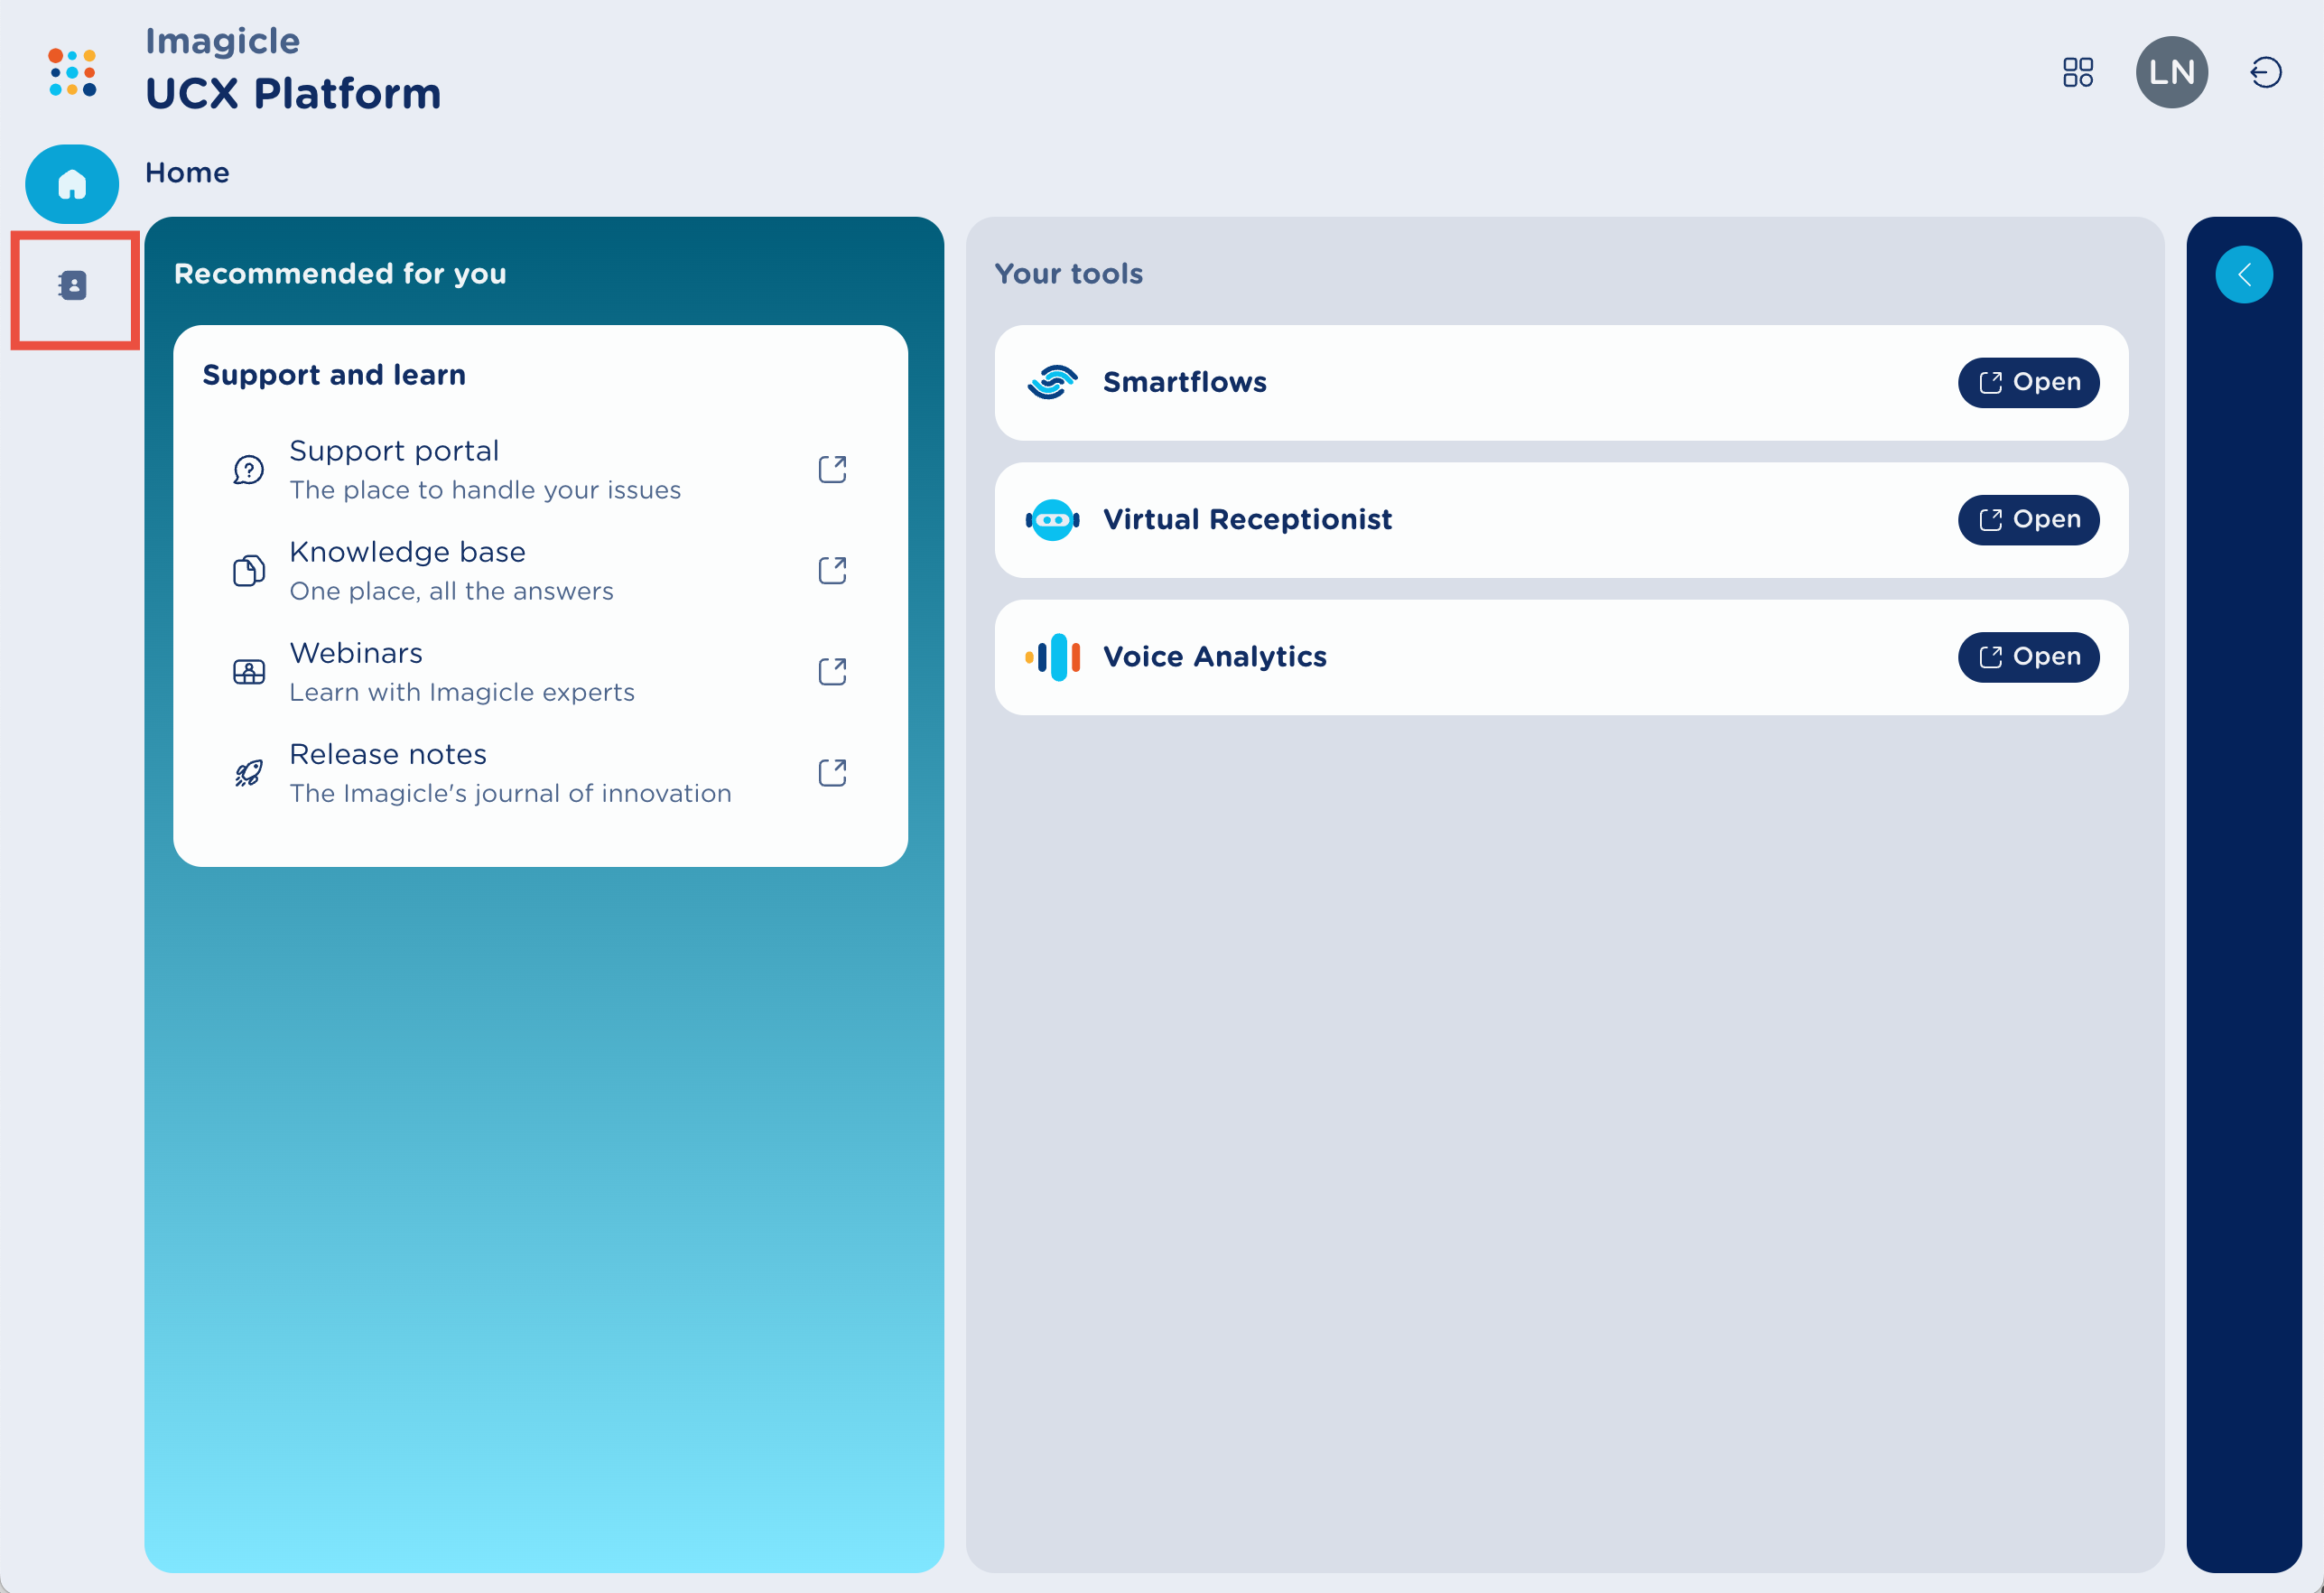
After Login inside the UCXP click on the left directory icon and access you contacts list
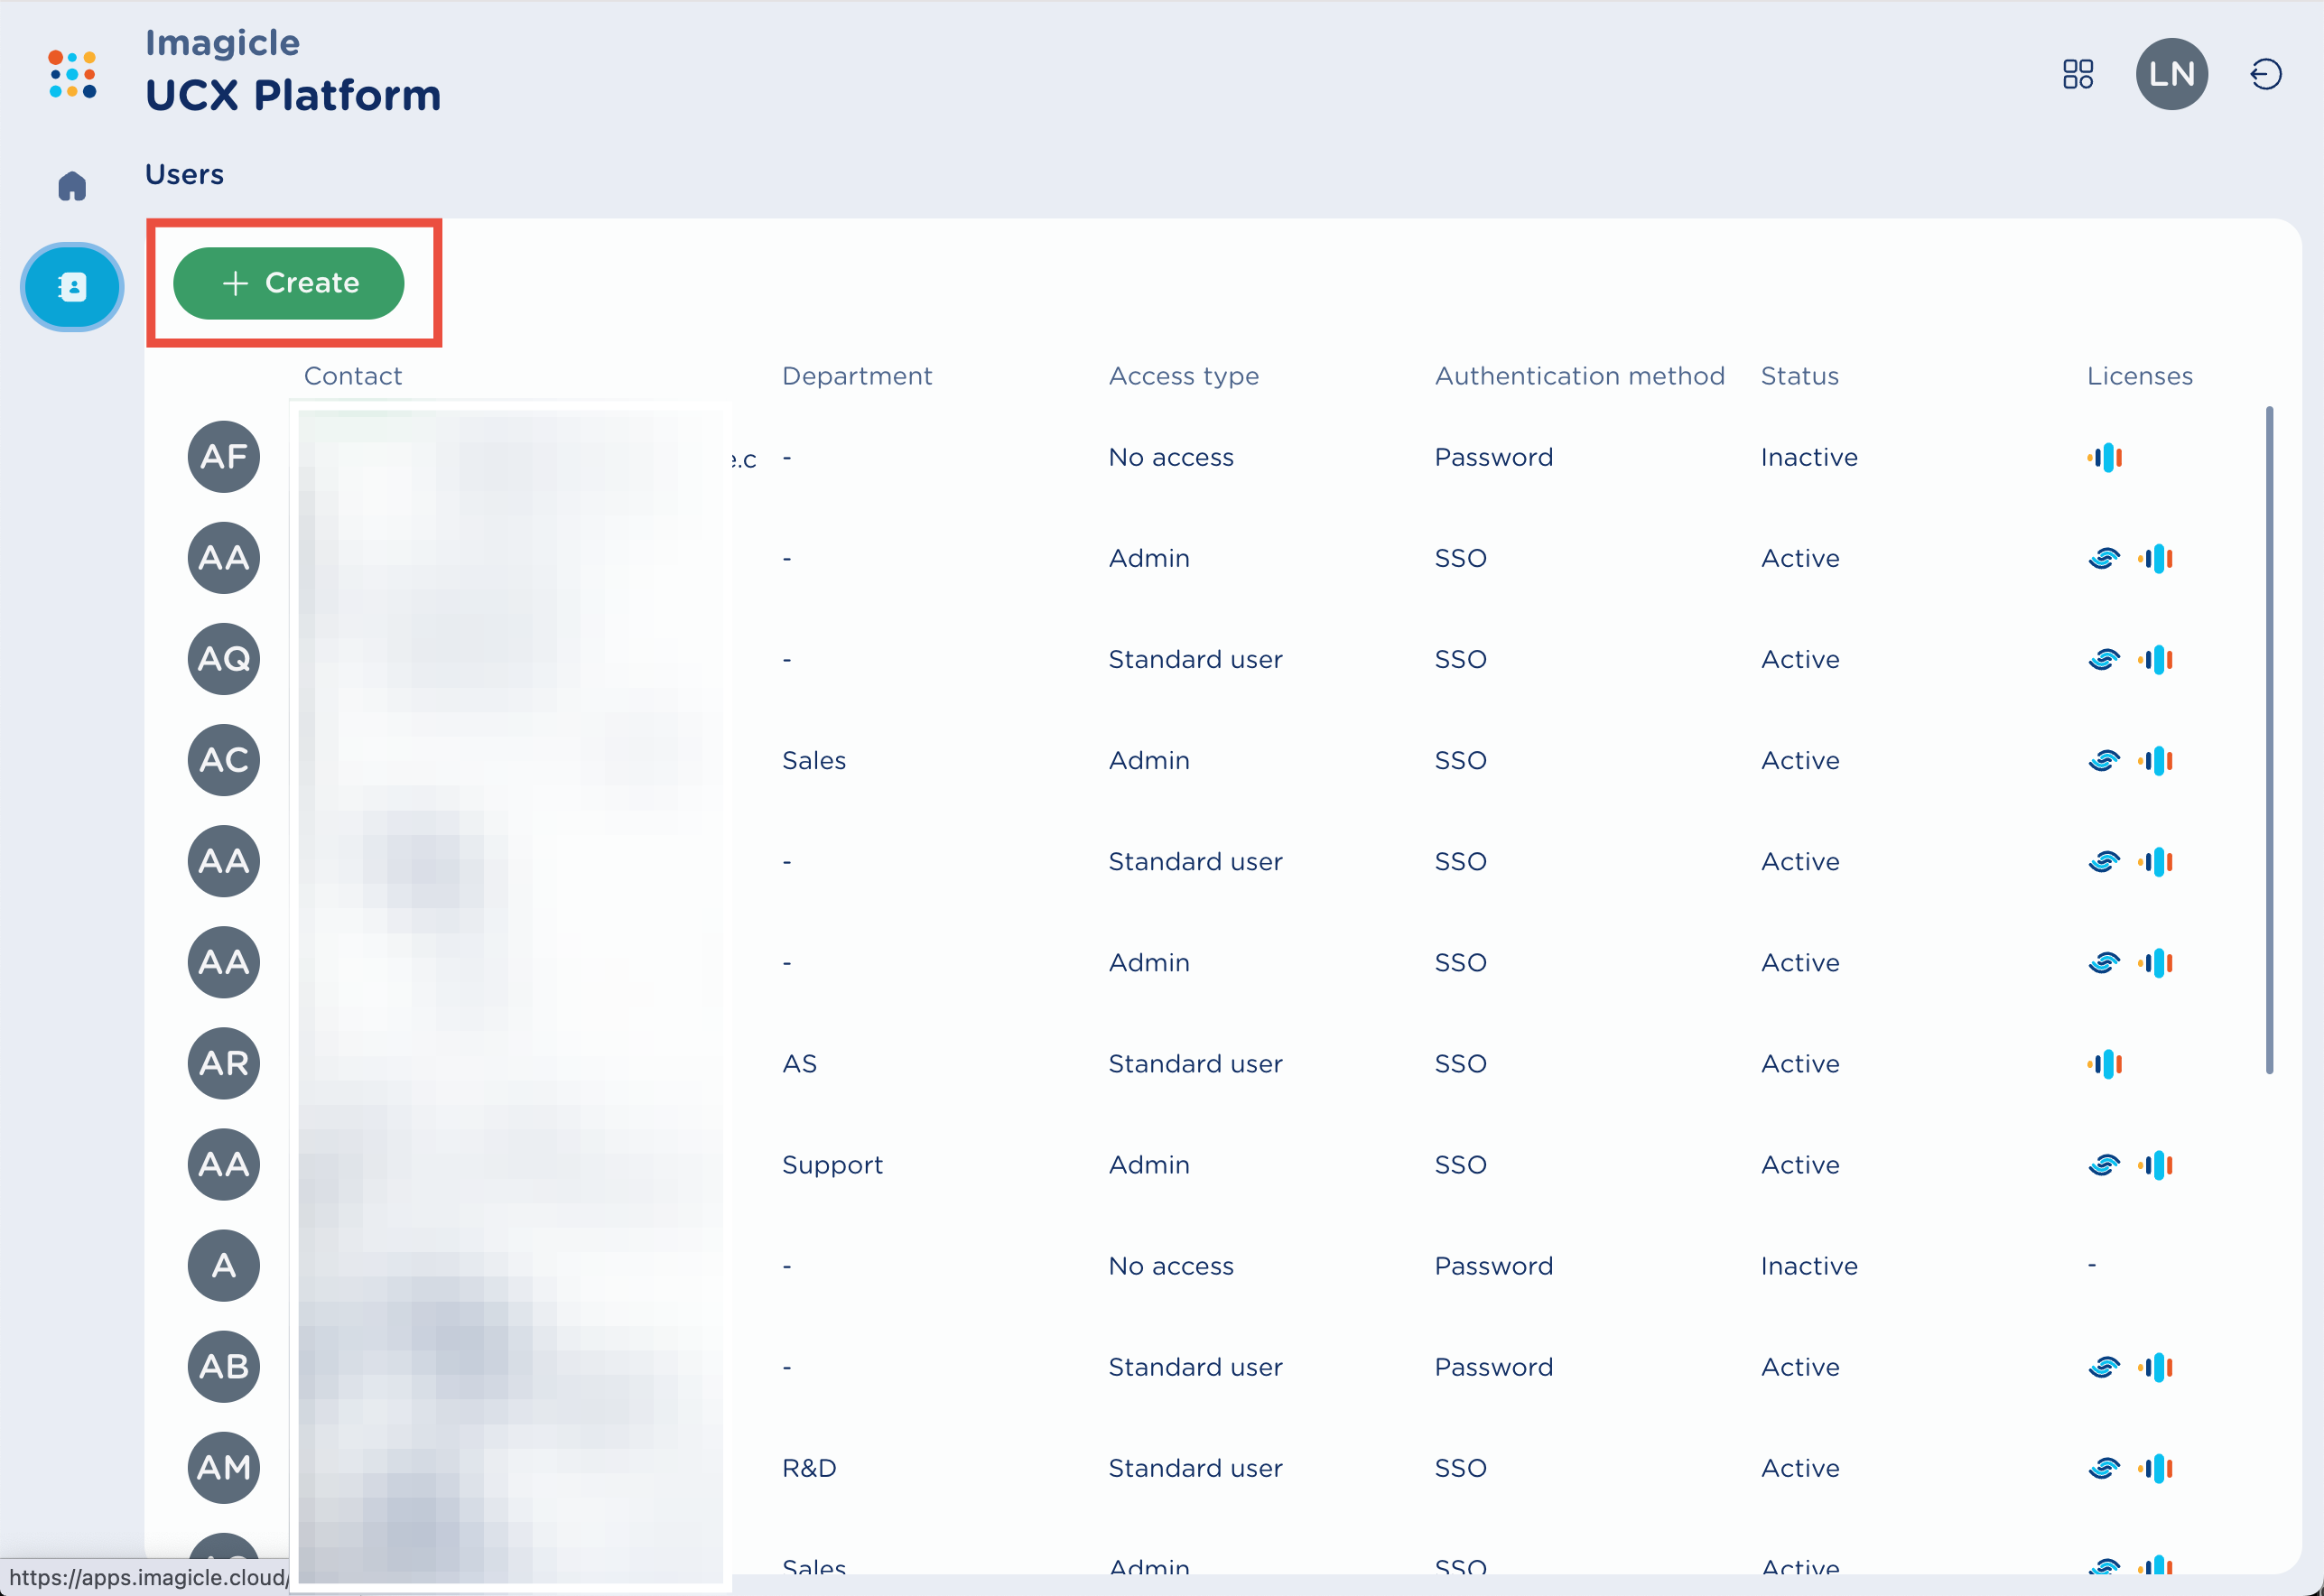
Now click on “Create” to add a new user
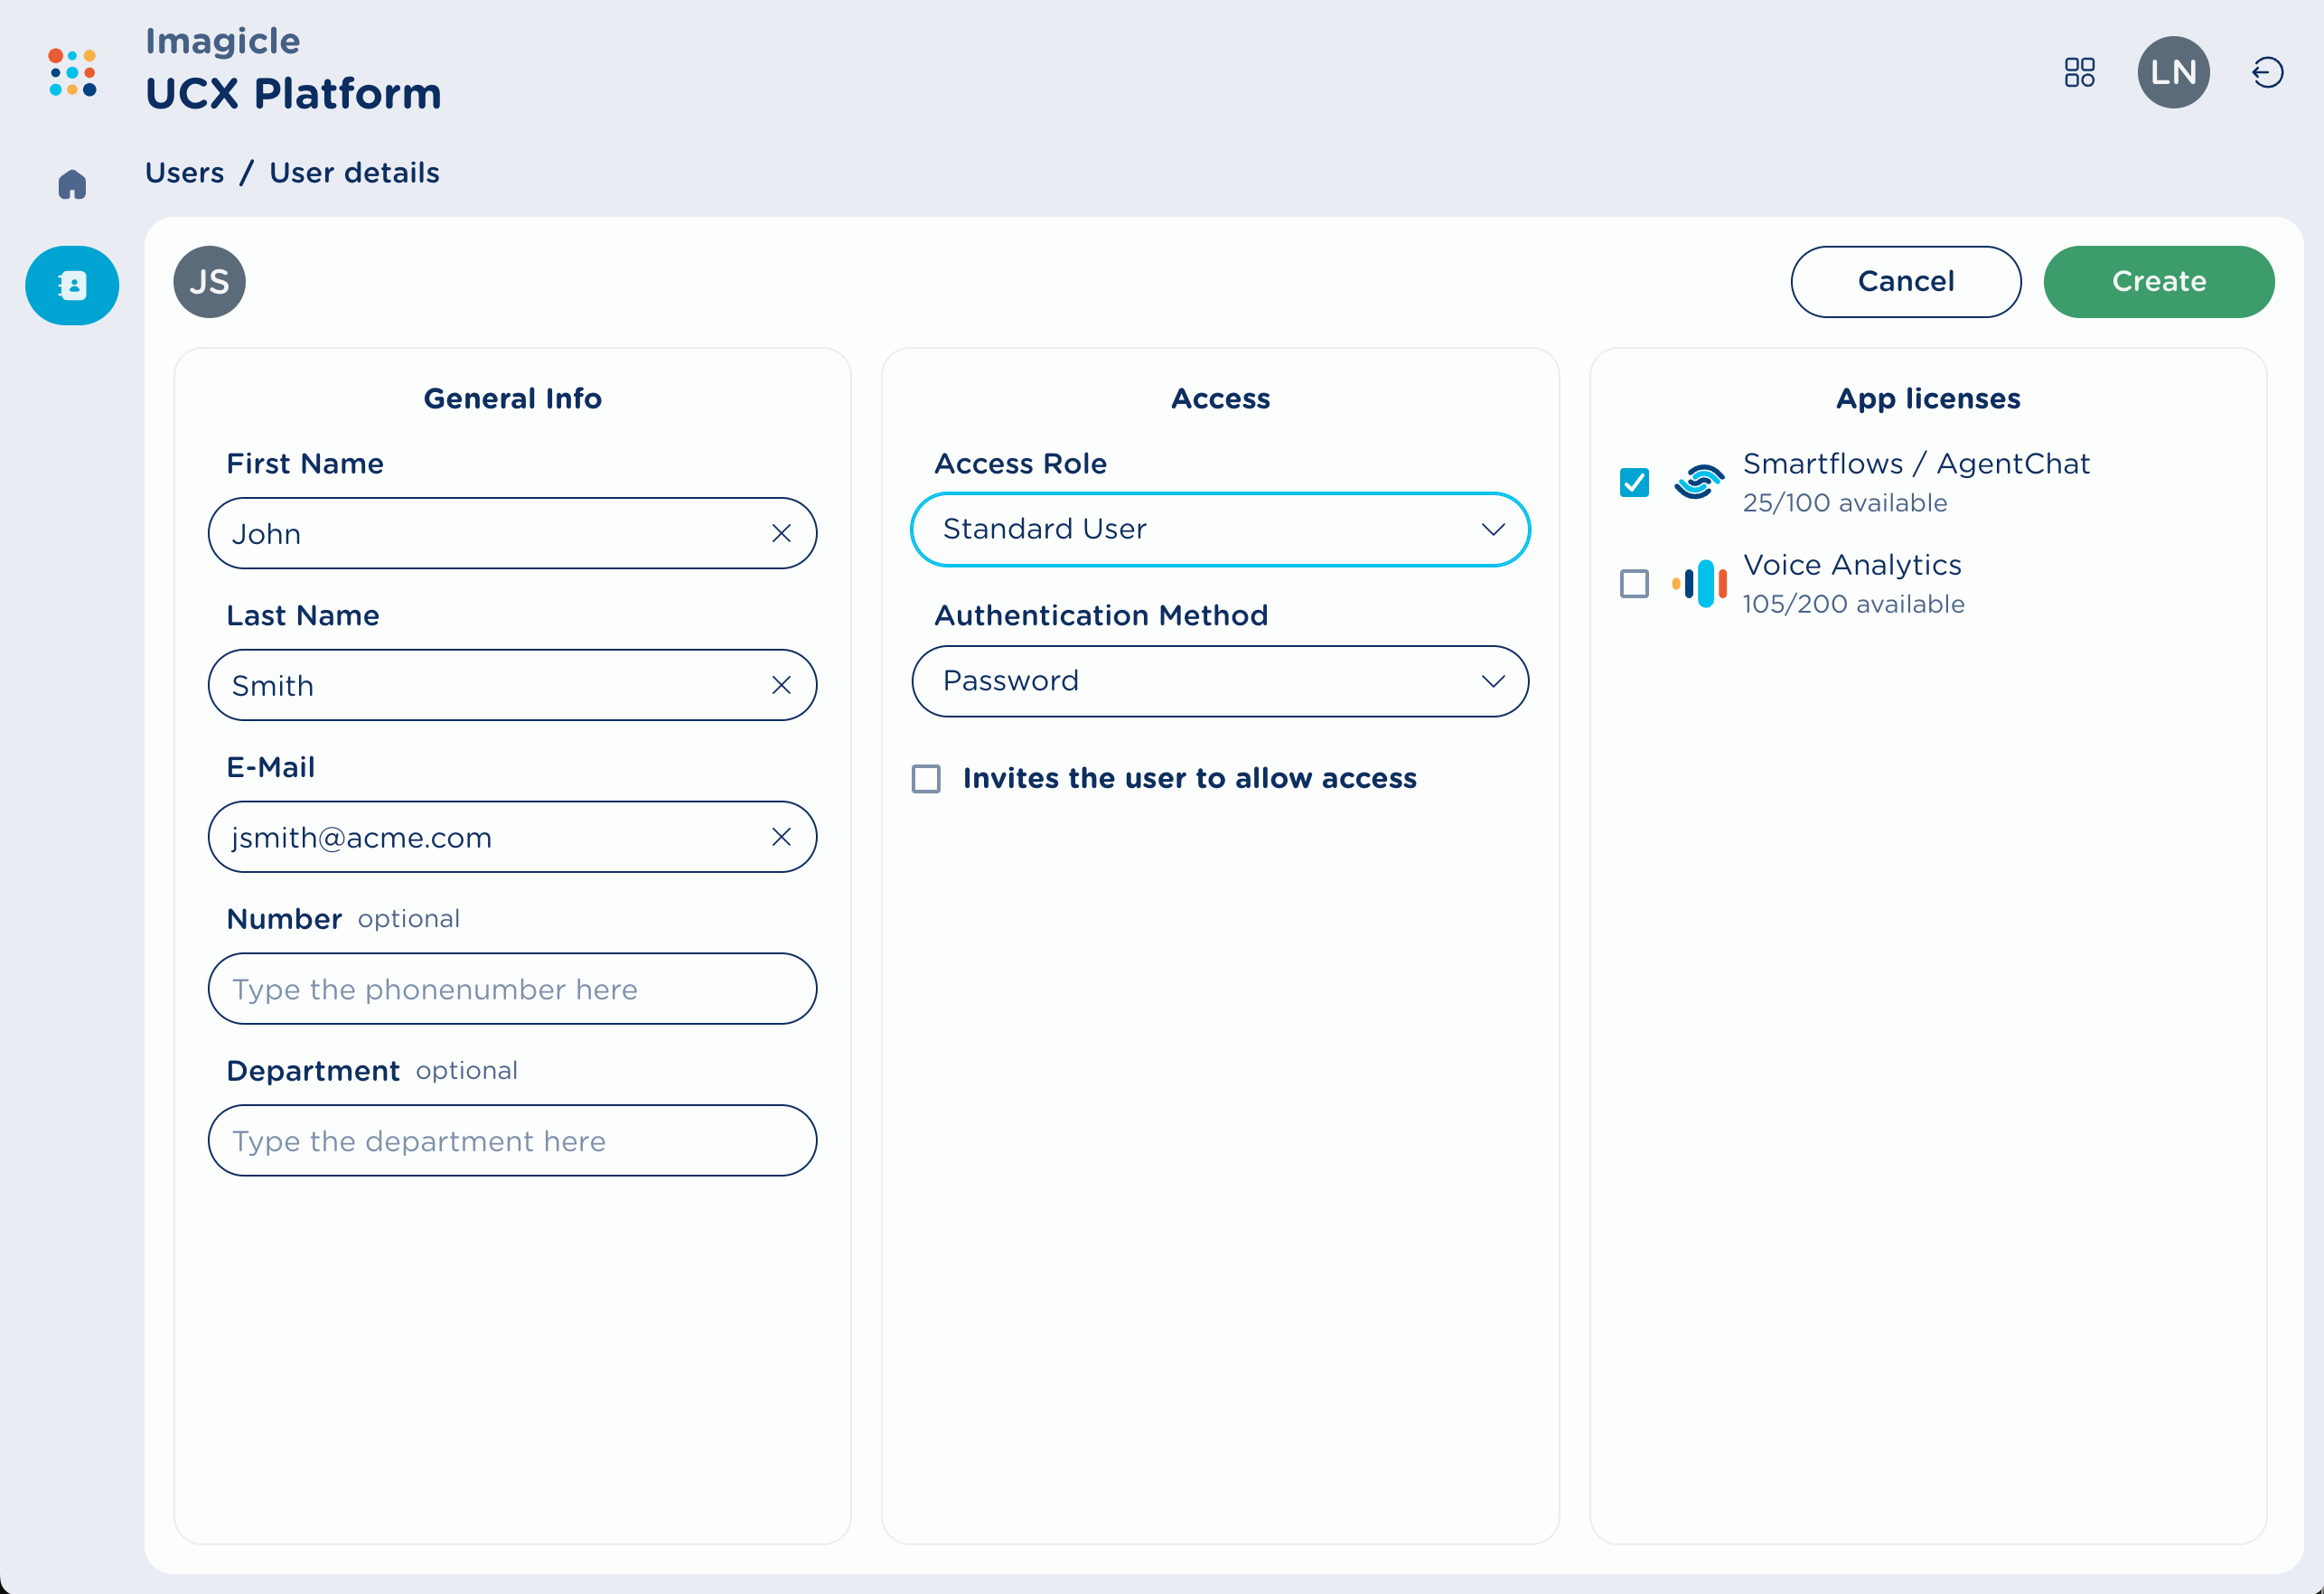
Add all the information required and those you want to add and select an “access role” you want to assign
These are the available roles:
No Access: the user has no access to UCXP
Standard User: grants standard privileges based on the licensed applications:
Smartflows → Agent role
Virtual Receptionist → Not visible
Voice Analytics → Access to personal recordings only (see Voice Analytics documentation)
Admin: grants administrator privileges based on the licensed applications:
Smartflows → Administrator role
Virtual Receptionist → Administrator role (see Virtual Receptionist documentation)
Voice Analytics → Access to all recordings (see Voice Analytics documentation)
These are the available application licenses:
Smartflows / AgentChat: provides access to the Smartflows portal and Agent Chat console. Available features depend on the user’s role
Voice Analytics: provides access to the Voice Analytics application (see Voice Analytics documentation)
Once the teammate is added inside UCXP it will be also automatcailly created into Smartflows portal, with the relevant access role and information. In particular, these are the Smartflows roles:
Agent: has the ability to:
engage in customer chats
view and manage both active and archived chats assigned to them or their group (if part of a department configured with groups)
add teammates to ongoing conversations assigned to them or their group, and forward conversations to other teammates
configure personal settings
access contact information
Administrator: possess all the default privileges of an agent. Additionally, they have the capability to:
view all active and archived chats
archive conversations
configure both global and personal settings
manage triggers, departments, and groups
create and manage canned responses and tags
access and review analytics
Owner: this role grants full control over every aspect of the Smartflows tenant. Assigned by Imagicle during the creation of the tenant, it is a unique position, and additional tenant owners cannot be created
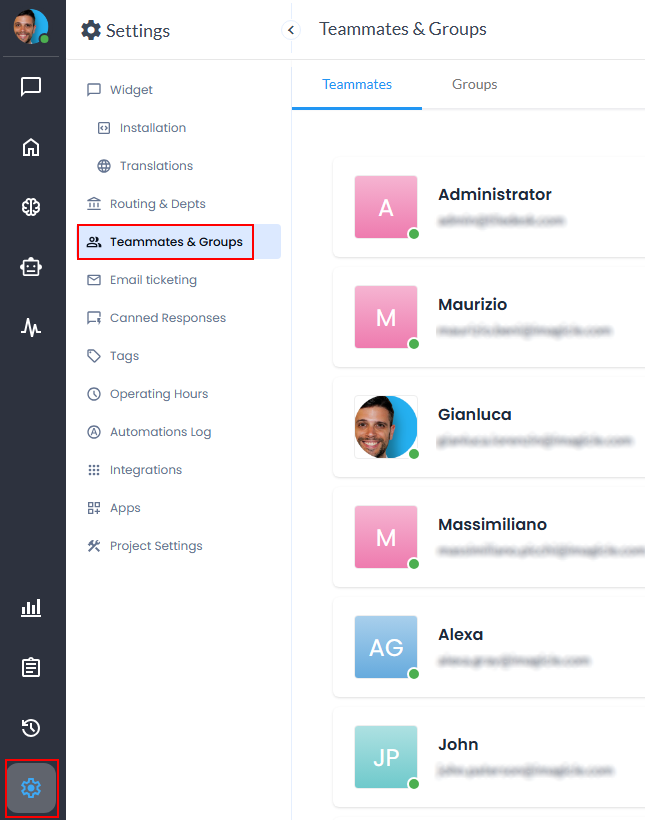
A Smartflows administrator can review the available users from Settings → Teammates & Groups:
Edit the teammate profile
By clicking on Edit Profile in the user row, you can modify the following user information:
Status: this allows the administrator to manage an agent's availability for chats. The statuses include:
Available: the agent is ready to handle conversations
Unavailable: the agent is currently busy managing conversations
Inactive: the agent is absent and not working
Chat Limit: this sets the maximum number of chats an agent can handle simultaneously. If set to "-1", there is no limit to the number of chats an agent can receive at once. By default, there is no specified limit, allowing agents to receive an unlimited number of chats
Tag: assign a tag for company purposes.

Create a User Group
In the Teammates & Groups section, navigate to the Groups tab. This page allows administrators to manage user groups within the system efficiently. Groups help in organizing teammates based on roles, departments, or other categorizations, facilitating streamlined collaboration and conversation assignment.
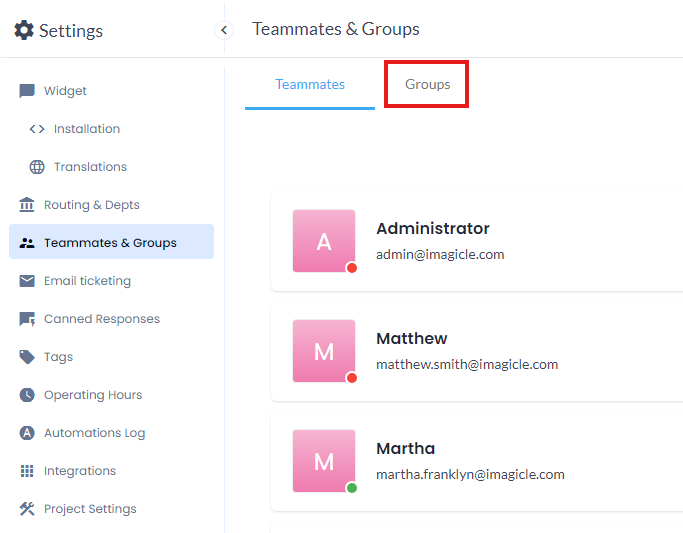

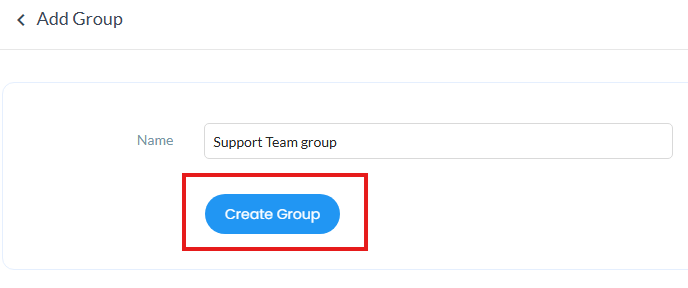
To create a new group, select "Add Group," input the desired name in the "Name" field, and proceed by clicking "Create Group." Then, you can assign as many agents as you need to this newly created group, aligning them with your company's organizational structure and preferred routing logic.
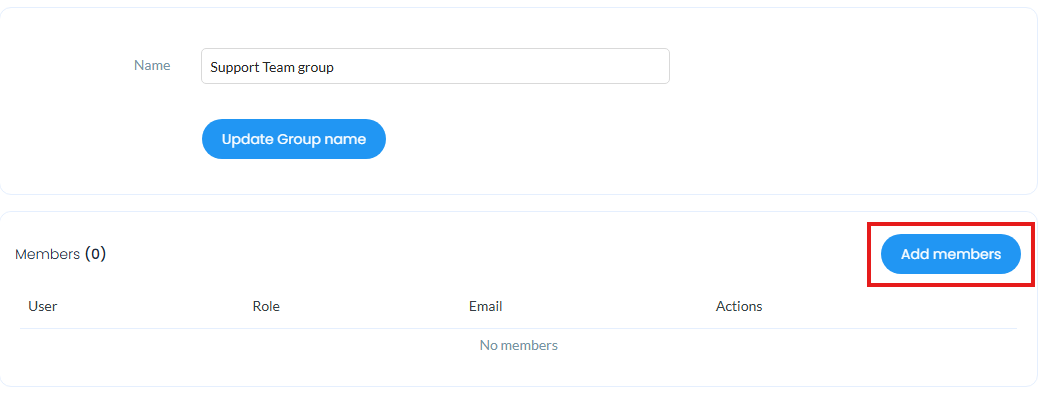
Once the group is configured, you can associate it with one or more departments. Agents within the group that is associated with a department will be responsible for handling the conversations assigned to them, depending on the routing rules configured for that department (for the department configuration, you can refer to this section).
You can edit or delete existing groups by selecting the relevant row in the group list:

