Avaya Aura PBX and Imagicle UCX Suite specific configurations to enable UCX Console CTI monitoring.
Applies to
Imagicle UCX Console solution on Avaya CM IP telephony environments
Scope
This article contains all required information for configuring Imagicle UCX Console in Avaya CM / Aura telephony environments, with focus on CTI-based communications.
UCX Console limitations
Some CTI-related actions are not supported from Imagicle UCX Agent/Attendant Console, in Avaya CM/Aura telephony environments:
Call Toggle feature is not working, so the operator should manually hold connected call and resume the other call from hold.
Avaya architecture
Imagicle solution for Avaya CM / Aura environment requires the installation, in the Imagicle server, of an Imagicle CTI driver able to communicate via TSAPI to the Avaya Application Enablement Service (AES). The connection is summarized in the diagram below, where all the various Imagicle / Avaya components involved are represented.
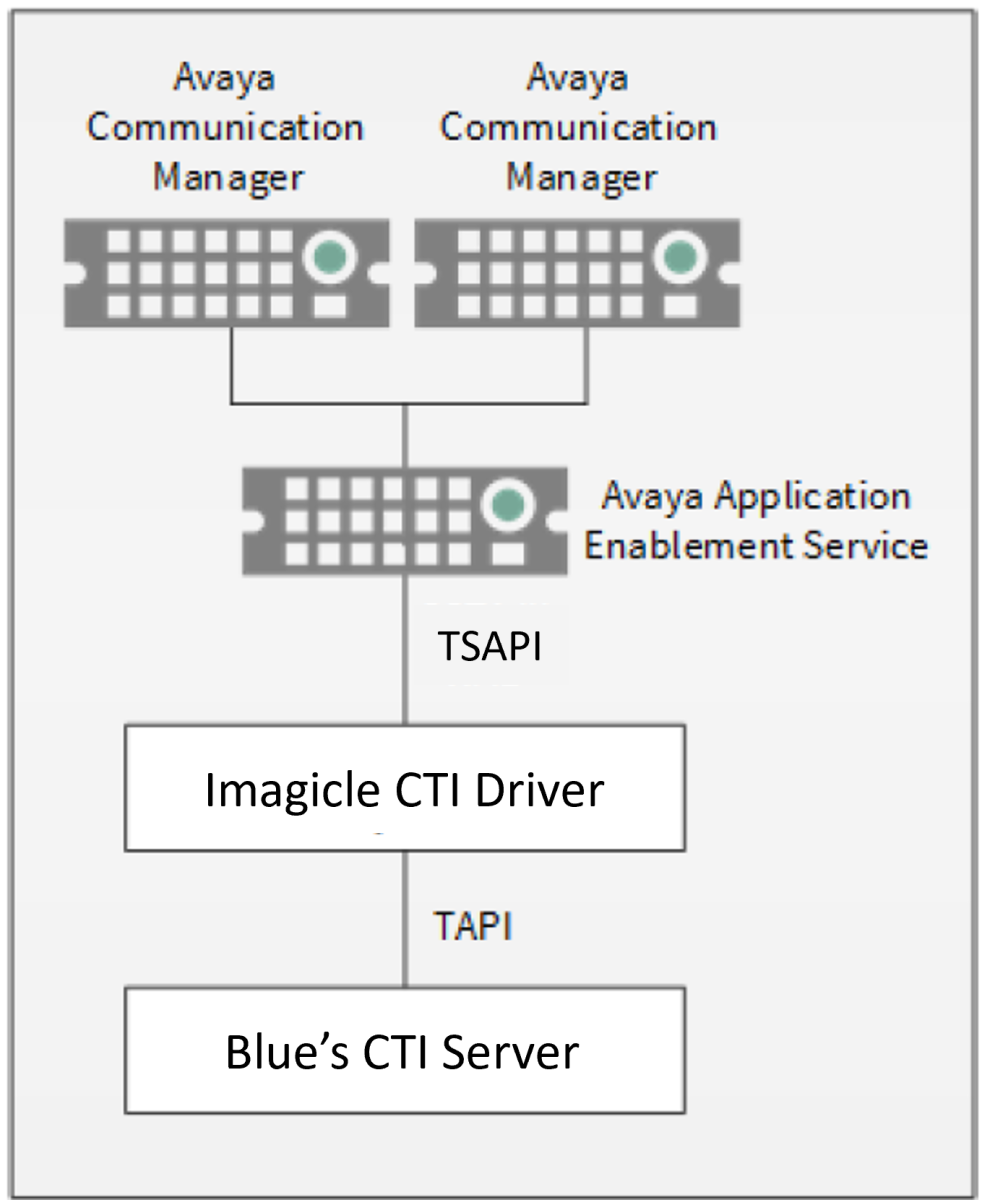
Please note that Imagicle CTI driver and the “Blue’s CTI Server” components are both included into the Imagicle UCX Suite.
Avaya AES Configurations
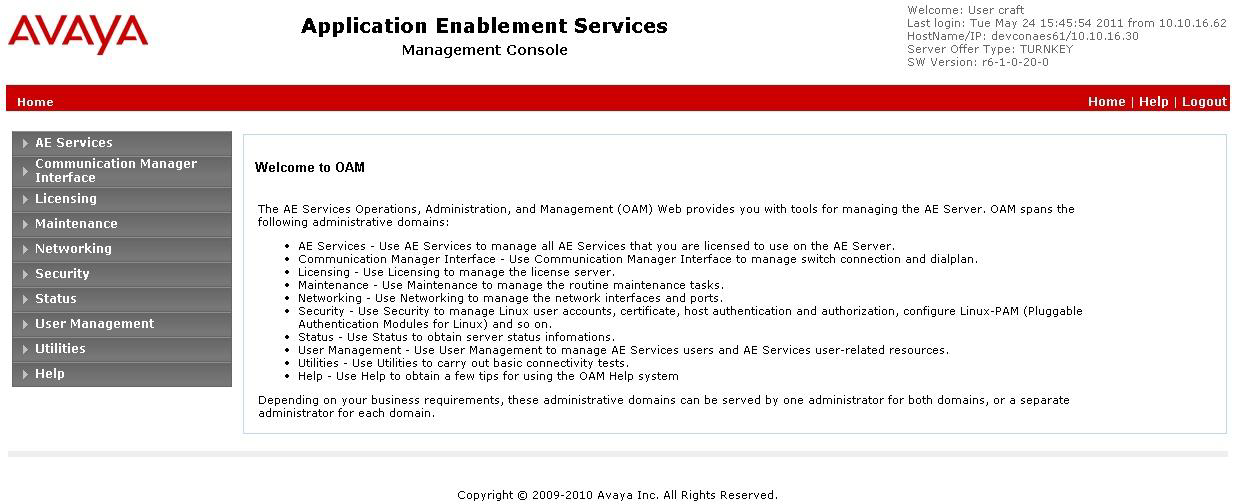
From a web browser, enter the AES IP address and log in with management console credentials.
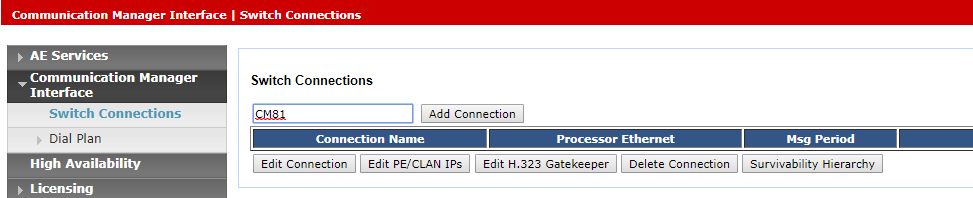
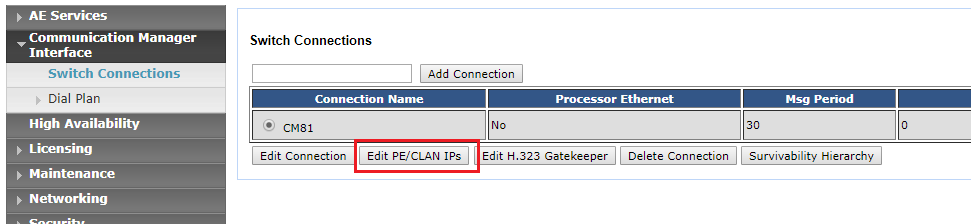
Configuring Switch Connection
Select Communication Manager Interface ⇒ Switch Connections
Enter here the connection to a new Avaya CM server (i.e. CM81) and click Add Connection. Please note that you must use alphanumeric name, without any special character.
Enter a password (i.e. avaya1234567) which will be later on required during Avaya CM configuration, to create AES link. Password should have from 12 up to max 16 characters.
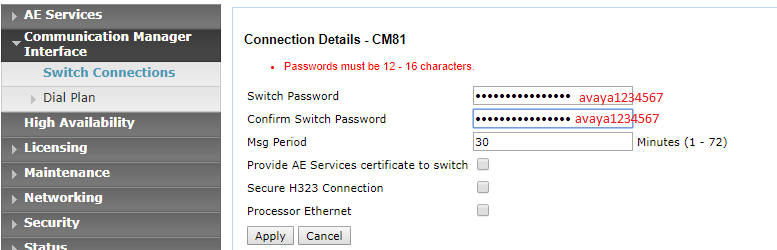
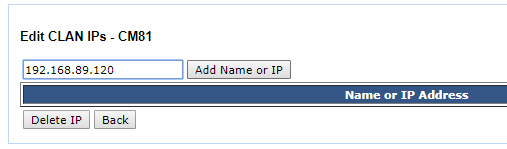
Then click on "Edit PE/CLAN IPs"
Specify here Avaya CM IP address and hit "Add Name or IP"
Configuring TSAPI Link
Select now AE Services ⇒ TSAPI ⇒ TSAPI Links
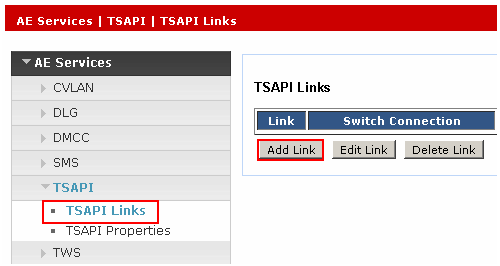
Click on Add Link
On the page that opens, enter the data as shown below:
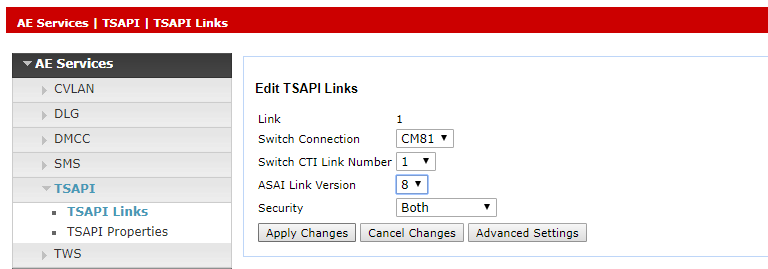
In the Link field field, select the link number (usually 1)
In the Switch Connection field, select the previously defined Avaya CM connection.
In the Switch CTI Link Number field, select 1.
In the ASAI Link Version field, select the value 8
Note: ASAI Link Version 8 is the appropriate value for Avaya Aura / CM ver. 7.1.1 and above, with AES ver. 7.1.1 and above.
Security field can be populated as follows:
Unencrypted: Connection to the client without encryption.
Encrypted: Connection encrypted to the client, for this link TSAPI.
Both: To enable encrypted and non-encrypted connections.
By selecting "Both", all TSAPI clients using an encrypted "Advertised TLINK" require AES ver. 4.1 or higher. TSAPI clients using an unencrypted "Advertised TLINK" can use an AES prior to 4.1.
Click on Apply Changes to save configuration.
Click again on Apply and restart the TSAPI service to enable the changes. To restart the service:
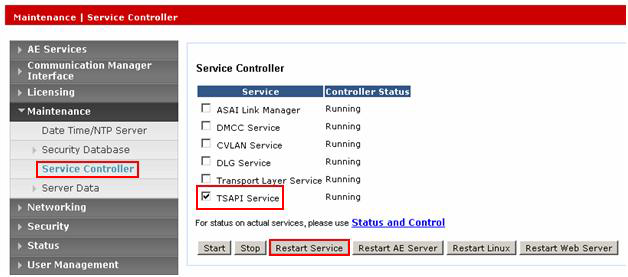
From the left panel of the AES console select Maintenance -> Service Controller.
On the Service Controller page, select TSAPI Service.
Press on Restart Service. TSAPI restarts and the "Controller Status" column displays the message Running.
Configuring TSAPI CTI User
Select User Management ⇒ User Admin ⇒ Add User
Please create a user that will be configured into Imagicle CTI Server:
Enter user Id, Common Name and Surname (i.e. imagicle)
Enter password (i.e. imagicle01!)
In Avaya Role, select userservice.useradmin
In CT User select Yes
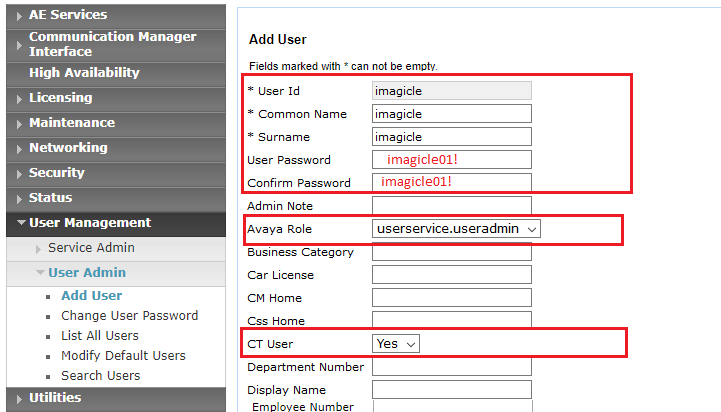
Click "Apply Changes" to save data.
Now select Security ⇒ Security database ⇒ List All Users
You will find previously defined CTI user. Click on "edit" and check Unrestricted Access flag.
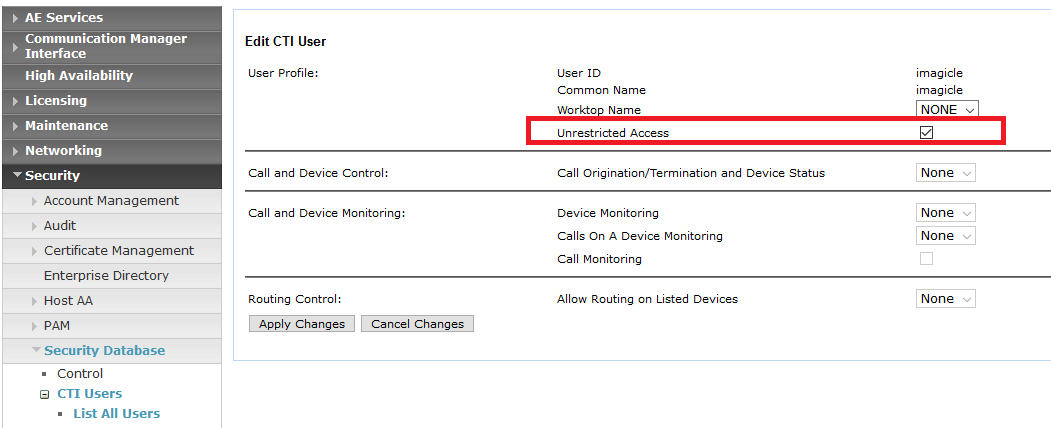
Click "Apply Changes" to save data.
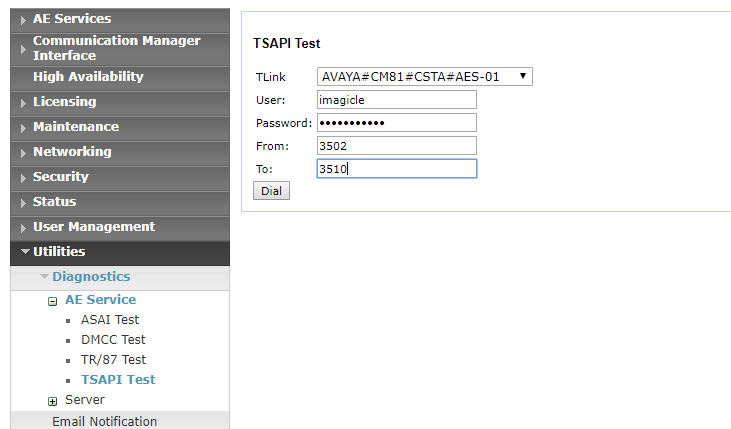
Finally, in Utilities ⇒ Diagnostic ⇒ AE Service ⇒ TSAPI Test , you can test the correct functionality of newly created CTI user.
Please pull down TLink field and select first item including "#CSTA#"
User and Password fields should be populated with above defined CTI User credentials
From field should be populated with any registered internal extension from which you initiate the call
To field should be populated with any registered internal extension which receives the call
Hit Dial to start test.
If test is successful, you can see a short internal call between two extensions, with the following test result:
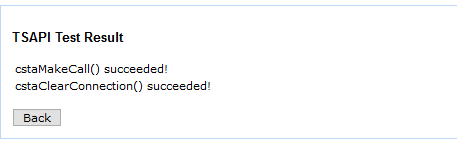
Avaya CM/Aura Configurations
Avaya CM configuration has to be accessed via an SSH client, for example "Putty". Enter the administrator login credentials. To access the console with the correct display type the following commands:
“SAT” + PIN (usually it’s the same as the Admin password)
“STUN”
Configuring interfaces toward Avaya AES and Imagicle Server
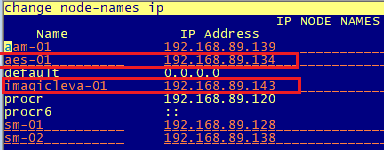
Enter the name and IP address of AES, in the example "aes-01" and "192.168.89.134" respectively. Enter here Imagicle Suite's IP, too: imagicleva-01 & 192.168.89.143
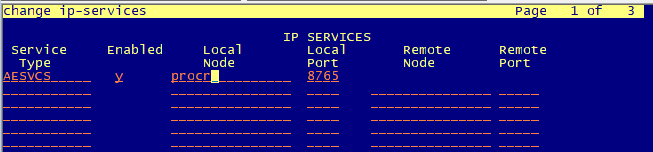
Then modify the IP-Services with the "change ip-services" command, entering the data highlighted in the screen below for the AESVCS service:
in Service Type, please enter AESVCS service
in Enabled, just type Y
in Local Node, enter CM interface procr
in Local Port, just leave 8765 port
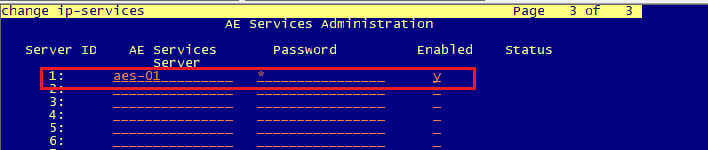
Now proceed to page 3 of same command and fill the first line with:
in AE Services Server, please enter the AES server name (AES hostname)
in password, enter the password above defined into Switch Connection (i.e. avaya1234567)
in Enabled, just enter y
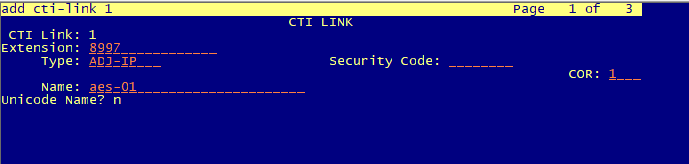
To enable the connection of Avaya CM to the Application Enablement Services, enter a new CTI Link as shown below. Specify an unused Extension number and the Type as "ADJ-IP", which represents an IP link to the "Adjunct Server", finally assigning a Name that corresponds to the AES hostname configured before.
To check connection status to AES, enter the status aesvcs link command. If the configuration is correct, status will be established. See below sample:
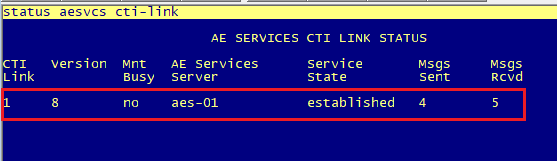
Moreover, to view the list of cti-links and their status, type status aesvcs cti-link.
TSAPI CTI Link Status and TLink Acquisition
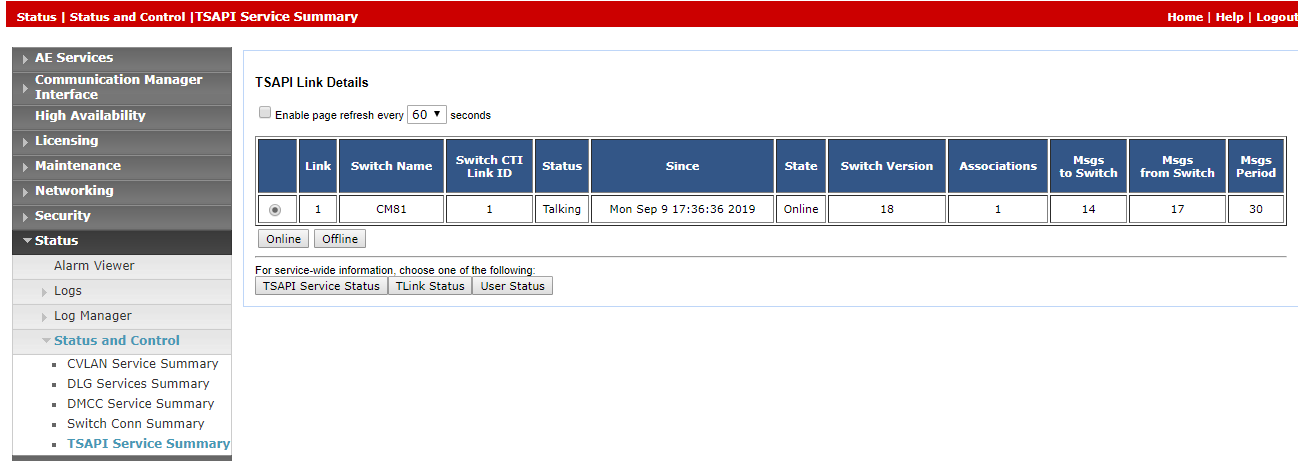
Please login to AES and go to Status ⇒ Status and Control ⇒ TSAPI Service Summary
Verify that link status toward Avaya CM is "Talking". If there are communications problem, the status will be "Down"
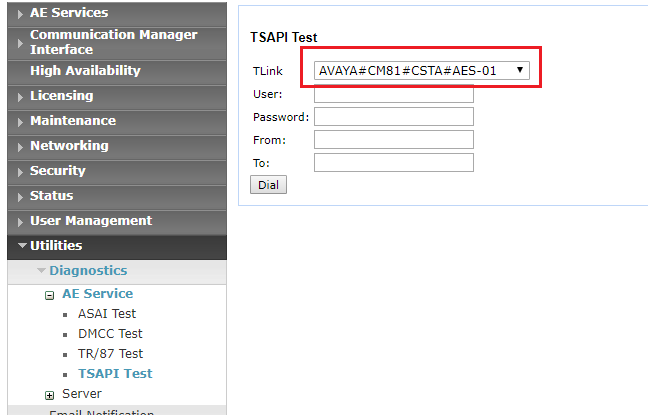
Now you can retrieve the TLink ID from AES. Go to Utilites ⇒ AE Service ⇒ TSAPI Test
TLink is normally available with this syntax: AVAYA#<switch connection>#CSTA#<AES hostname>
Example: AVAYA#CM81#CSTA#AES-01
Save this data for Imagicle CTI configuration, below explained.
Configurations on Imagicle Server
Connect to the Imagicle UCX Suite server via Remote Desktop and download the following software packages from web:
Run both the executables and install everything with default parameters.
You can find "Imagicle CTI Configuration" application on Windows Start menu. If it is not available, restart the machine and restart the setup.
Launch the Imagicle CTI Configuration application. The main menu appears:
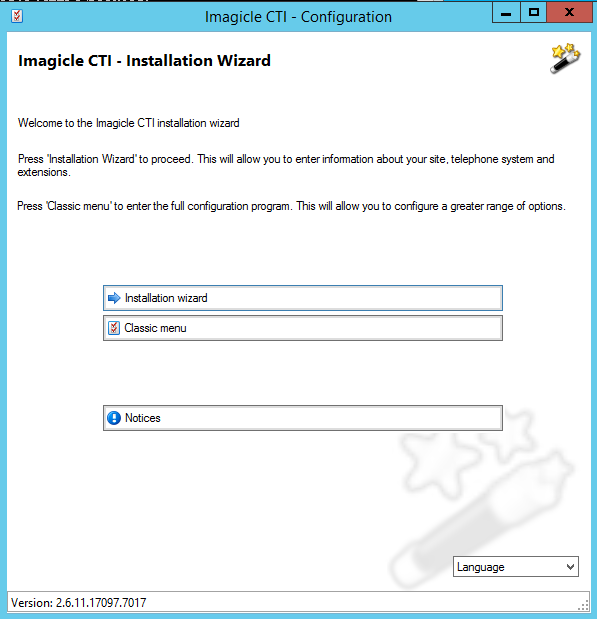
Select Installation Wizard
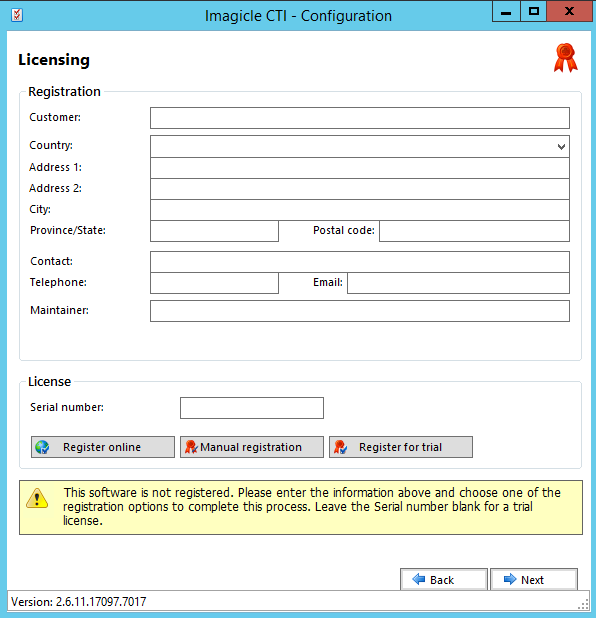
If actual license is not immediately available, please apply for a trial license. This requires an internet connection.
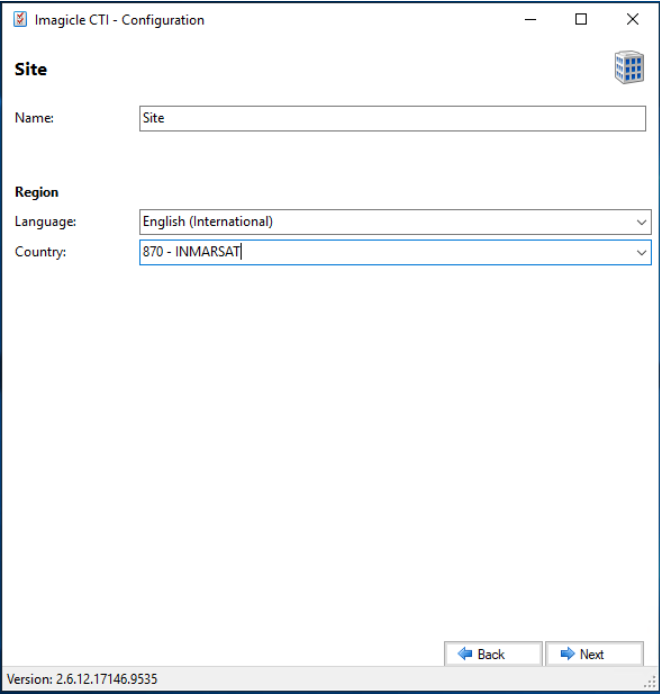
Once actual or trial license is activated, hit Next and proceed with entering the site data, entering the language English (International) and Country=INMARSAT. Then press Next again.
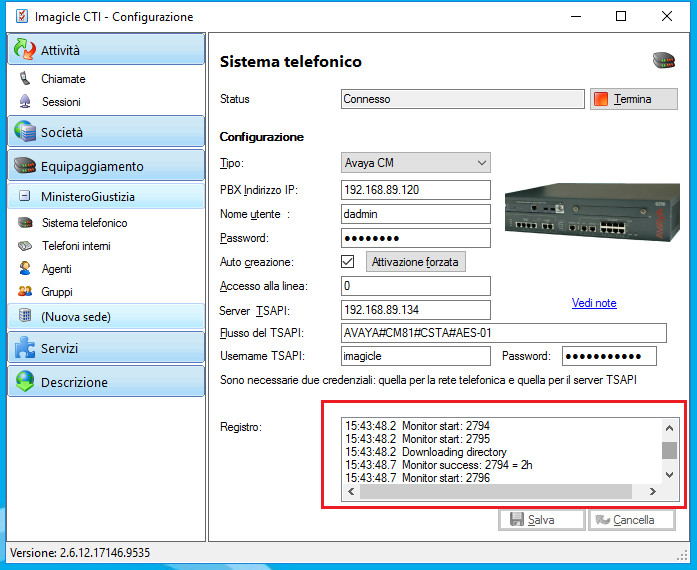
Avaya PBX connection screen appears, to be filled with CM / AES data.
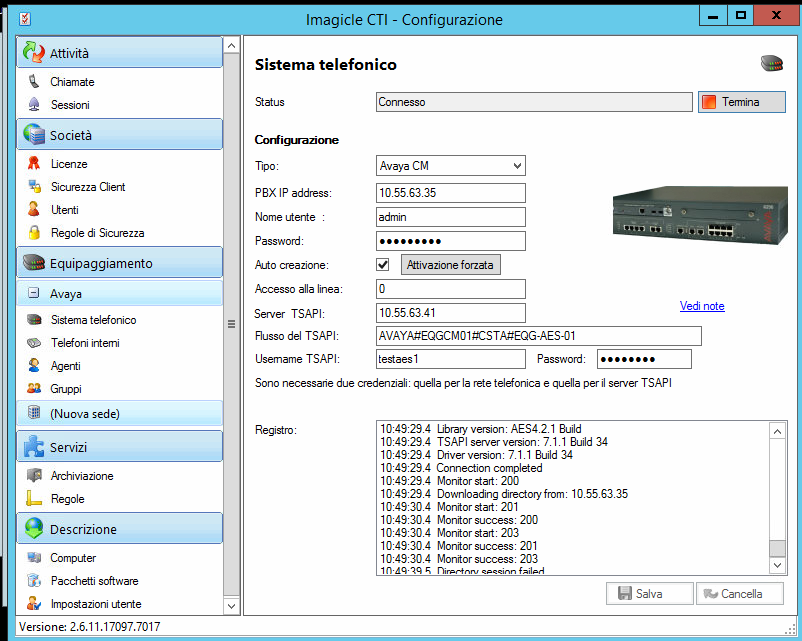
In the Type field, select Avaya CM
PBX IP address contains the IP address of the Avaya Aura / CM server
Username / Password refer to Avaya CM login credentials (usually dadmin – dadmin01)
Auto creation must be flagged, to automatically acquire extensions
In the TSAPI Server field, enter the IP of the AES server
In the TSAPI Flow field, enter the connection string to the CTI-Link. This is TLink ID previously saved.
Username TSAPI / Password refers to previously configured credentials for accessing the AES web console
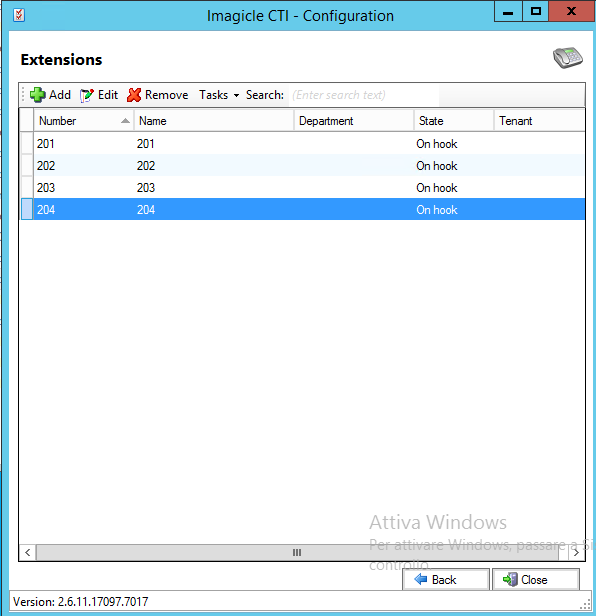
Save the data and then click on Internal Phones, in the left panel. Check that all the lines monitored via CTI appear.
If CTI monitoring works correctly, you can see real-time phone status by looking into phone system logs. See below sample:
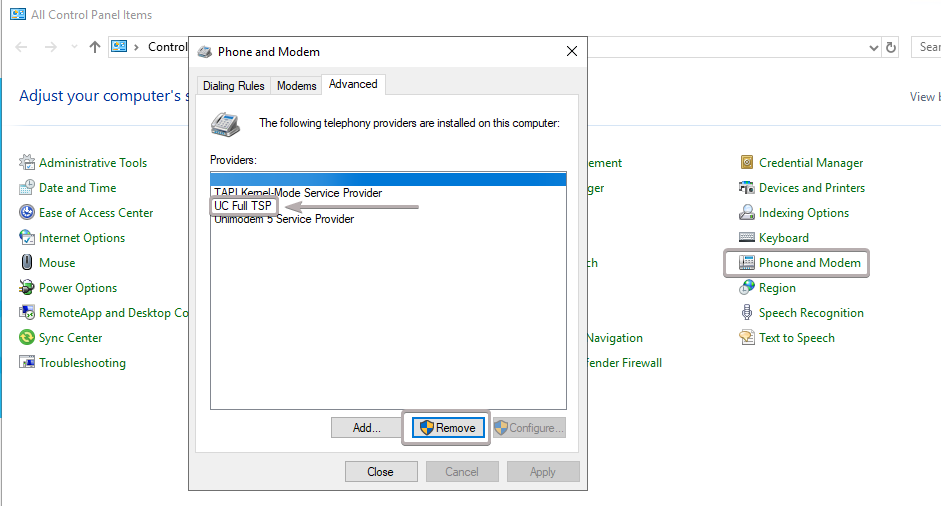
Open "Phone and Modem" in the Windows Control Panel and remove UC Full TSP entry:
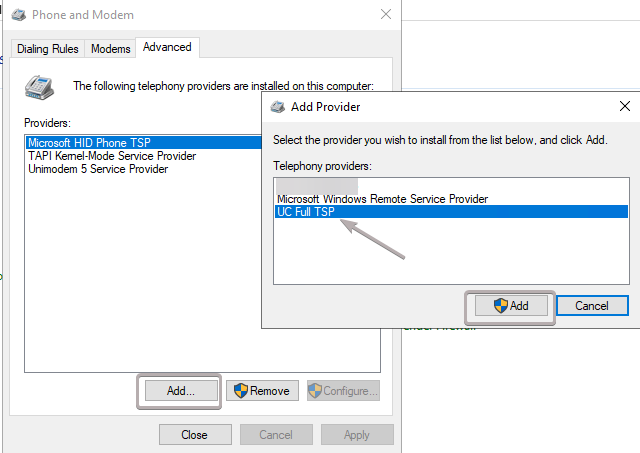
Click on "Add.." and select UC Full TSP again
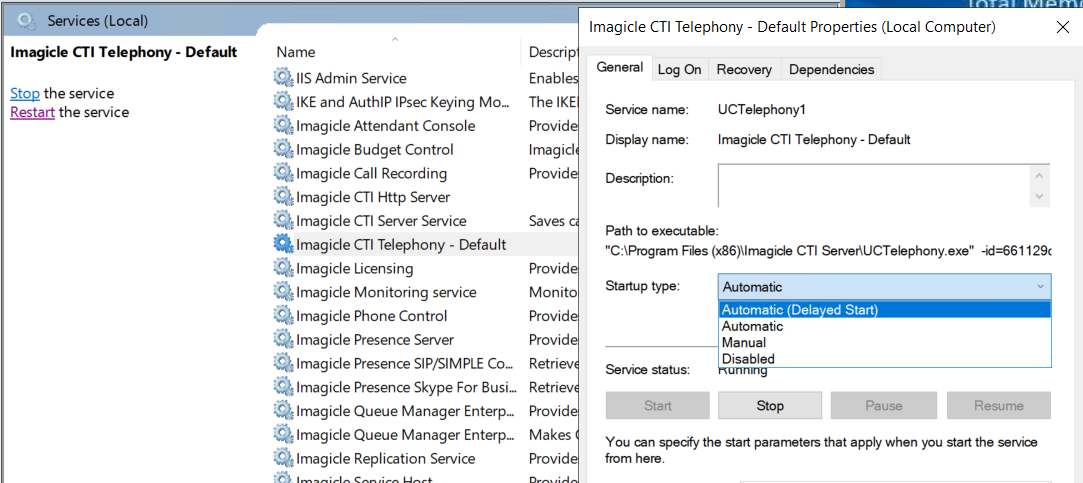
Open Windows Service Panel, find "Imagicle CTI Telephony - Default"
Change Startup Type from Automatic to Automatic (Delayed Start)
We suggest a full server reboot.
Imagicle UCX Suite Summer 2018 (2018.6.1) or older
If the phones do not appear automatically on the internal phones screen, download the following components from the web:
https://www.dropbox.com/s/ypm8el55mlbecsm/ApplicationSuite.Phone.Control.schema.xml?dl=1
https://www.dropbox.com/s/vbwwcwz4qpii8en/ApplicationSuite.Phone.Control.GO_ACM.config.xml?dl=1
https://www.dropbox.com/s/40z1dzoaa19y7el/ApplicationSuite.Phone.Control.GO_ACM.schema.xml?dl=1
then paste the above three files into the following folder:
C:\Program Files (x86)\StonevoiceAS\Apps\ApplicationSuite\Settings\
Override any already existing file(s), if necessary
From Windows services panel (services.msc), please restart:
Imagicle Phone control
Imagicle Queue Manager Enterprise