Poly SIP Phones additional configurations
Imagicle UCX Console solution for MS-Teams offers the unique feature of allowing customers to choose which phone device to associate to operators. Actually, Imagicle UCX Agent/Attendant Console supports both ACS integration, not requiring any MS-Teams client, and MS-compliant SIP Phones from vendor Poly, registered to MS SIP Gateway.
Supported phone models are VVX series. Please contact Imagicle to learn about available models and minimum firmware version.
To monitor and control such SIP phones, an additional CTI server component is installed by Imagicle in the UCX Cloud Suite.
Customer network should expose SIP phones to internet, to allow a UDP-based CTI session between phones and Imagicle Cloud. For this purpose, Imagicle provides to customer a DNS entry with the following naming convention: cti-xxxx.imagicle.cloud, where xxxx is the customer name. SIP Phones must reach this DNS using UDP port 6050.
Configurations to apply from MS-Teams admin portal
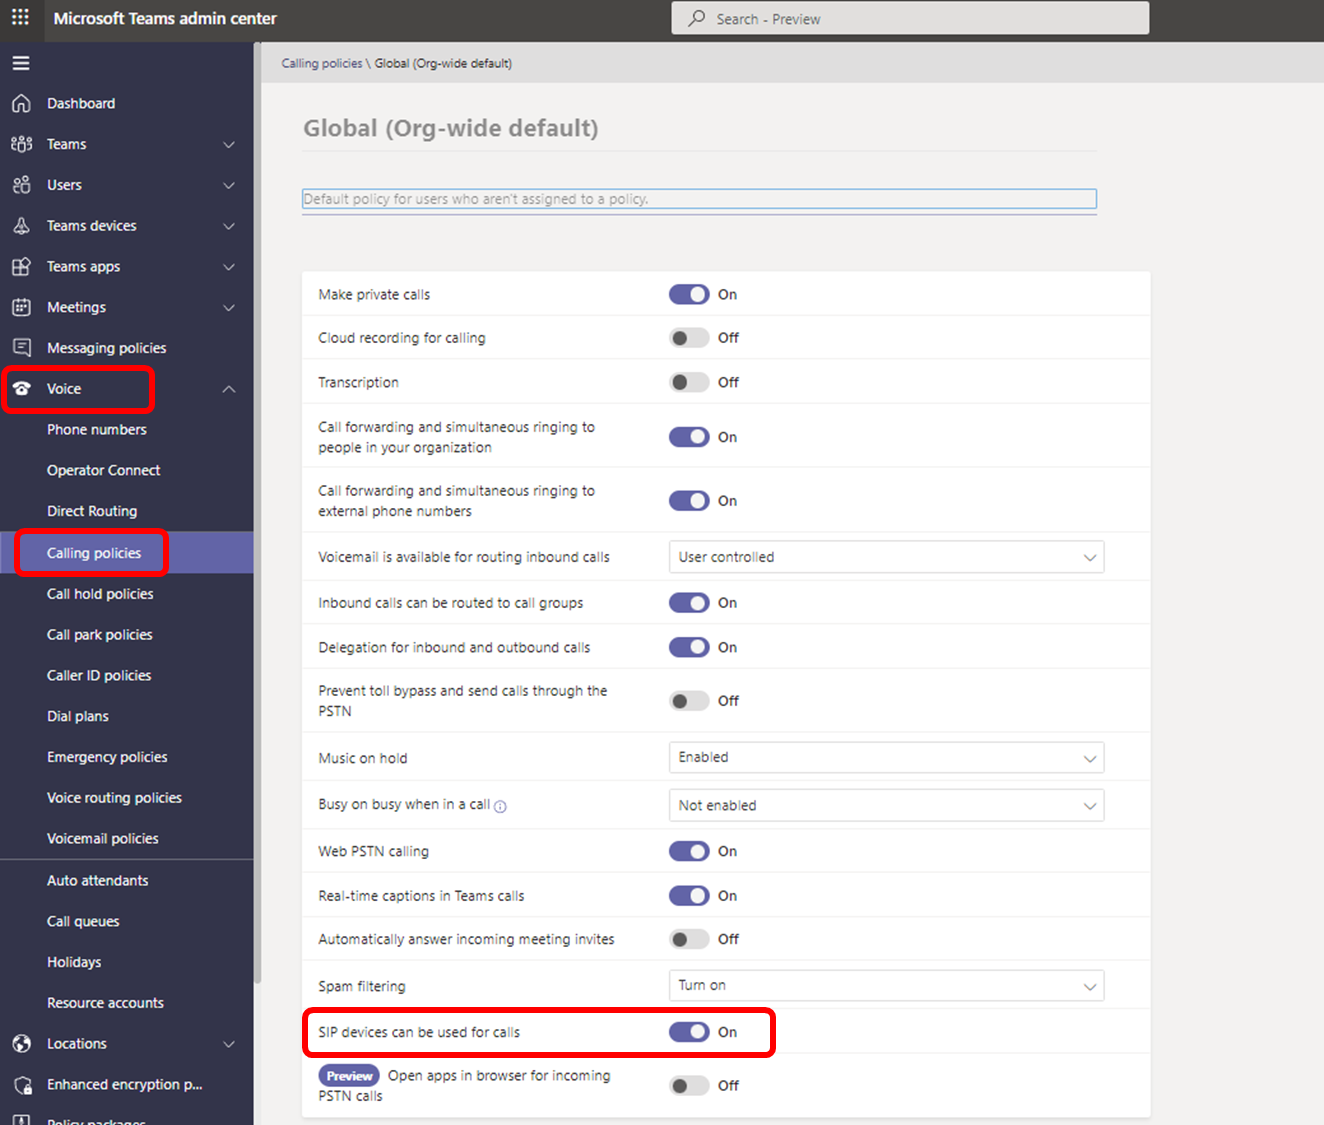
First thing, please make sure that your MS Tenant allows to leverage SIP phones for calling. See below screenshot, with relevant setting:
Configurations to apply on Poly SIP Phones
Please login to Poly phone embedded web portal and, first of all, check if the firmware version is compliant with above table. If not, please download the latest MS-compliant firmware from Poly web site and follow the instructions for the update.
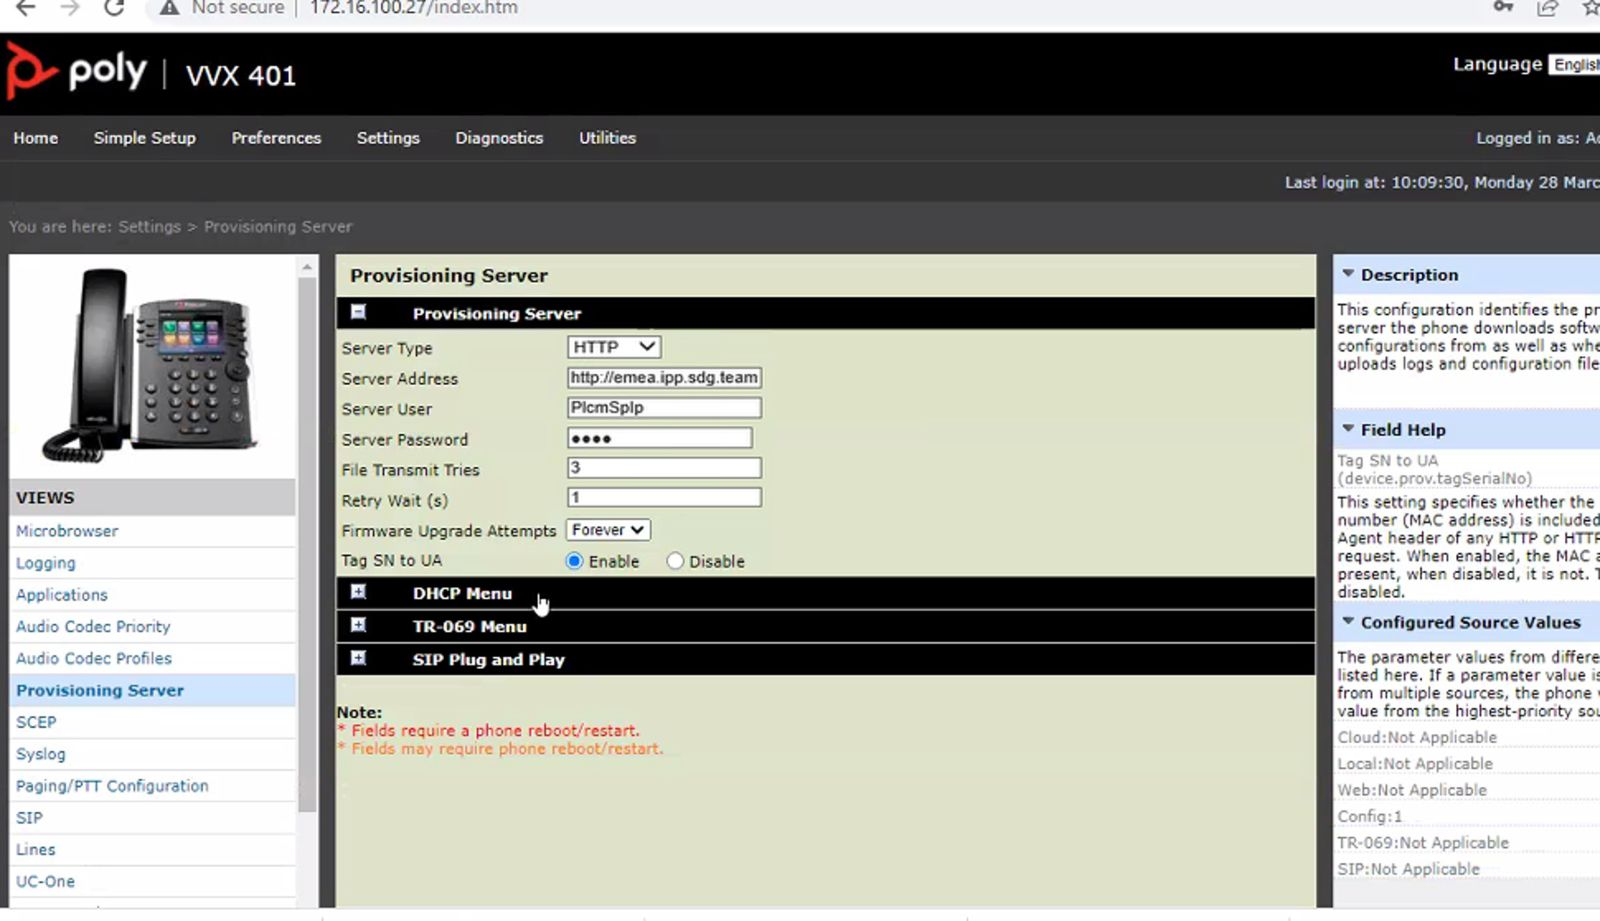
Once the firmware has been verified, please go to Settings ⇒ Provisioning Server and enter the following data:
Server Type: HTTP
Server Address ⇒ Depends on MS-Tenant region in use:
Server User/Password: leave default values.
File Transmit Tries: 3
Retry Wait: 1 sec.
Firmware Upgrade Attempts: Forever
Tag SN to UA: Enabled
Now go to Settings ⇒ Lines and select an unused line, like Line 2 in below screenshot sample:
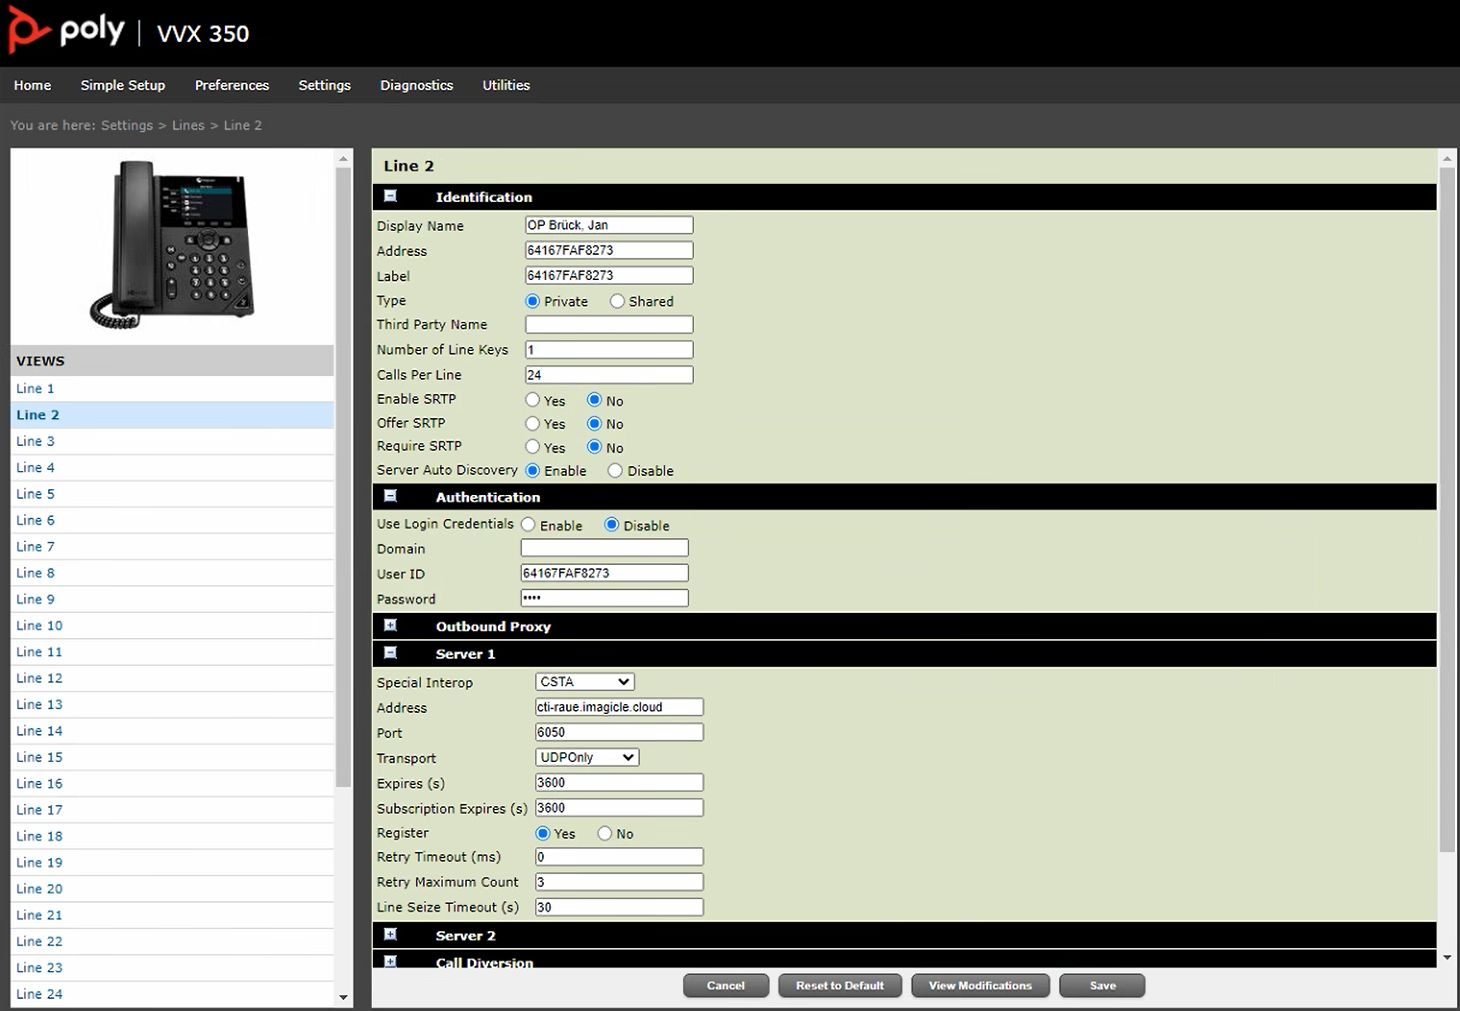
Expand the Identification tab and compile the following fields:
Display Name: xxxxxx_op, where xxxxxx is the operator's name and surname (john.smith_op)
Address: copy here the phone's MAC address, without separators
Label: copy here the phone's MAC address, without separators
Type: Private
All other fields can be left as default values.
Now expand the Authentication tab and compile the following fields:
Use Login Credentials: Disable
User ID: copy here the phone's MAC address, without separators
Password: imagicle
Finally expand Server 1 tab and compile the following fields:
Special Interop: CSTA
Address: cti-xxxx.imagicle.cloud (provided by Imagicle, like cti-acme.imagicle.cloud)
Port: 6050
Transport: UDPOnly
Register: Yes
All other fields can be left as default values. Hit Save.
Now go to Utilities ⇒ Import & Export Configuration and export the configuration to a text file.
Open exported configuration with a text editor (notepad or similar) and append the following two lines at the end of the configuration file:
reg.x.csta=”1”, where x should be replaced with the line number added before (Line 2 in above sample) ⇒ reg.2.csta=”1”
VoIpProt.SIP.intercom.alertInfo=""
See below sample:
…reg.2.server.1.specialInterop="CSTA"reg.2.server.1.transport="UDPOnly"reg.2.csta=”1”VoIpProt.SIP.intercom.alertInfo=""
/></PHONE_CONFIG>
Save the file and upload it from the same "Import & Export Configuration" page.
Reboot the phone to enable new configuration. The phone should immediately establish a communication with Imagicle UCX Cloud Suite, through Line 2.