ODBC Source Direct Query Directories
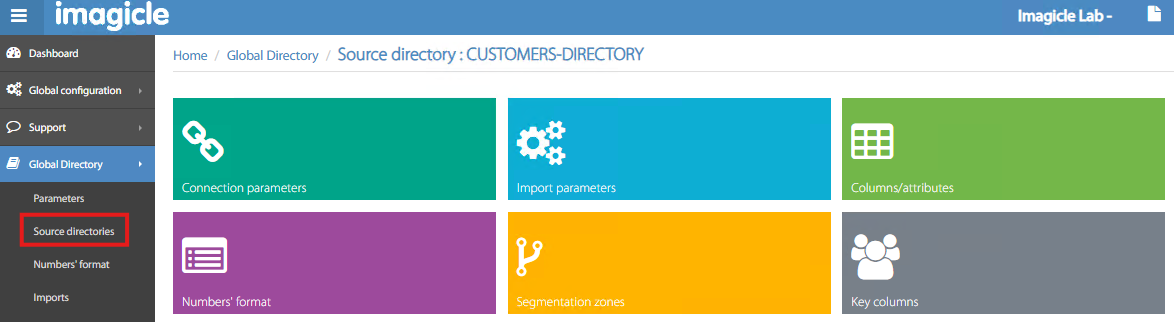
If you choose ODBC source for your Direct Query directory, when you hit ![]() you get the following new menu:
you get the following new menu:
Connection parameters
In this section, you can configure the ODBC connection settings:
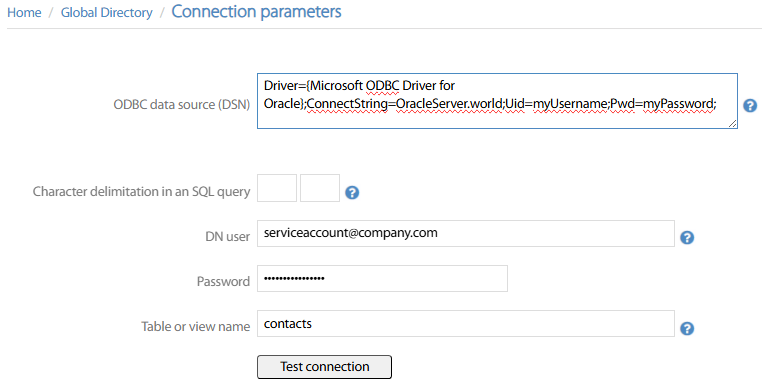
ODBC data source DSN → This is the connection string to the ODBC-compliant database. It typically starts with “DSN=<source DB>” or with “Driver=<ODBC string>”. Different samples are available in this web page.
Char delimitation in an SQL query → Queries to SQL-based DBs return data delimited by specific characters. MS-SQL uses
[xxx]; MySQL uses'xxx'DN user → Service account username, with read permissions to access the database.
Password → Service account password
Table or view name → DB query can point to a specific table or to a predefined View.
A useful Test connection button allows to immediately test DB reachability and login credentials. If the test is successful, the message “Success” is displayed.
Import parameters
This is a Direct Query directory, so the automatic import can be kept disabled as below sample:

Columns/attributes
In this section, you can define the structure of your database, by adding all the fields to display, with relevant internal column name. Each ODBC connector provides a Default values structure, including most common attributes. You can decide to apply the default structure or just manually Add the required fields. See below:
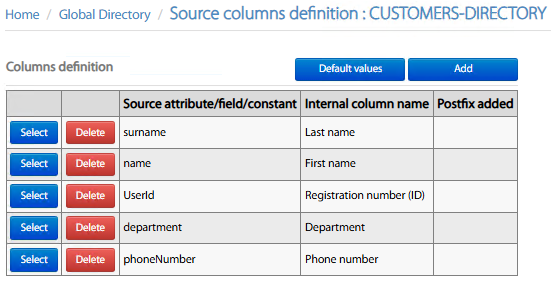
You can Select any existing row and modify field mapping. You can also remove unused fields by clicking Delete. For each row, the following setting must be applied:
Internal column name → Pull-down menu including all available contact fields. Just pick the one to be added in the structure.
Three different mapping options:
Free attribute/field → Add here the DB attribute name you wish to display upon search. This option also allows to concatenate multiple attributes into a single contact field, like “[ipPhone] [custom1]”.
Constant → Just display contact field with a fixed value.
Empty → Displays empty field.
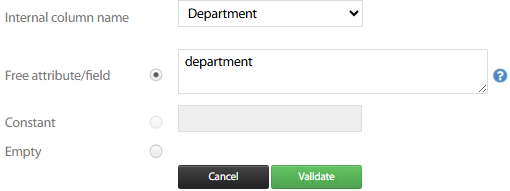
Hit Validate to save new/amended attribute. Once all fields have been added, you can Save.
Numbers' format
Within this section, you can apply multiple rules to “normalize” phone numbers to local dial rules. For example, you can instruct the system to add a prefix for outside line breakout or to replace ‘+' with '00’ for international dialing. See below:
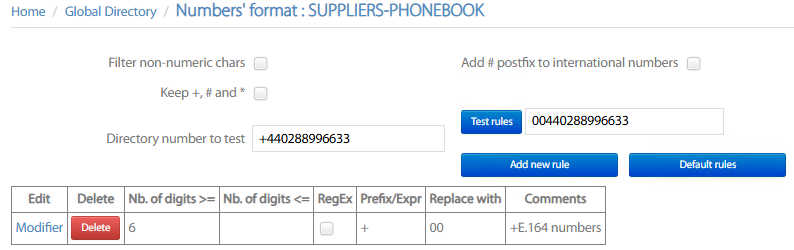
Each rule includes the following details:
phone number digits range when to apply the rule
RegEx flag, which allows you to add a complex rule based on a RegEx expression.
Prefix to be matched or RegEx expression
Value to replace the prefix
Text comment of your choice, to remind the rule purposes
A Test rules button allows to add a phone number and get the resulting normalized number after having applied all matched rules.
Segmentation zones
If you wish to limit the access to this directory to specific phone devices configured in your CUCM, then you can apply the segmentation. For this purpose, you can select how your segmentation is applied from pull-down Type menu: Device Pool, Calling Search Space, Locations, IP Addresses range. See below:
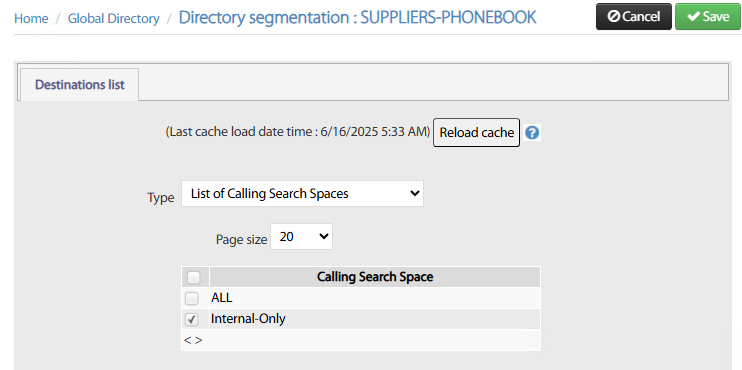
If you have applied recent changes to your CUCM config, please hit Reload cache button prior to apply segmentation.
Once segmentation rule is applied, hit Save.
Please remember that segmentation is applied to one type only. For example, you can’t apply segmentation based on CSS + DP.
Key columns
It might happen that different directory sources include some duplicated contacts. To avoid listing duplicated contacts in Imagicle ConMan Entp. directories, you can define the “Distinct Column(s)” including key data, which should not be duplicated.
Up to five contact fields can be used to prevent duplications, even if we recommend to leverage just one contact field to avoid performances issues (i.e. UserID). The Distinct treatment pull-down menu allows to select how duplicated contacts are merged or just discarded:
Keep only first contact → First contact found is displayed. Any following duplicates are ignored.
Merge phone columns → First contact found is displayed. If following duplicates include additional phone attributes, they are displayed in the first entry.
Merge all columns → First contact found is displayed. If following duplicates include additional attributes, they are displayed in the first entry.
Left Join → First contact found is displayed. If same contact is included into a second directory, you can display all missing attributes in the first entry.
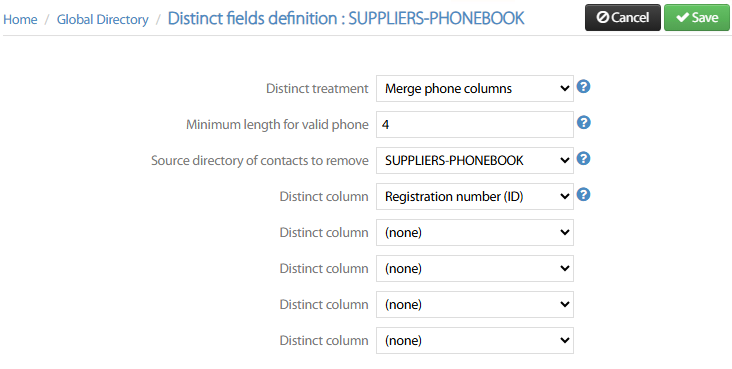
Source directory of contacts to remove → Choose from pull-down menu which directory should be considered as master for duplicated contacts. If you keep (none) default setting, then above treatment is applied as per directory query sequence. If a specific directory is selected, then duplicated contacts are not displayed from other directories but master one.