On-demand Recording trigger for Built-in Bridge, Live Keep and Dial-in Recording Methods
On-demand Recording Control
If you are configuring the On Demand recording mode, there are some additional configuration steps to be performed in order to configure phone(s) to be able to invoke the recording.
If you are leveraging Cisco Built-in Bridge phone/gateway forking recording method, you can just enable a Record button within the SoftKey template.
For Built-in Bridge and also other recording methods, you can enable a CUCM phone service and relevant SURL button.
Both methods are fully described below:
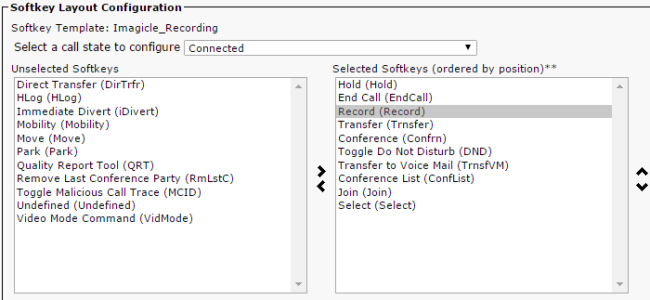
Record button (Start-stop only) in Softkey template or Programmable Line Key
Create a new Softkey Template (Device ⇒ Device Settings ⇒ Softkey Templates) that includes the “Record” softkey into Connected call state. You can alternatively add such softkey to your existing Softkey Template.
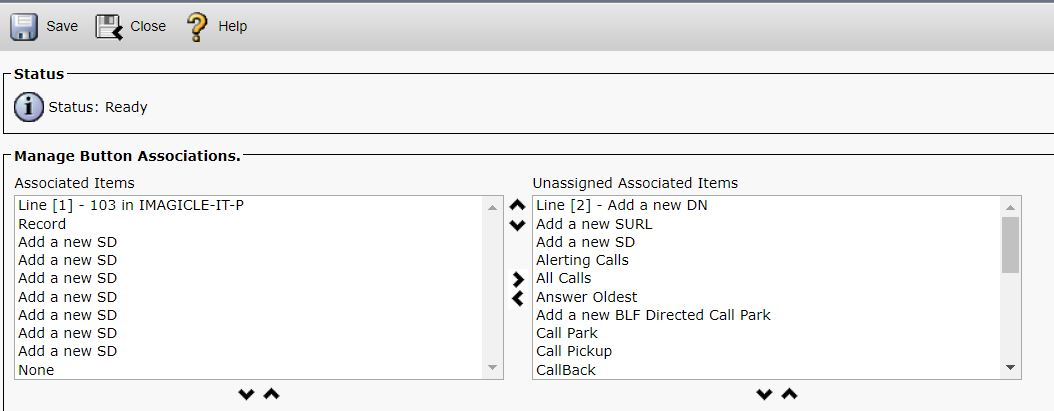
On Cisco 99xx, 88xx, 89xx IP Phones, you need to configure the recording button into the Button Template, so it appears as a PLK (Programmable Line Key) on the left-hand side of the phone. From the Device ⇒ Phone menu, select the device you want to configure, and the click Modify button items on top of the button/PLK list to the right. Look for the "Record" entry among the "Unassigned Associated Items" and move it to "Associated Items" as in the screenshot below.
Start/Stop and Pause/Resume buttons with Cisco Phone Service
Imagicle Call Recording also supports pause and resume for recordings. If pause recordings is not a required use case, and you are leveraging Built-in Bridge method, you can opt for previous Softkey/PLK solution. In all other cases, please follow below procedure:
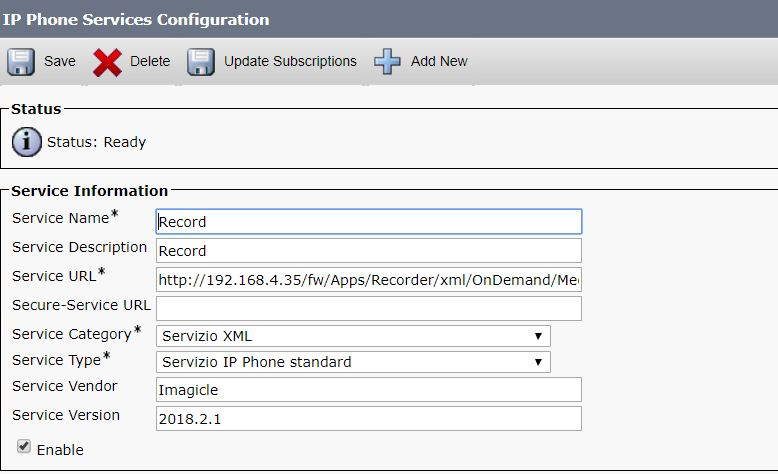
Create a new Phone Service (XML)
In CuCm Web interface, go to Device ⇒ Device Settings ⇒ Phone Services. Add a new phone services with the following details:
Service Name: something meaningful, e.g. Record
Service URL: Depending on chosen recording method, please choose among the following:
Built-in Bridge phone/gateway forking:
http://<UCX_IP_ADDRESS>/fw/Apps/Recorder/xml/OnDemand/MediaForking.aspx?name=#DEVICENAME#Built-in Bridge "Live Keep" recording:
http://<UCX_IP_ADDRESS>/fw/Apps/Recorder/xml/OnDemand/StartMediaForking.aspx?name=#DEVICENAME#SIPREC "Live Keep" recording:
http://<UCX_IP_ADDRESS>/fw/Apps/Recorder/xml/OnDemand/LiveKeepSiprec.aspx?name=#DEVICENAME#Automated Dial-in recording:
http://<UCX_IP_ADDRESS>/fw/Apps/Recorder/xml/OnDemand/Start.aspx?name=#DEVICENAME#
Service Type: XML Service
Enable: on
Note: you can copy above URLs from your UCX Suite web interface: Call Recording ⇒ Global Settings ⇒ Services URL section.
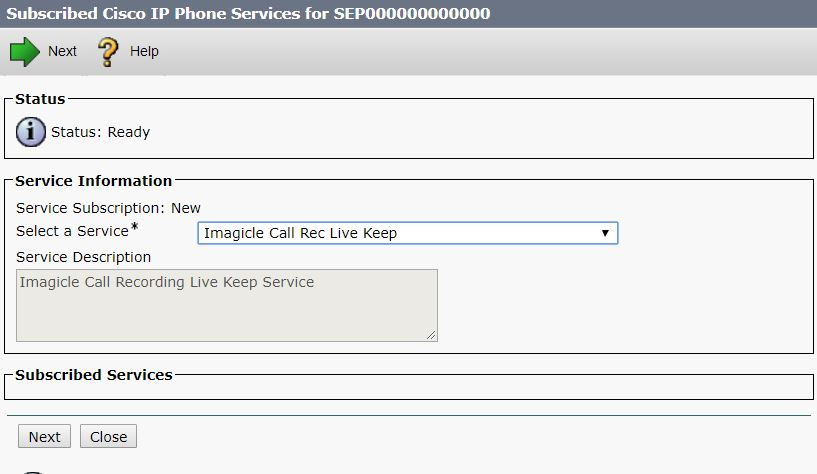
Subscribe the phones you want to enable to recording, to the XML phone service you just created. You'll be able to use the new service pressing the "Services" button on the IP phone
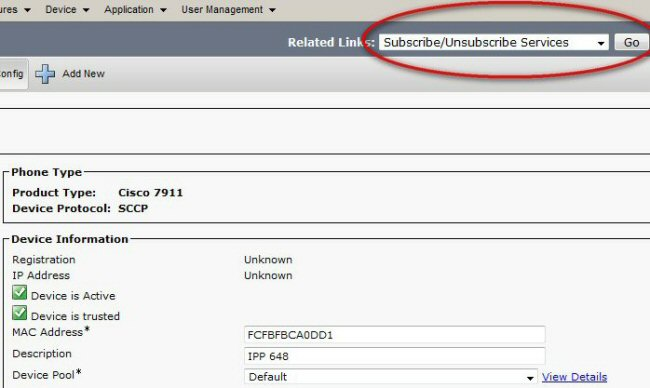
In "Select a Service", choose "Imagicle Call Recording" (or whatever name you assigned), click "Next" and then "Subscribe".
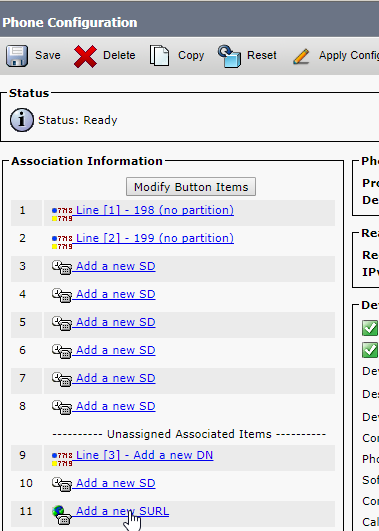
Optionally, you can add the service as a new Service URL button on the phone. Just go back to the target phone configuration page and, in the "Association Information" panel on the left, locate and click the "Add a new SURL":
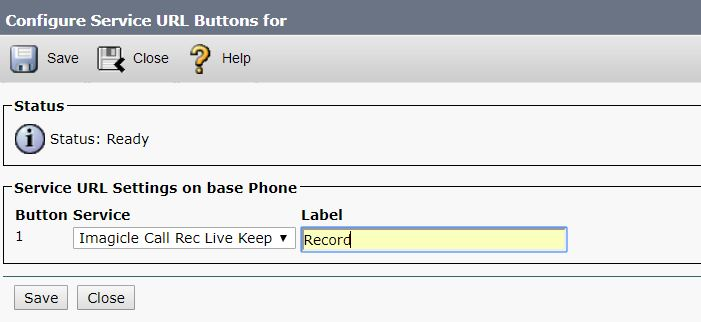
Then, in the "Service" drop-down, choose the service you want to link to the button, i.e. "Imagicle Call Recording". Edit the "Label" field appearing on IP phone display. Then Save.
Finally, click on "Modify Button Items" to associate a phone button to the Service Button URL.
By default, only the Start Recording option is included. To allow the users to Stop, Pause and Resume recordings, you need to change the default settings on Imagicle UCX Suite: Call Recording ⇒ Global Settings ⇒ Recording Control section. Here you can set the relevant options.
You can also set the options per device, overriding the global setting, through the use of XML Service parameters. The procedure is detailed in the FAQ section of this guide.
Route Pattern Creation
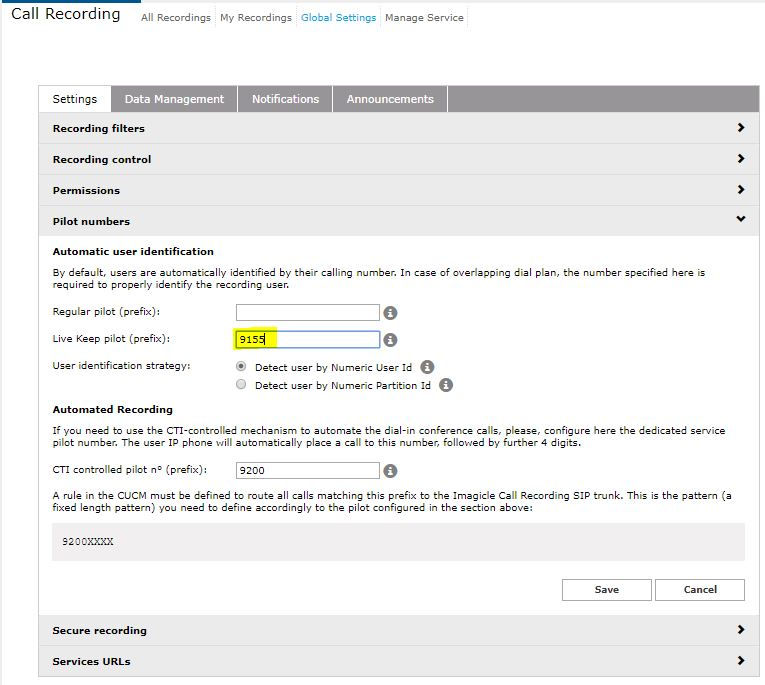
A Route Pattern must be configured accordingly with the pilot number specified in "Live Keep pilot (prefix)" field within "Pilot Numbers" of Imagicle Call Recording's Global Settings (e.g. 9155, in the image below).