Alternative Webex Trunking SIP Routing
Cisco Webex Calling™ Configurations from Control Hub
Imagicle UCX Cloud Suite leverages Public SBC deployed in Imagicle Cloud around the world, to allow the Internet "OTT" Peering to Webex Calling MT cloud.
The following configuration procedure applies ONLY when leveraging on-prem PSTN (local CUBE) or Cloud-Connected PSTN. If you are using Cisco Calling Plan, please apply the configuration described here.
License requirements
Webex Trunking configuration requires a specific Route List license, corresponding to the number of Imagicle Digital Fax channels in place. Please check Cisco web site for more details here.
SIP Trunk Setup
Please access to Webex Control Hub web portal to define the Secure SIP Trunk which allows to route fax calls from Webex Calling to Imagicle Cloud. Please select PSTN & Routing ⇒ Gateway Configurations ⇒ Trunk:

Hit "Add Trunk" and populate the following fields:
Location: select the location where incoming calls for Imagicle Digital Fax should land from pull-down menu
Name: enter a name to identify the SIP Trunk. Max 12 characters.
Trunk Type: select "Registration based" from pull-down menu
Dual Identity Support: disabled
P-Charge-Info Support: disabled
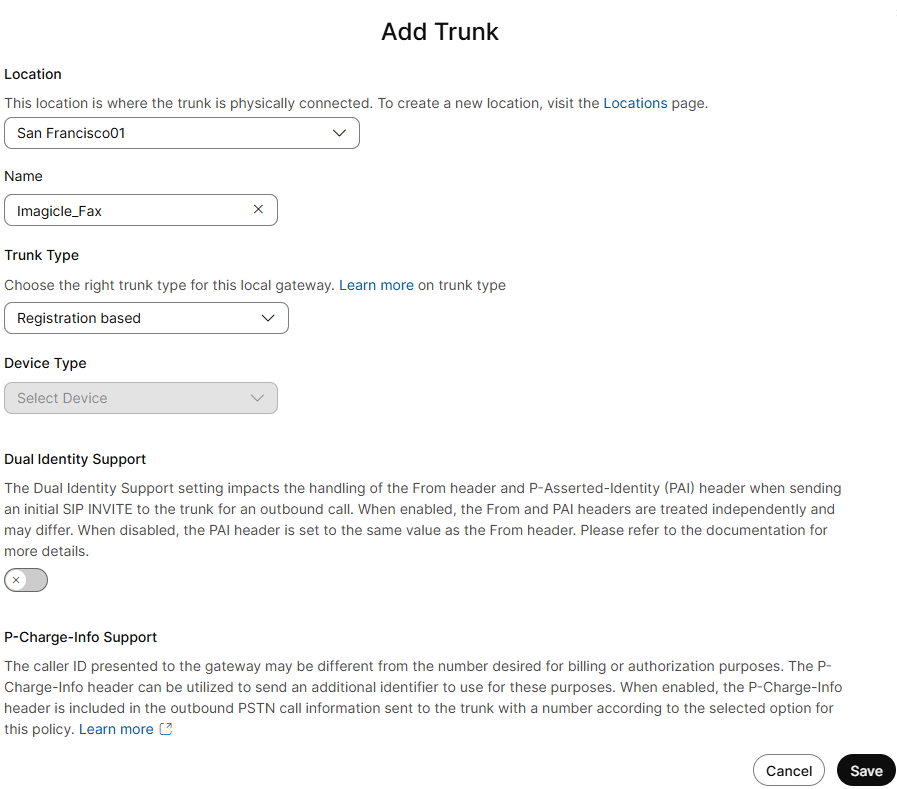
Hit Save to display a Trunk recap page:
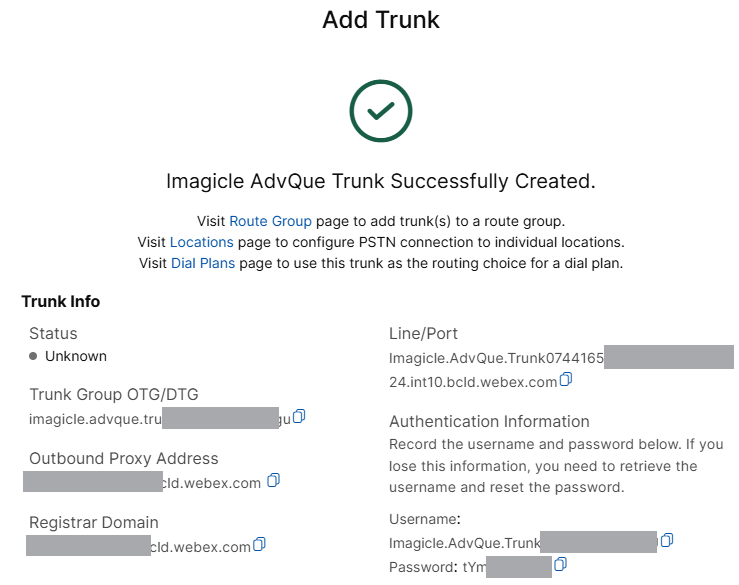
As you notice in above sample, Trunk Status is "Unknown". That's because the destination gateway (Imagicle Public SBC) hasn't been configured yet. Please take note of the following info available in above recap page and send them to wbx.onboarding@imagicle.com:
Registrar DomainTrunk Group OTG/DTGLine/PortOutbound Proxy AddressUsernamePassword
Imagicle Public SBC Configurations
Public SBC configuration is applied by Imagicle Cloud Services team, based on above Trunk parameters, retrieved in Trunk recap web page.
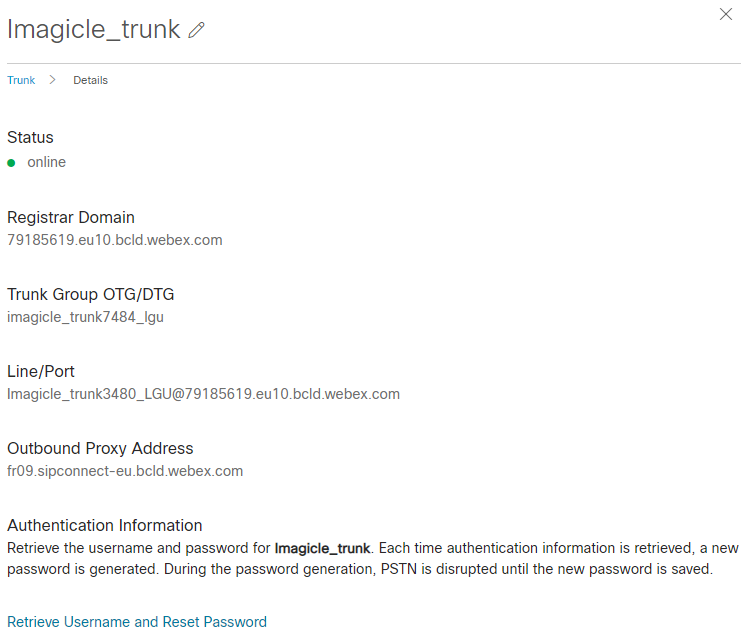
Once Imagicle CS has applied required SBC configurations, you can go back to Webex Control Hub web portal and check that SIP Trunk(s) are Online: PSTN & Routing ⇒ Gateway Configurations ⇒ Trunk ⇒ Details:
Route Group Setup
One or more SIP Trunks can be associated to a Route Group within Webex Control Hub. Please go to PSTN & Routing ⇒ Gateway Configurations ⇒ Route Group.
Hit Create Route Group button:
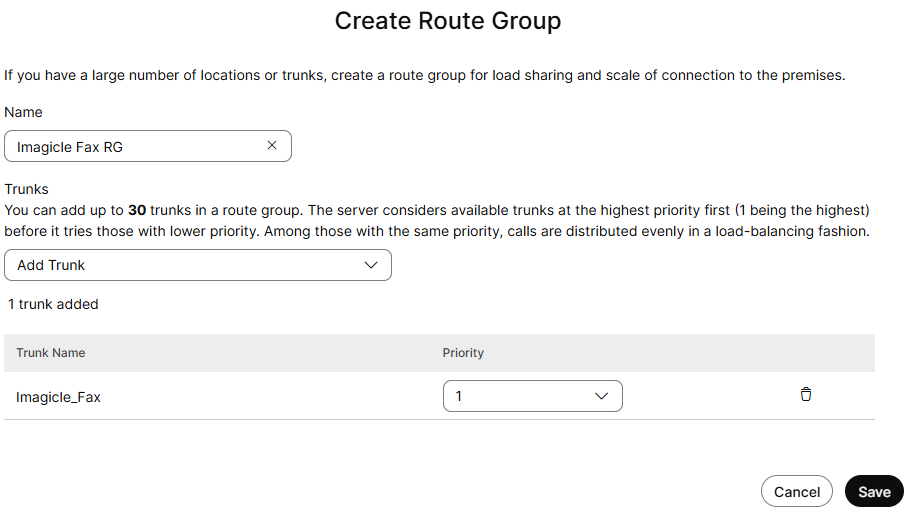
Assign a name of your choice to the RG and start adding one or more trunks, each with a different priority (1 is the highest). Once done, hit Save.
Route List Setup
Route Group inturns must be assigned to a Route List. Please go to PSTN & Routing ⇒ Gateway Configurations ⇒ Route Lists.
Hit Create Route List button:
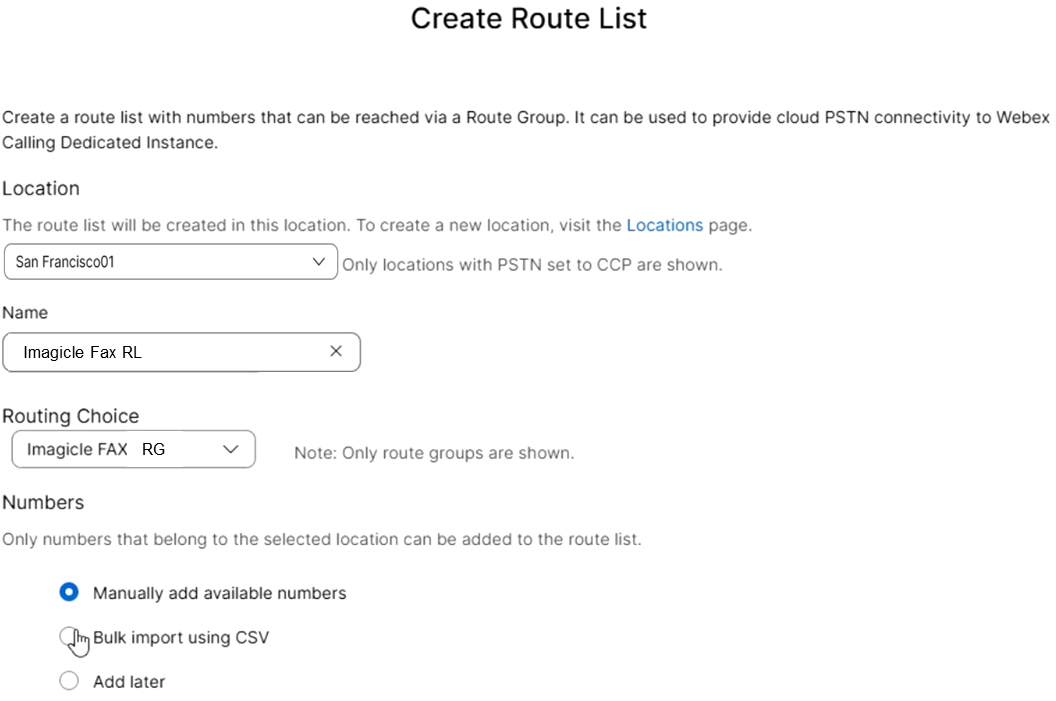
Select the Location from pull-down menu, add a name of your choice to the RL, add previously defined Route Group in Routing Choice and finally select “Manually add available numbers” to choose the PSTN Fax DIDs to be routed through the Route List.
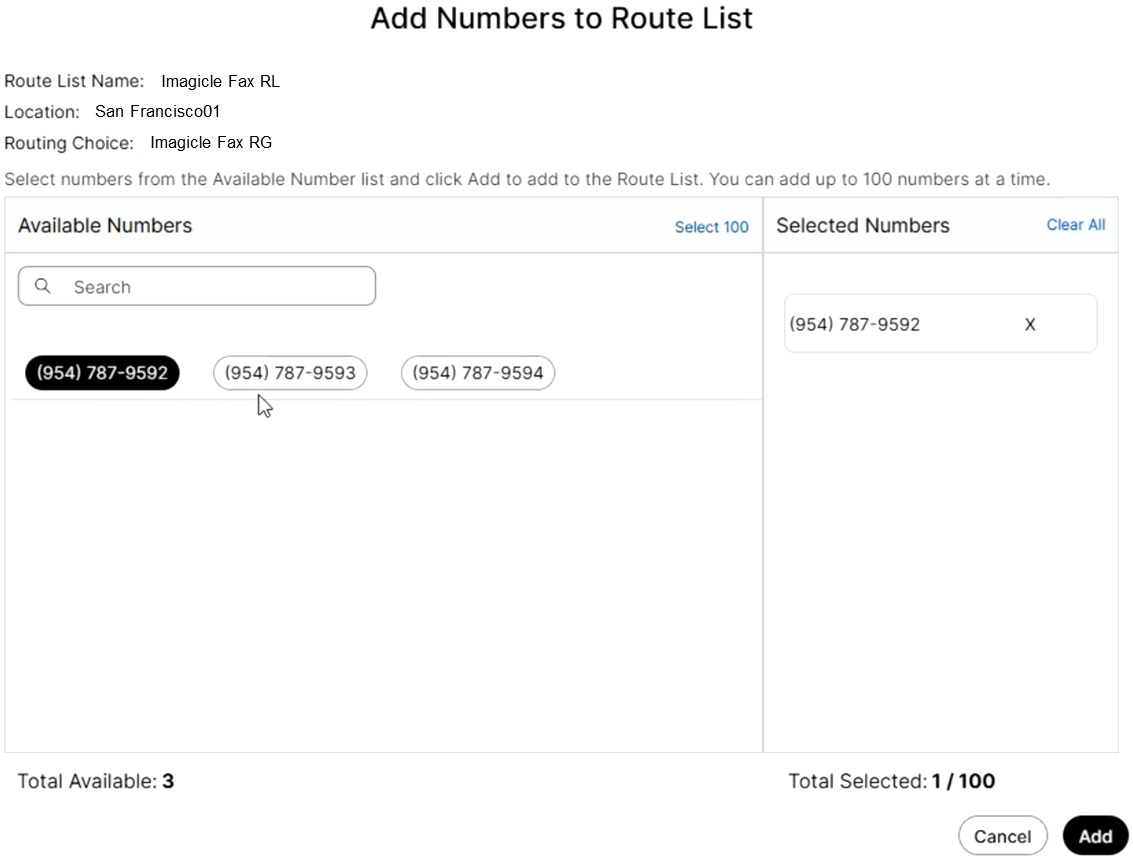
Once done, hit Create.
Configure users on your Imagicle tenant as described here.
Bear in mind that each Route List is associated to a single Location. If you need to route Fax DIDs included in different Locations, then you must define multiple Route Lists by Location, while there’s no need to define multiple trunks or multiple trunk groups.
Configurations on Imagicle UCX Suite
On Imagicle UCX Cloud Suite, please define a user or a fax group for each configured fax number. See here.
Moreover, the IP routing for outbound faxes should point to the correct Imagicle Public SBC.
Please access to Imagicle web portal with admin credentials and go to Digital Fax ⇒ Advanced Settings ⇒ IP Routes and set the "Default Route" field according to your regional macro-area:
Europe: 172.32.9.136
Middle East: 172.32.1.86
North America: 172.31.128.157
Once IP routes have been properly set, you must restart the service from Digital fax ⇒ Manage Service menu.
If you are accessing an existing installation, you might find different IPs for EU and USA (see below). Just leave them as they are, unless Imagicle suggests you to change them:
Europe: 172.31.9.136
North America: 172.30.128.157