How to install and use a certificate on Imagicle UC Suite server
This KB article applies to Imagicle UCX on-prem Suite owners. If your Imagicle UCX Suite is deployed in the Cloud, please contact Imagicle Support to apply internal settings.
Applies to:
on-prem UCX Suite version 2014.3 or higher
Windows Server 2012 R2 or higher
Description:
How to install a custom certificate on the UCX Suite server to allow encryption.
How-to:
It is possible to upload and use the following types of certificates for different functionalities such as http traffic or recordings encryption:
Use a self signed certificate. This solution has no cost, but implies that the certificate must be manually added to the trusted certificates of each client (for some use cases, the PBX is an https client)
Using a certificate issued by the Domain Controller. This is also free, but the certificate will be valid within the domain only
Using a certificate issued by a well known Certificate Authority. This may have an additional cost for the customer
When a certificate which has a CN matching the IAS server FQDN is available, you must load it to the IAS web server.
How to use the AppSuite self-signed certificate
You can use the self-signed certificate that had been generated and installed on IIS during IAS installation.
However, this certificate must be modified to match current machine's Fully Qualified Domain Name.
Open "Internet Information Services (IIS) Manager" and select the main node in the left panel. Click on "Server Certificates", double click on certificate issued to "ImagicleApplicationSuite". In the "Details" tab, select "Authority Key Identifier" field and look for the "CN=" string in the Value.
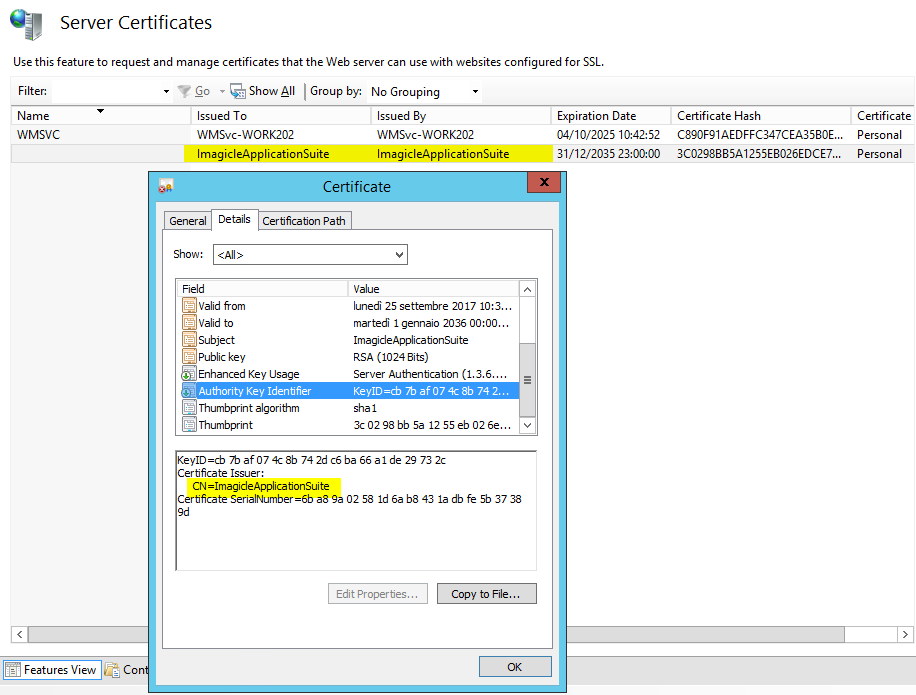
If the CN does not match machine FQDN (it must match the exact FQDN entered in ECC configuration), please proceed as follows:
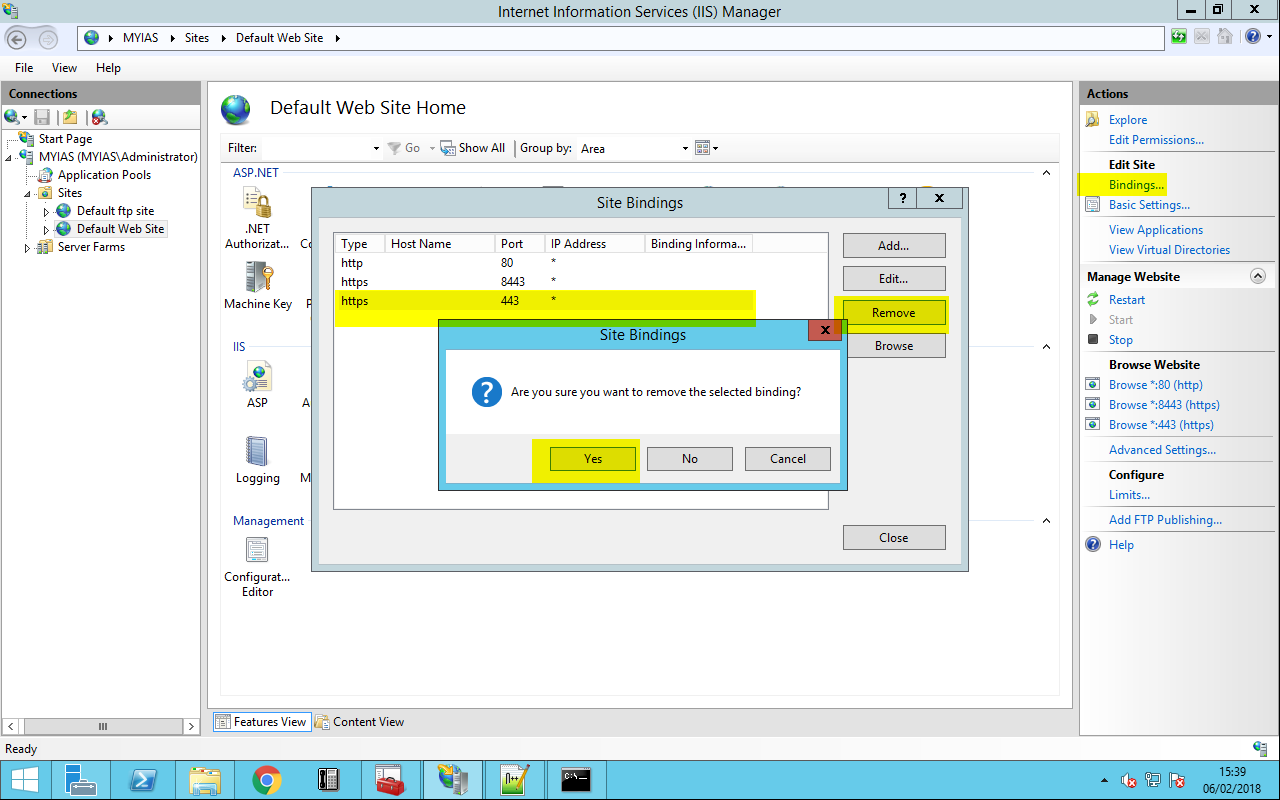
a. In case used the certificate used for HTTP traffic encryption, remove the https binding on port 443
In the left panel of "Internet Information Services (IIS) Manager", select "Default Web Site". Then, in the right panel, click on "Bindings...". In the left panel, select row for protocol "https" on port "443" and click Remove.
b. Modify the file
<StonevoiceAS>\System\SSL\ImagicleSSLCert.ps1 and ImagicleUdsProxyCert.ps1
Editing line 15:
From: $CertificateName = "ImagicleApplicationSuite";
To: $CertificateName = $env:computername;
c. Run the following batch file with administrative permissions:
<StonevoiceAS>\System\SSL\RunMe.bat
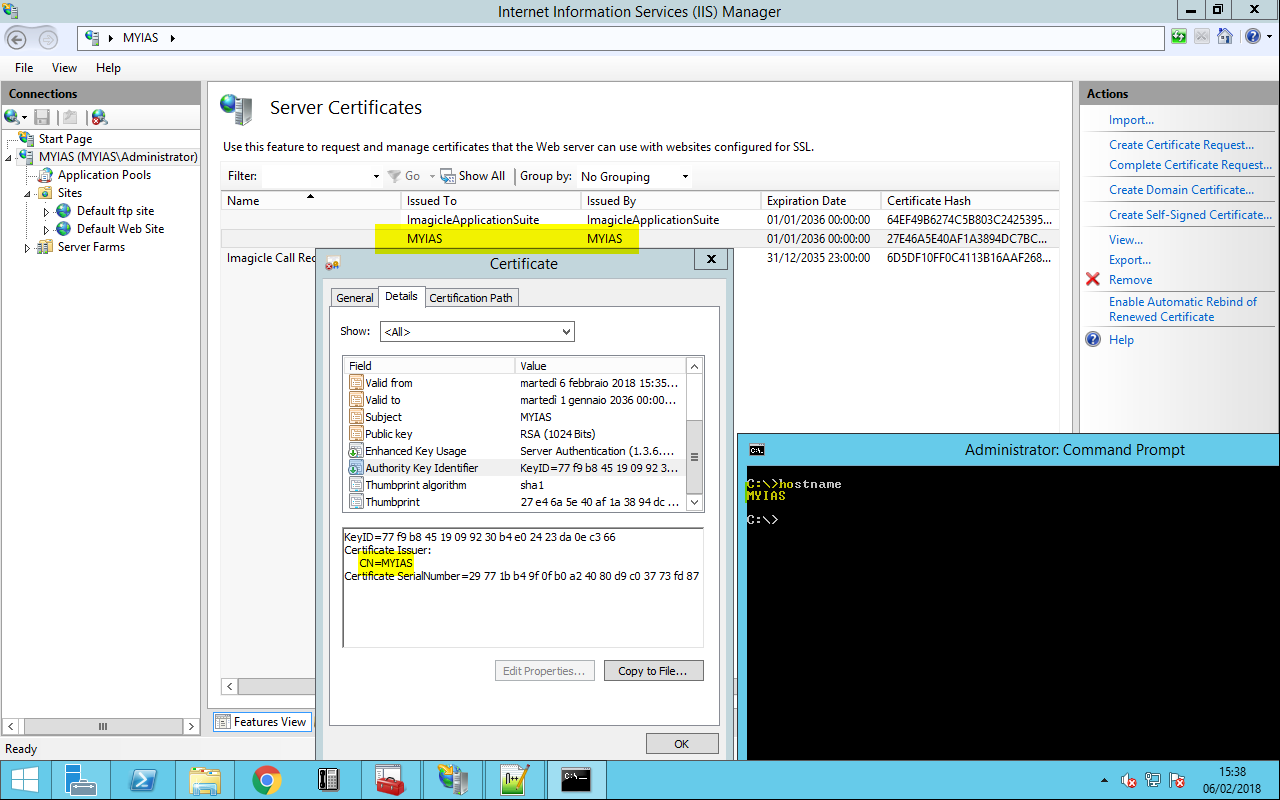
Now the certificate looks like this (in the example, the FQDN is "MYIAS"):
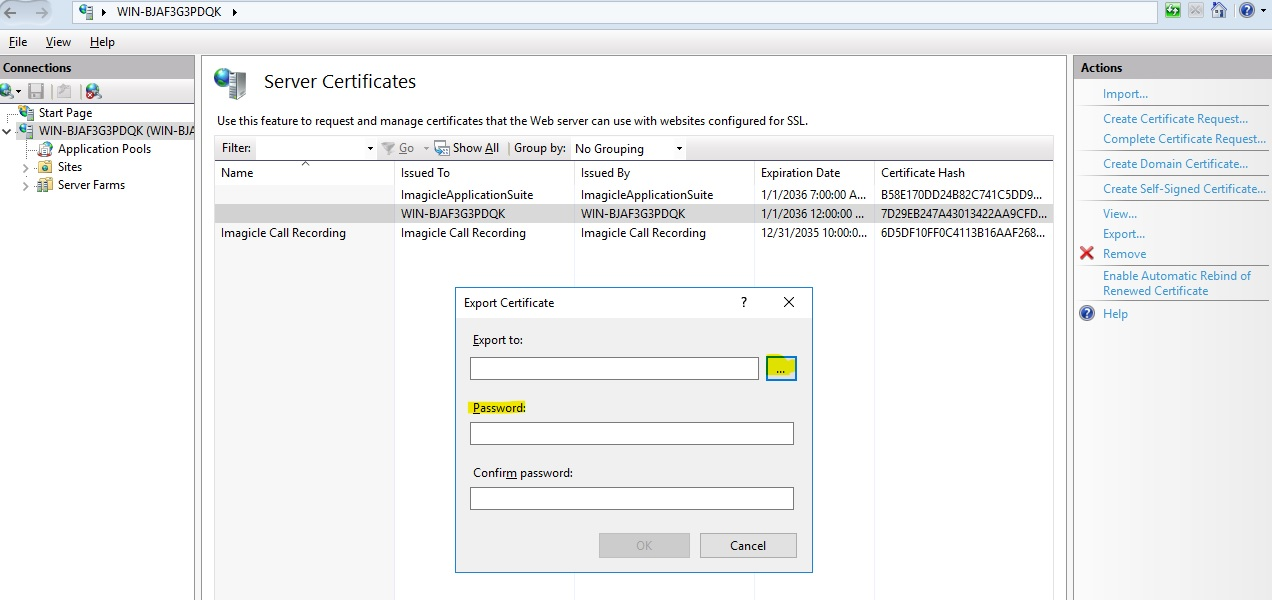
d. Now export the certificate from IIS and import it into internet explorer to get rid of the certificate warning that is displayed into the browser once the Imagicle home URL is plugged in.
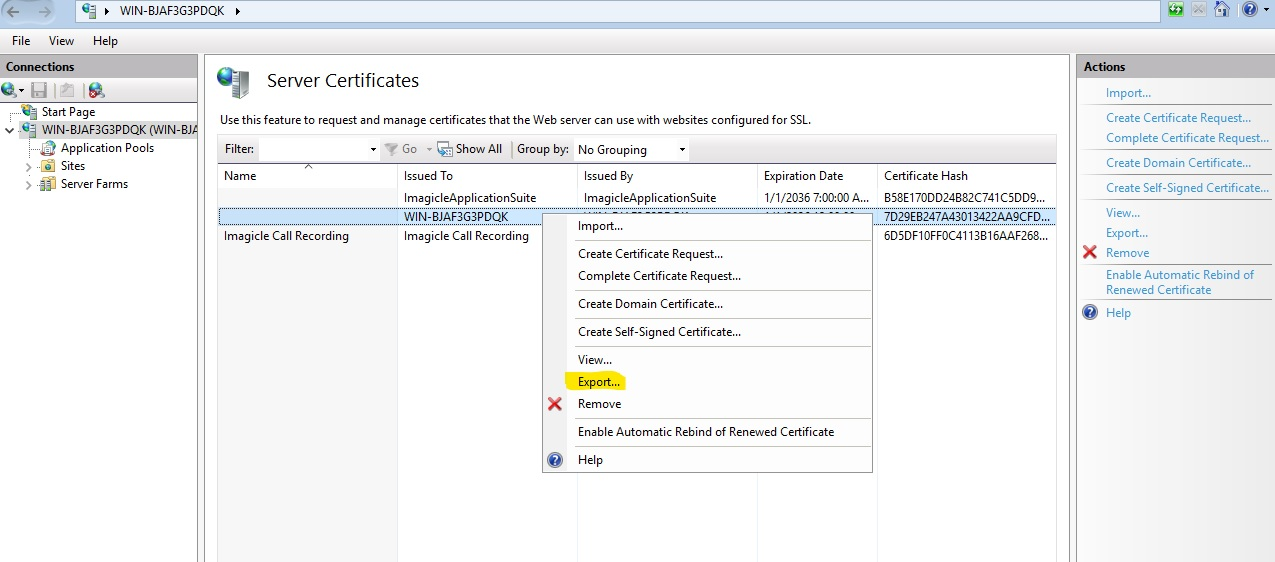
Choose the path where to store it, define a password and then press OK:
e. In Internet Explorer go to tools-->internet options--> content-->Certificates, and import the previously exported certificate.
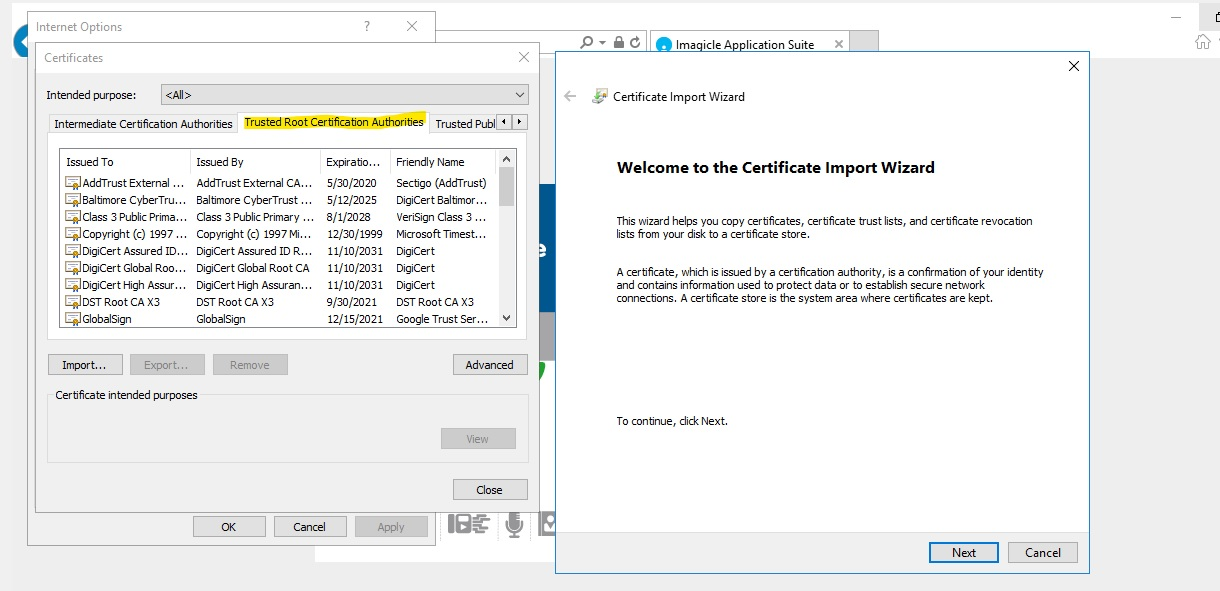
Once it is imported, restart Internet Explorer and plugin the following URL: https://FQDN to access the Imagicle interface without security warning. (Lock should be displayed at the end of the URL).

How to use a certificate issued by the Domain Controller
If the IAS server belongs to an Active Directory domain, you can request a new web server certificate.
Log in to the Imagicle UCX Server as an administrator with permission to Enroll for a Web Server Certificate (e.g. a Domain Administrator).
Click the Start button, then Run, type cmd.exe, right click over Command Prompt and click on Run as administrator
In the Command prompt shell, type mmc.exe.
Open the File menu and select Add/Remove snap-in.
In the Add or Remove Snap-ins window, select Certificates, and click Add.
Choose Computer Account, and click Next.
Choose Local Computer, and then Finish.
Click OK on the Add or Remove Snap-ins window.
Expand Certificates.
Expand Trusted Root Certification Authorities and click Certificates. Make sure the root certificate is present for the Enterprise Certificate Authority in the domain.
Right-click Personal and select All Tasks, then Request New Certificate.
Click Next.
If prompted to select a Certificate Enrollment Policy, select one under the category of Configured by your administrator. Click Next.
Select Web Server (If Web server is unavailable see the WebServer certificate section), and click the link for More information is required to enroll for this certificate. Click here to configure settings.
Click the Subject tab:
Under the Subject Name section, change the Type to Common Name, and change the Value of the Fully Qualified Domain Name of the server hosting the Imagicle UCX Suite (e.g. myias.mydomain.com).
Click Add.
(optional) Click the General tab and type a Friendly Name
Click Apply, and OK.
On the Certificate Enrollment window, click Enroll.
Verify that the STATUS is Succeeded, and click Finish.
WebServer certificate
If there is no available WebServer certificate, you have to create it.
On the CA computer (the DC), click Start, type certtmpl.msc, and then press ENTER.
In the contents pane, right-click the Web Server template, and then click Properties.
Click the Security tab, and then click Add.
Click Object Types
Flag Computers checkbox
In Enter the object names to select, type the name of Imagicle UCX Suite Server, and then click OK.
In Permissions, click Enroll under Allow, and then click OK.
How to use a certificate issued by a well-known Certificate Authority

Ensure you already have a valid certificate (with private key) in a .pfx file format
Access to Imagicle Server and launch IIS Manager
Select the computer in the left tree view and double-click on "Server Certificates"
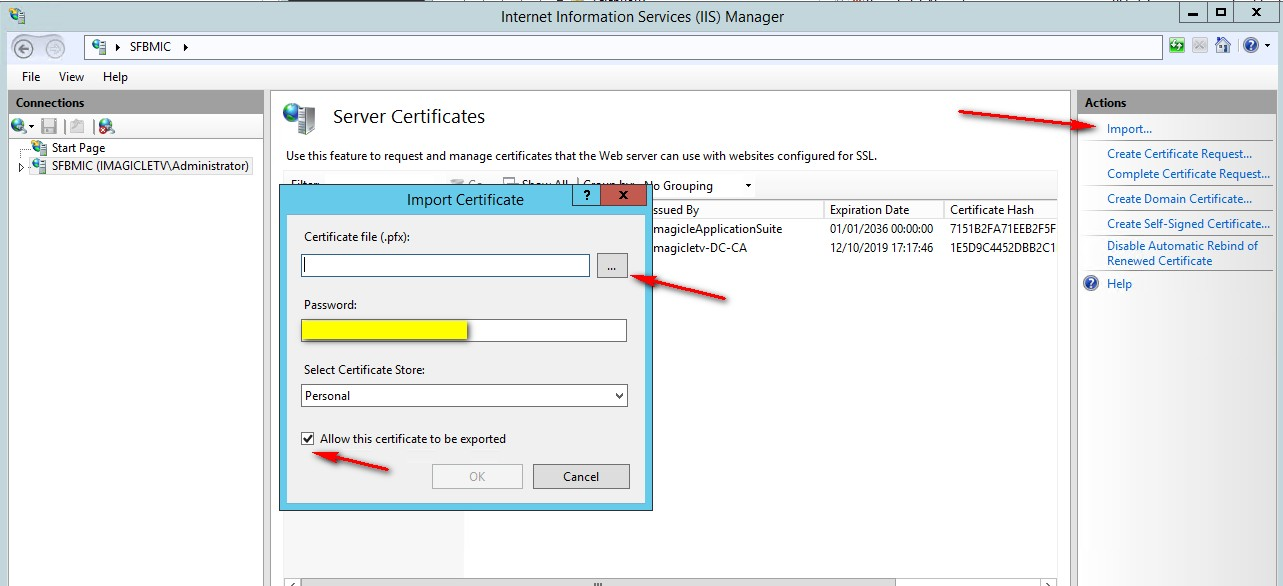
Click on Import command on the right actions panel
Select the certificate pfx file
Insert the relevant password
Tick the option "Allow this certificate to be exported" and press OK
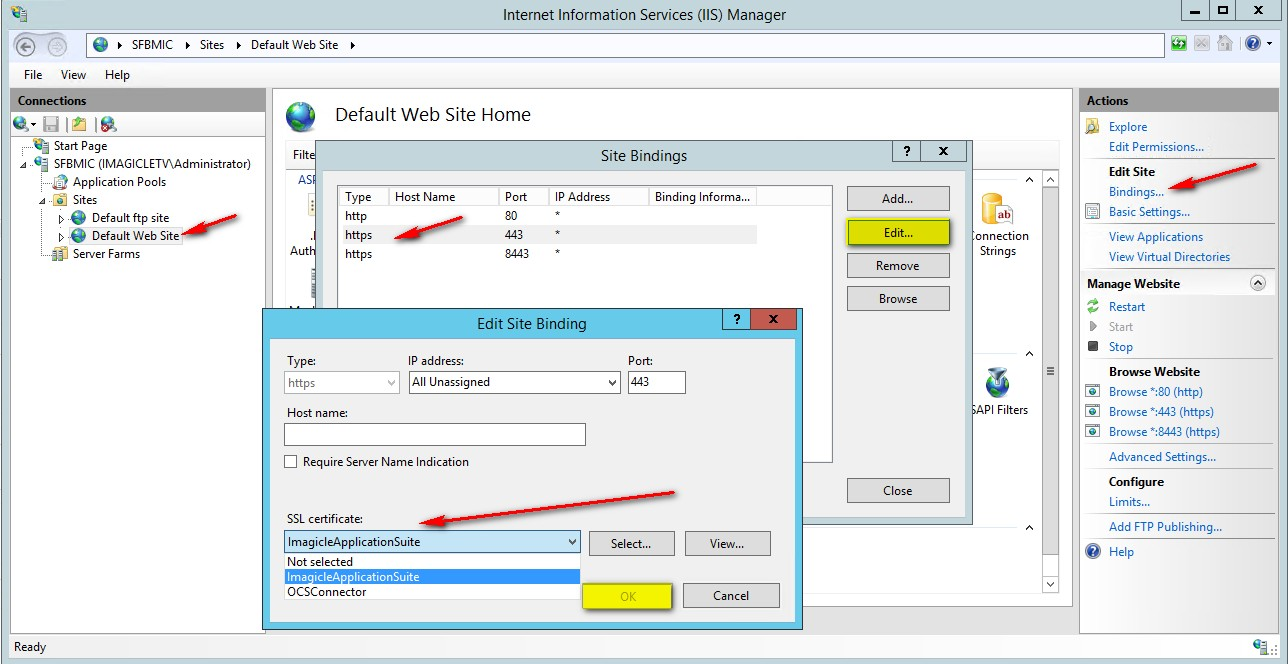
Click on "Default Web Site" in the left tree view
Click on "Bindings..." command in right actions panel
Click on https and press Edit button
Under "SSL Certificate" drop-down menu choose the new certificate and press OK
Close IIS Manager