How to migrate old EWS-based Email integration to new OAuth2-based integration
As mentioned in our KB related to Email Parameters, Imagicle UCX Suite version Summer 2025 or older supports OAuth2 authentication based on Exchange Web Services (EWS). This protocol is deprecated by Microsoft for non-Microsoft apps to Exchange Online starting from October 1st, 2026.
That’s why we strongly suggest to update your on-prem UCX Suite instance to latest version prior to this deadline and lately amend your Azure Enterprise Application (App registration). See below the procedure for migrating the existing Azure App to new modern authentication.
Azure web portal configurations
Please access to Azure portal and go to "Enterprise Applications":

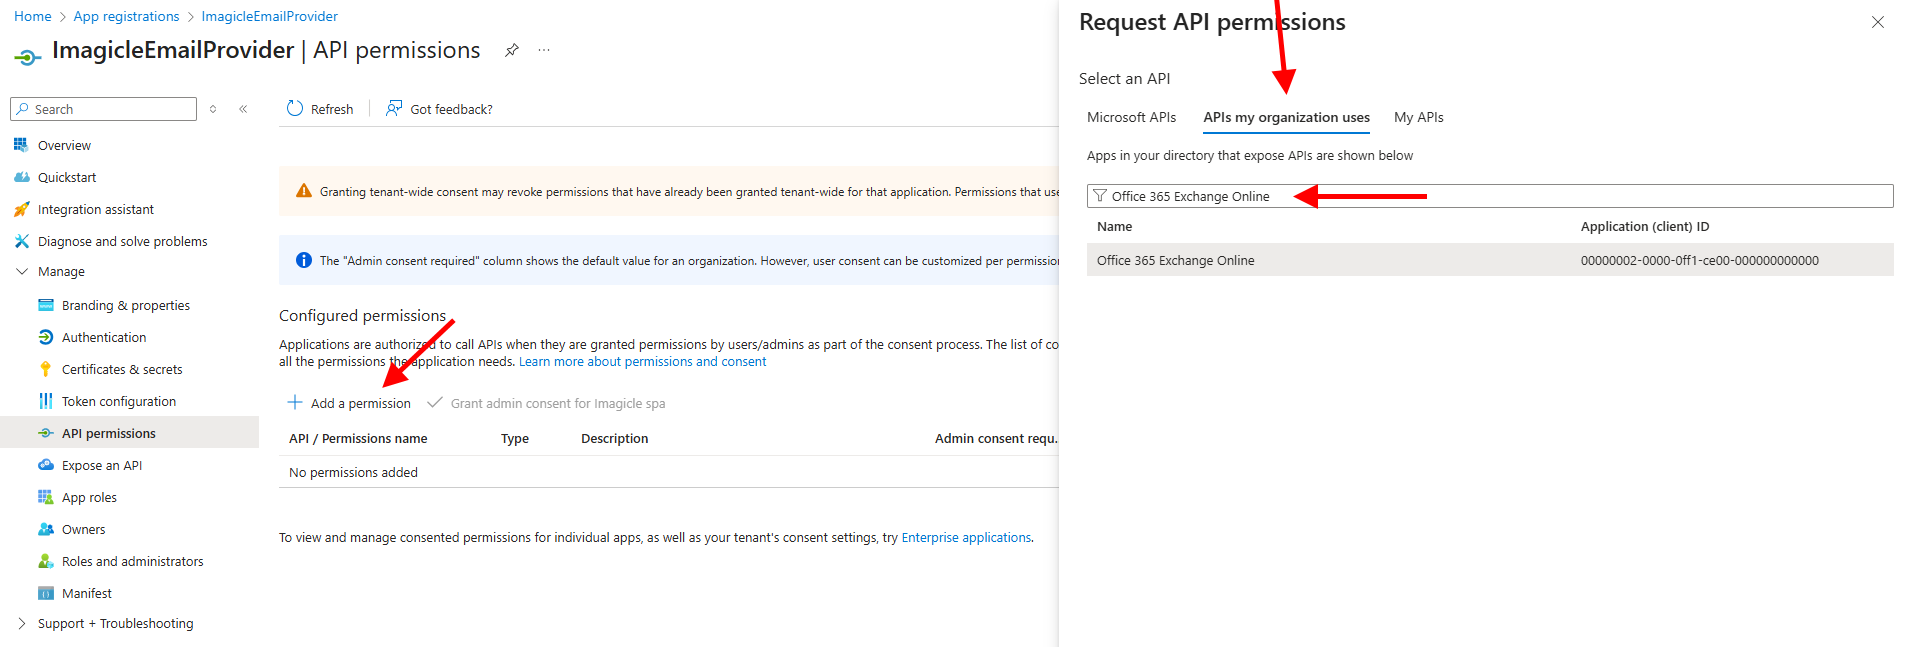
Locate “Imagicle Email Provider” app (or any previously assigned name) and click on it to edit. From left menu panel, click on API Permissions:
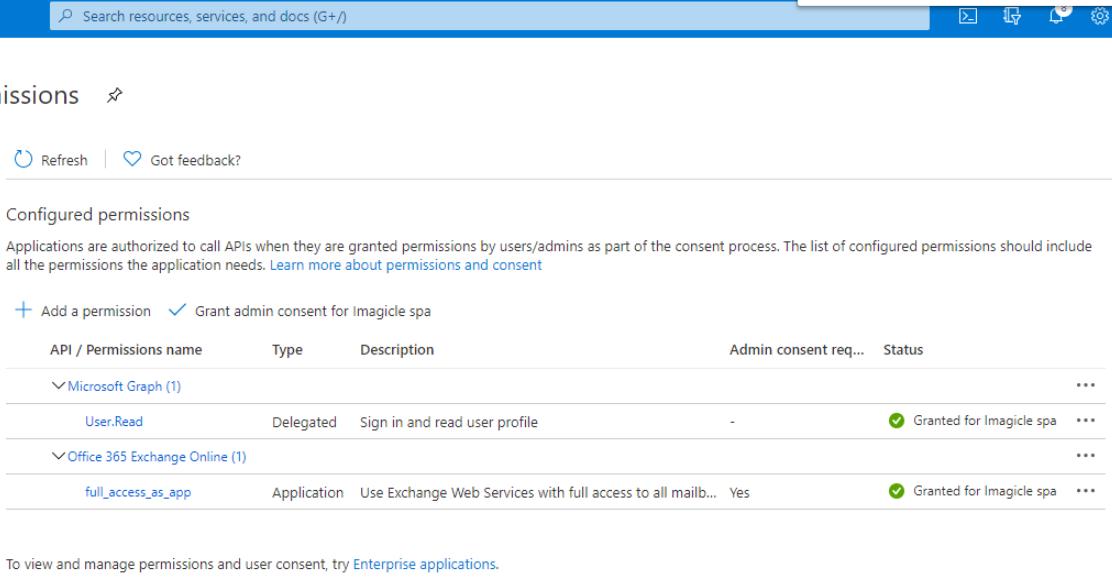
Please remove the existing Office365 Exchange permission and then click on "Add permissions" → "API’s my organization uses". Then search for "Office 365 Exchange Online".
Select "Office 365 Exchange online" and then click on "Application Permissions"
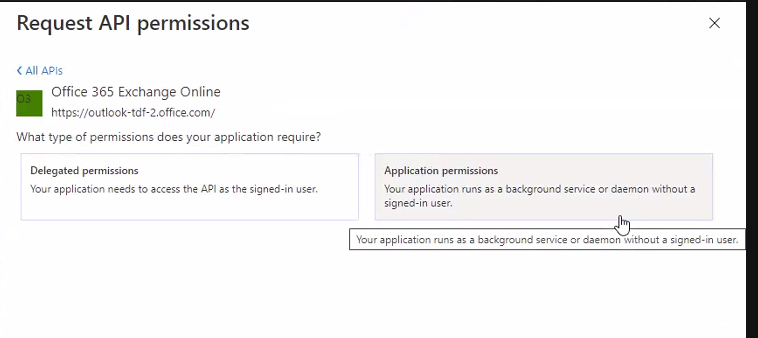
From the list of available permission levels, please search for the following items:
IMAP.AccessAsApp
SMTP.SendAsApp
Once permission has been assigned, you must authorize them for your organization, by clicking on "Grant admin consent for <company_name>".
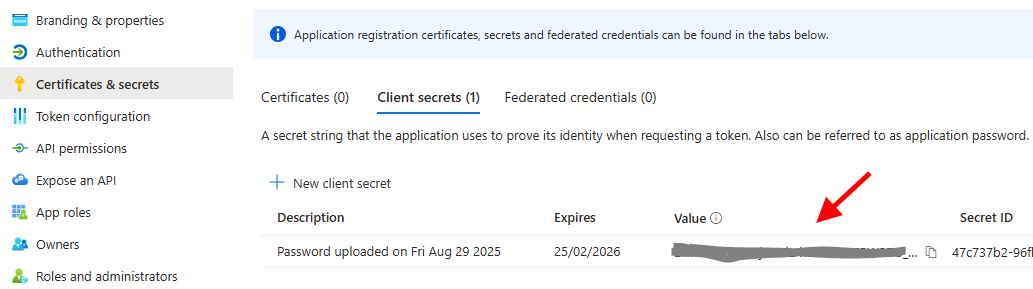
A new client secret must be issued too, by selecting “Certificates and secrets” → “New client secret”. See below:
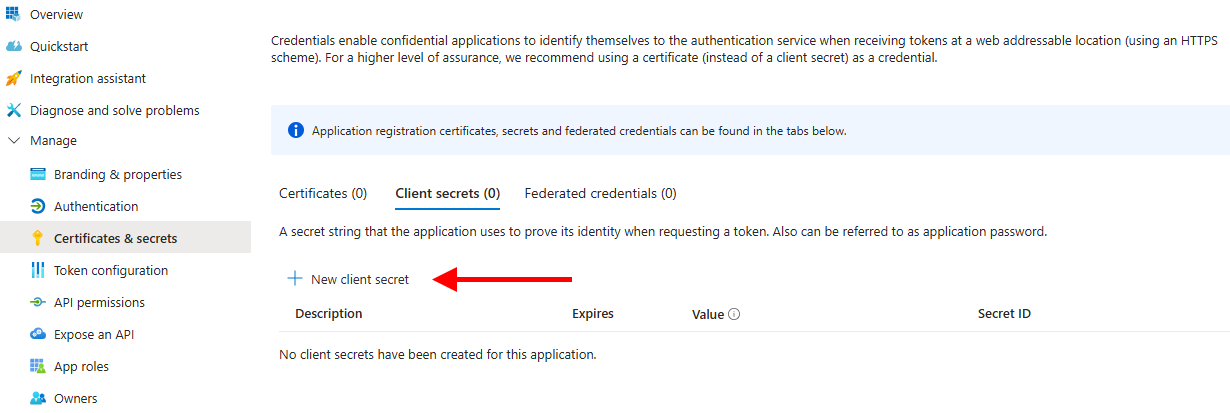
Do not forget to copy new Client Secret Value, once created, to be lately copied in UCX Suite web portal.
Now go back to the list of Enterprise Applications and locate your application:

Copy the “Object ID” for later usage.
PowerShell configurations
Please run PowerShell as Administrator and execute the following commands:
Set-ExecutionPolicy RemoteSigned
Install-Module ExchangeOnlineManagement
Connect-ExchangeOnline
Authenticate with your full admin Tenant account
Execute the following command:
New-ServicePrincipal -AppId <ApplicationID> -ServiceId <ObjectID> -DisplayName AnyNameYouLikewhere <ApplicationID> and <ObjectID> must be replaced with those coming from your Enterprise App.
Now execute the following command:
Add-MailboxPermission -Identity <email> -User <ObjectID> -AccessRights FullAccesswhere <email> should be replaced with the dedicated account to be used by Imagicle applications.
<ObjectID> is the previous one associated to the Enterprise App.
Finally, you need to enable SMTP Client Authentication:
Set-TransportConfig -SmtpClientAuthenticationDisabled $false