Installing Imagicle SimpleFailover
This KB article applies to Imagicle UCX on-prem Suite owners. If your Imagicle UCX Suite is deployed in the Cloud, Imagicle HA is included and does not require additional configurations.
Applies to:
Imagicle UCX Suite any release on Windows Server 2012 and above.
Description:
This article explains what is the Imagicle SimpleFailover application and the required steps to install it on every node belonging to an Imagicle cluster.
This application is not involved in UCX Console automatic switchover upon primary or backup HA nodes failure. This feature is directly handled by the UCX Console service running in Imagicle UCX Suite.
What is the Imagicle SimpleFailover
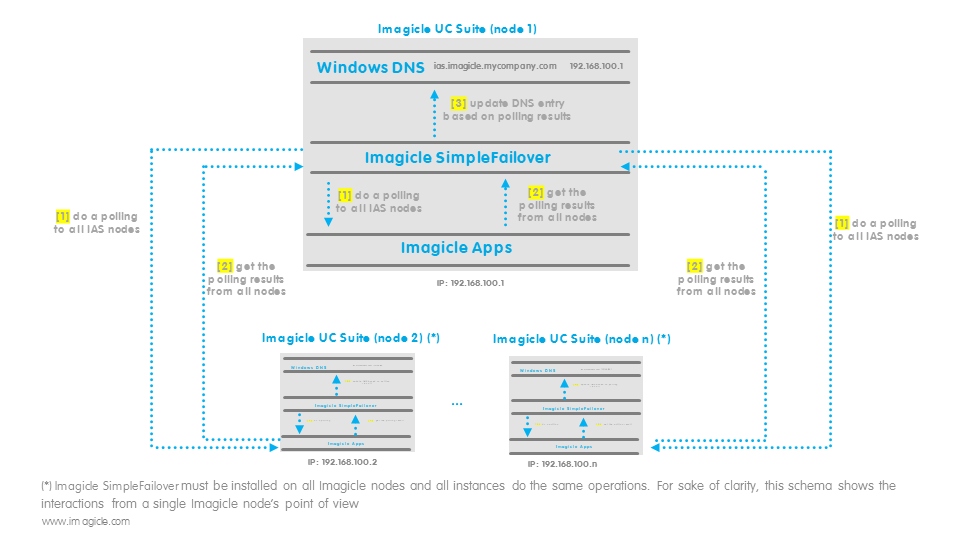
Imagicle SimpleFailover is an application that issues one or more polling requests (e.g. HTTP GET to a specific page) to verify if one or more services are up or not on different Imagicle UCX nodes (typically all nodes belonging to a cluster). Based on the results of these polls, it updates the IP of one or more DNS entries in the Windows DNS service. It leverages Windows DNS to manage DNS requests from remote clients, so it is not itself a DNS server.
In the image below, is it possible to see requests flow within a single Imagicle node:
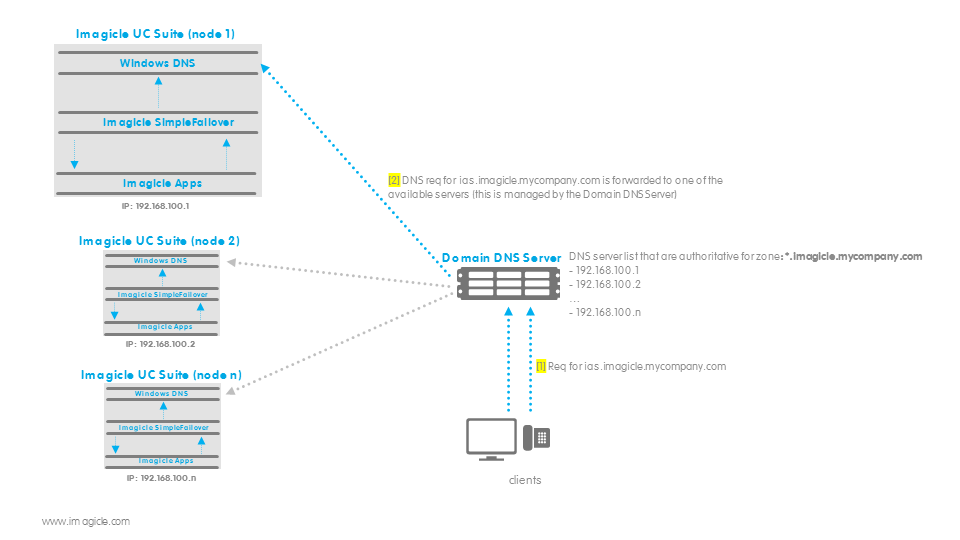
Instead, this is the general schema:
Known Limitations
Web browsers implement an internal DNS cache that may be up to 30 minutes. Such cache makes the client insensitive to above described failover mechanism, so a connection attempt might be sent to the unavailable server. The client can connect to the available server only when its internal DNS cache has expired.
To override this problem on web browser or Jabber/Webex/MS-Teams gadgets, please restart the client to clean DNS cache.
How to install it
To install the Imagicle SimpleFailover, there are some tasks Imagicle should perform:
configuration of the Domain DNS Server: we need this to forward DNS requests for a specific sub-domain (e.g., *.imagicle.mycompany.com) to one of the nodes in the Imagicle cluster
on every Imagicle node:
(two steps below are done automatically through the installation script)
installation and configuration of the Windows DNS Server role
installation and startup of the Imagicle SimpleFailover
Before proceeding with the installation/configuration, please make sure these configurations have been already done:
installation of all Imagicle nodes
configuration of all Imagicle nodes
configuration of the Imagicle cluster
Domain DNS Server configuration
We have to configure the Domain DNS Server in order to forward relevant DNS requests (like ucx.imagicle.mycompany.com) to the local DNS Servers available on Imagicle nodes.
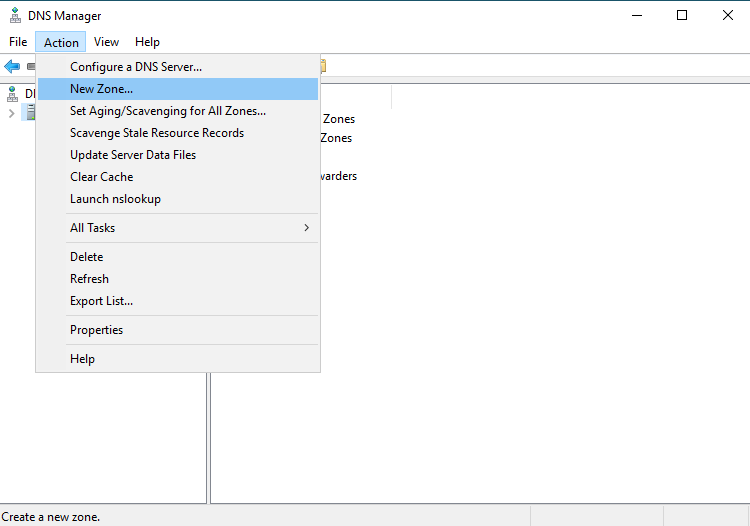
On the Domain DNS Server, open the DNS application and create a new Zone dedicated for Imagicle (e.g. imagicle.mycompany.com)
Open the DNS Manager and click on Action --> New Zone
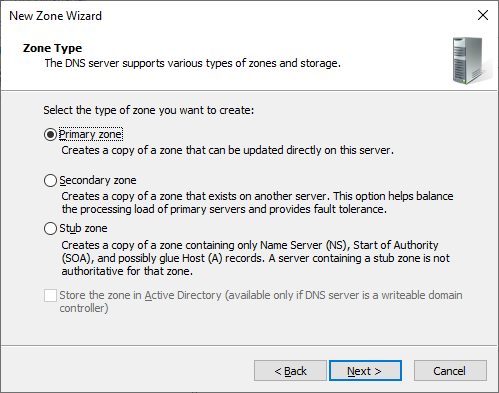
then select "Primary zone"
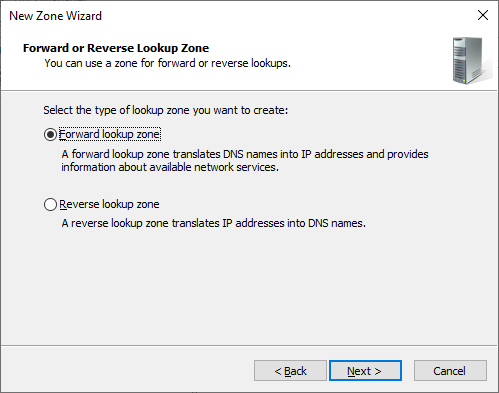
and "Forward lookup zone"
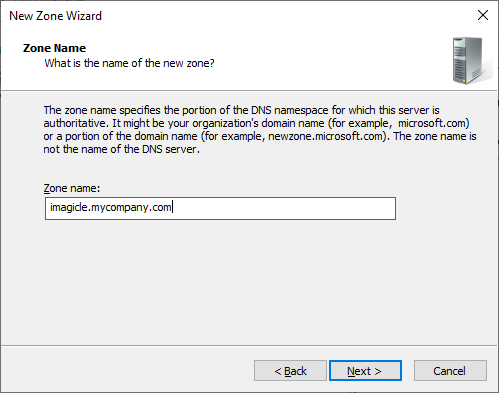
now enter the relevant Zone Name (e.g. imagicle.mycompany.com)
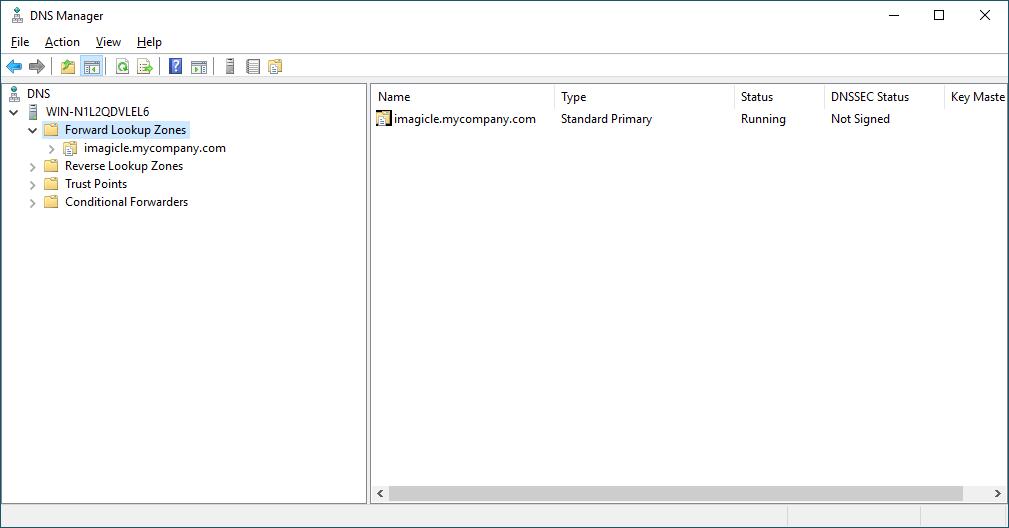
then confirm the default settings and complete the zone’s creation. At the end you should have the new zone listed under the Forward Lookup Zones:
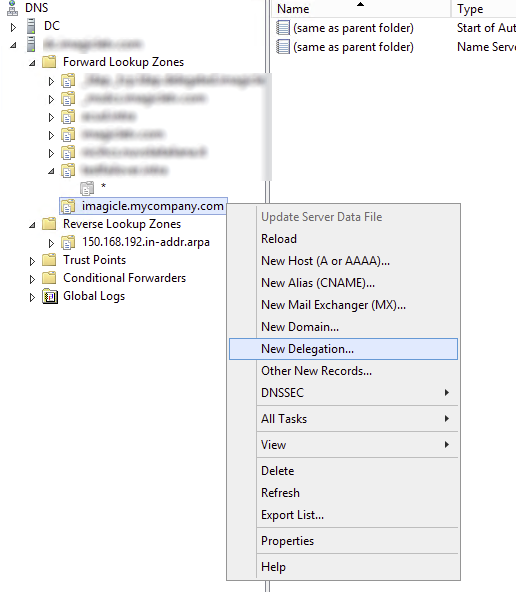
Now right-click on the created Zone and select “New Delegation”
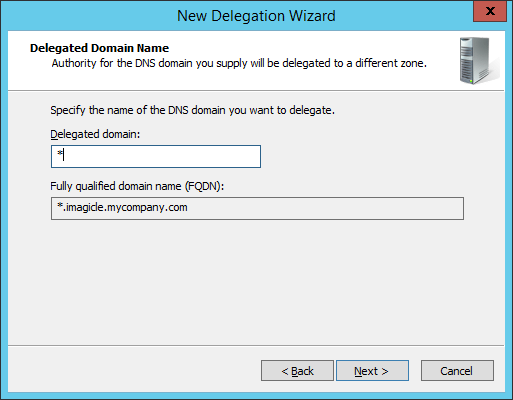
as a Delegated Domain Name add *, because we want to delegate the resolution of the whole *.imagicle.mycompany.com sub-domain
on the next screen, we have to add IPs of the servers delegated to resolve *.imagicle.mycompany.com sub-domain. So, click on Add
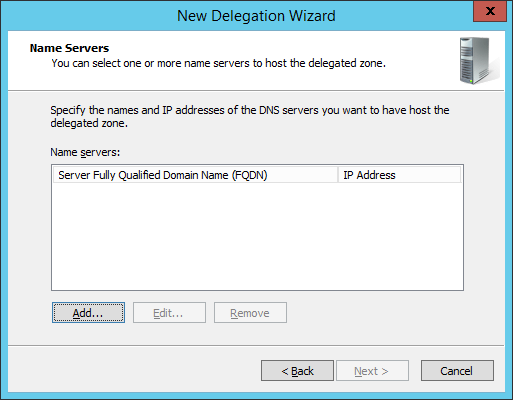
add all the UCX Suite nodes’ IPs and then click OK and confirm the configuration

Finally, confirm all the settings and complete the configuration. At the end you should have something like this:
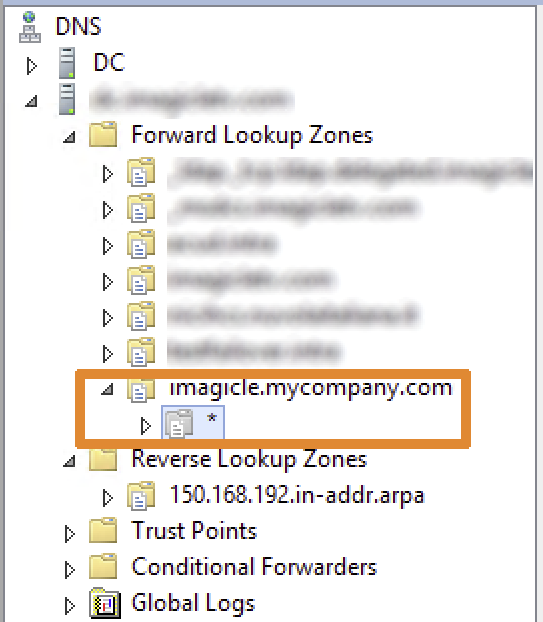
Now, the Domain DNS Server is configured.
Imagicle SimpleFailover installation
The procedure below must be done all Imagicle nodes belonging to the cluster.
In order to install the tool we have to:
install Nodejs
unzip application folders
execute a couple of Powershell scripts
All needed tools are available here. Before to start, copy the Imagicle SimpleFailover zip file to the Imagicle node.
Let’s start with the Nodejs installation, so extract from the zip archive the file node-<version>.msi and execute it. Installation is pretty straightforward, just next, next, next.
Now, create the "custom" folder within the UCX Suite installation folder. Default is C:\Program Files (x86)\StonevoiceAS):
<UCS_FOLDER>\custom
and unzip the archive into it. At the end, you should have this situation:
<UCS_FOLDER>\custom\ImagicleSimpleFailover<UCS_FOLDER>\custom\pm2-installer-main
Now open Powershell as an administrator and execute this command:
cd "<UCS_FOLDER>\custom\pm2-installer-main\service_scripts\"
Now we have to run the installation script, passing these 3 mandatory arguments:
zoneName: Zone Name to be configured on the local DNS Server (e.g. imagicle.mycompany.com)
hostname: name of the host on the local DNS Server to modify (e.g. ucx)
domainDNSServer: Domain DNS Server’s IP
this is the installation script:
.\install.ps1 -zoneName imagicle.mycompany.com -hostname ucx -domainDNSServer 192.168.1.2
if one of them is missing, the installation process will ask you to do the "Standard installation", in that case you have to abort it, entering "n" or pressing "ctrl+c". Don't proceed the "Standard installation", because it supposes to do some configurations manually.
If everything is ok, you will be prompted to confirm the "Smart installation", just press Enter (default is yes)
Params zoneName, hostname and domainDNSServer are available. Do you want to proceed with Smart Installation? [y/n][default:y]: y
The installation process will start, executing all the required operations. For your information, the installation doesn't need internet connection.
When the process terminates, execute this script to start the Imagicle SimpleFailover:
.\startApp.ps1
You should see an output like below sample:
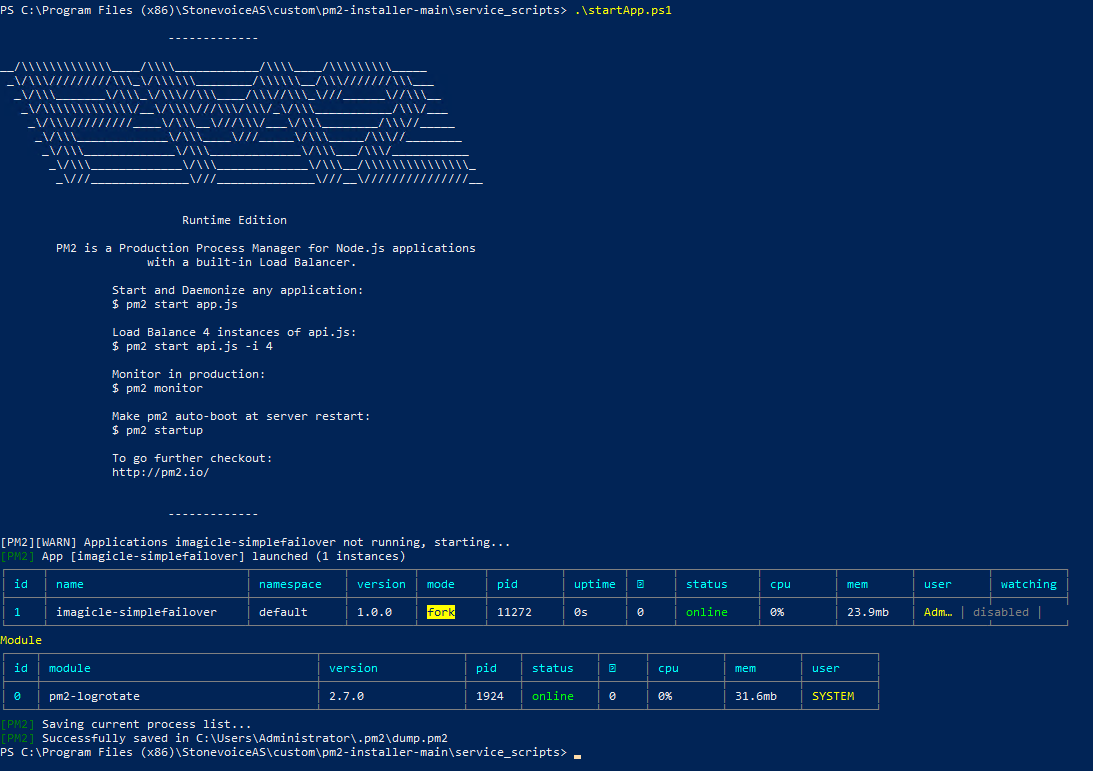
Try to connect to the Imagicle SimpleFailover dashboard from the local server (only access from localhost is granted), default url is http://localhost:81.
You can also try from another server to point to ucx.imagicle.mycompany.com, you should be able to reach the primary node.
If you want to try out the fallback to one of the secondary nodes, you can stop IIS on the master node and see if DNS are updated correctly. To do this test, open Powershell on the master node and run this command:
iisreset /stop
then wait some seconds (by default the check is done every 30 seconds when all nodes are OK). You should see on the dashboard the local node status updated to KO. After that, try again to point to ucx.imagicle.mycompany.com from another pc and you should be able to reach one of the secondary nodes.
After that, start again IIS on the master node:
iisreset /start
and verify from the Imagicle SimpleFailover dashboard that now all the nodes are OK.
You can now close Powershell, the installation is completed.
Additional Configurations to leverage new DNS entry
Ensure that all users access to Imagicle web portal by using the virtual hostname above defined, like: https://ucs.imagicle.mycompany.com
Ensure that all Imagicle-related CUCM XML Phone Services are including the virtual hostname. See below samples:
Phonelock Service URL: http://ucs.imagicle.mycompany.com/fw/Apps/Stonelock/xml/lock/default.aspx
Contact Manager Service URL: http://ucs.imagicle.mycompany.com/fw/Apps/Speedy/xml/directories/default.aspx
Finally, please ensure that Cisco IP Phones are configured to leverage customer's DNS server.
Configuration
Dashboard
Imagicle SimpleFailover has a built-in web dashboard, that can be used to see the status of the all the nodes, based on the results of the configured pollings. The dashboard is accessible only form localhost, pointing to http://localhost:81.
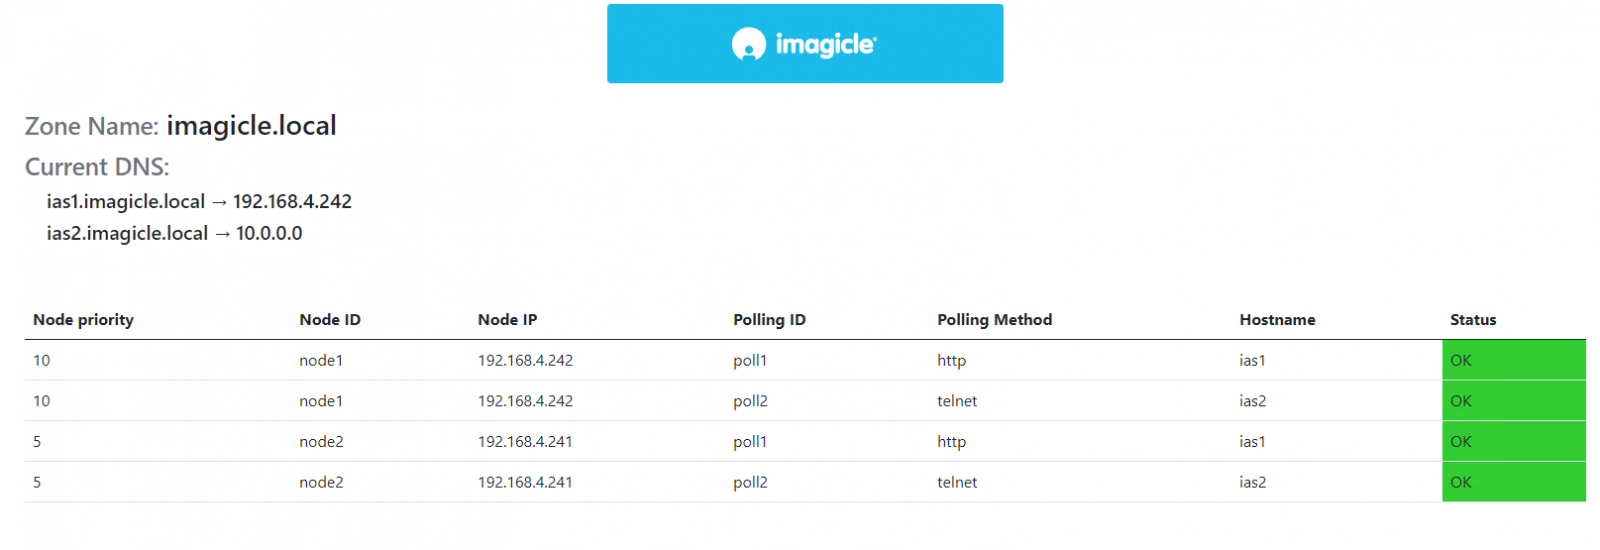
The web page is automatically refreshed every 60s.
Email notifications
Email notifications are enabled by default and they are sent when one of these events happens:
polling failure: when the polling fails and the previous polling was successful
polling success: when the polling succeed and the previous polling was failed
DNS update failure: when there is a failure in DNS updating
The Outgoing emails configuration is taken from the UCX Suite. You can see how to configure it here.
The recipient list is taken from the Monitoring service configuration on the UCX Suite. More information are available here.
If you change the outgoing emails parameters or the recipient list, you have to restart the Imagicle SimpleFailover:
access every Imagicle nodes through a Remote Desktop session
open Powershell
execute these commands
cd "<UCX_FOLDER>\custom\pm2-installer-main\service_scripts\"./restartApp.ps1
Configuration tests
From any user's PC, please open the web browser and enter the URL including DNS name: https://ucx.imagicle.mycompany.com The Imagicle UCX Suite login page should appear.
From any IP Phone, access to Imagicle Phone Services. Verify the service is properly working.
Turn off the Imagicle primary server or disconnect it from the network. Wait a couple of minutes.
Restart web browser and repeat test #1. The UCX Suite login page should still be reachable
Repeat test #2 (IP Phone Service access)