OAuth2-based New Integration
Requirements
To enable Imagicle UCX Suite to handle outbound email notifications and to handle email-to-fax service, leveraging OAuth2 authentication, you must configure an application on Azure Web Portal, taking note of Application ID, Directory ID and Client Secret data, needed later on while configuring this authentication method on Imagicle UCX Suite. Please find below the procedure.
Azure web portal configurations
Please access to Azure portal and go to "App Registrations":


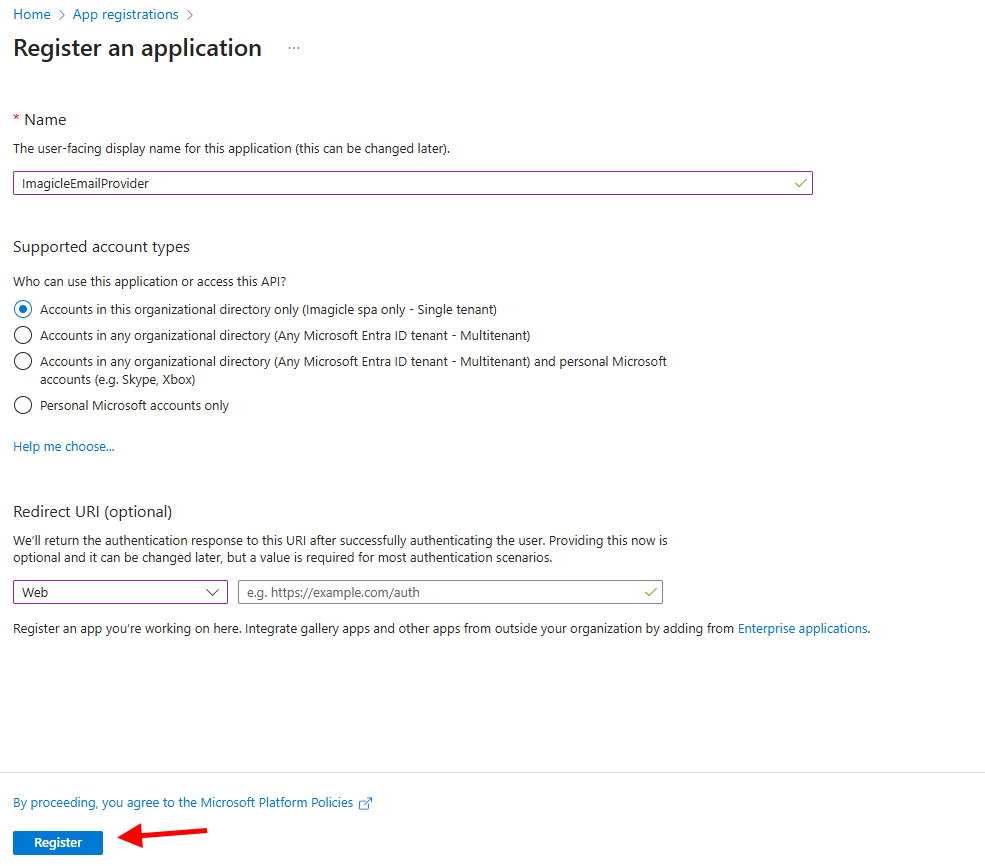
Click on "New registration" and add a name of your choice like "ImagicleEmailProvider". Then select "Accounts in this organizational directory only" and hit "Register"
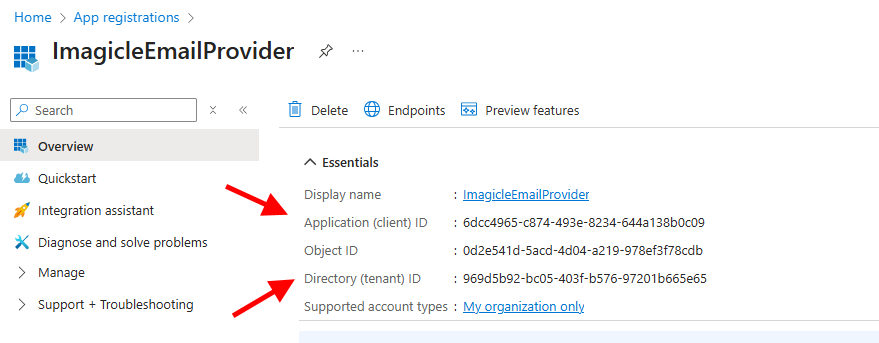
The following window appears, including Application ID and Directory ID. Please copy both data, for later usage.
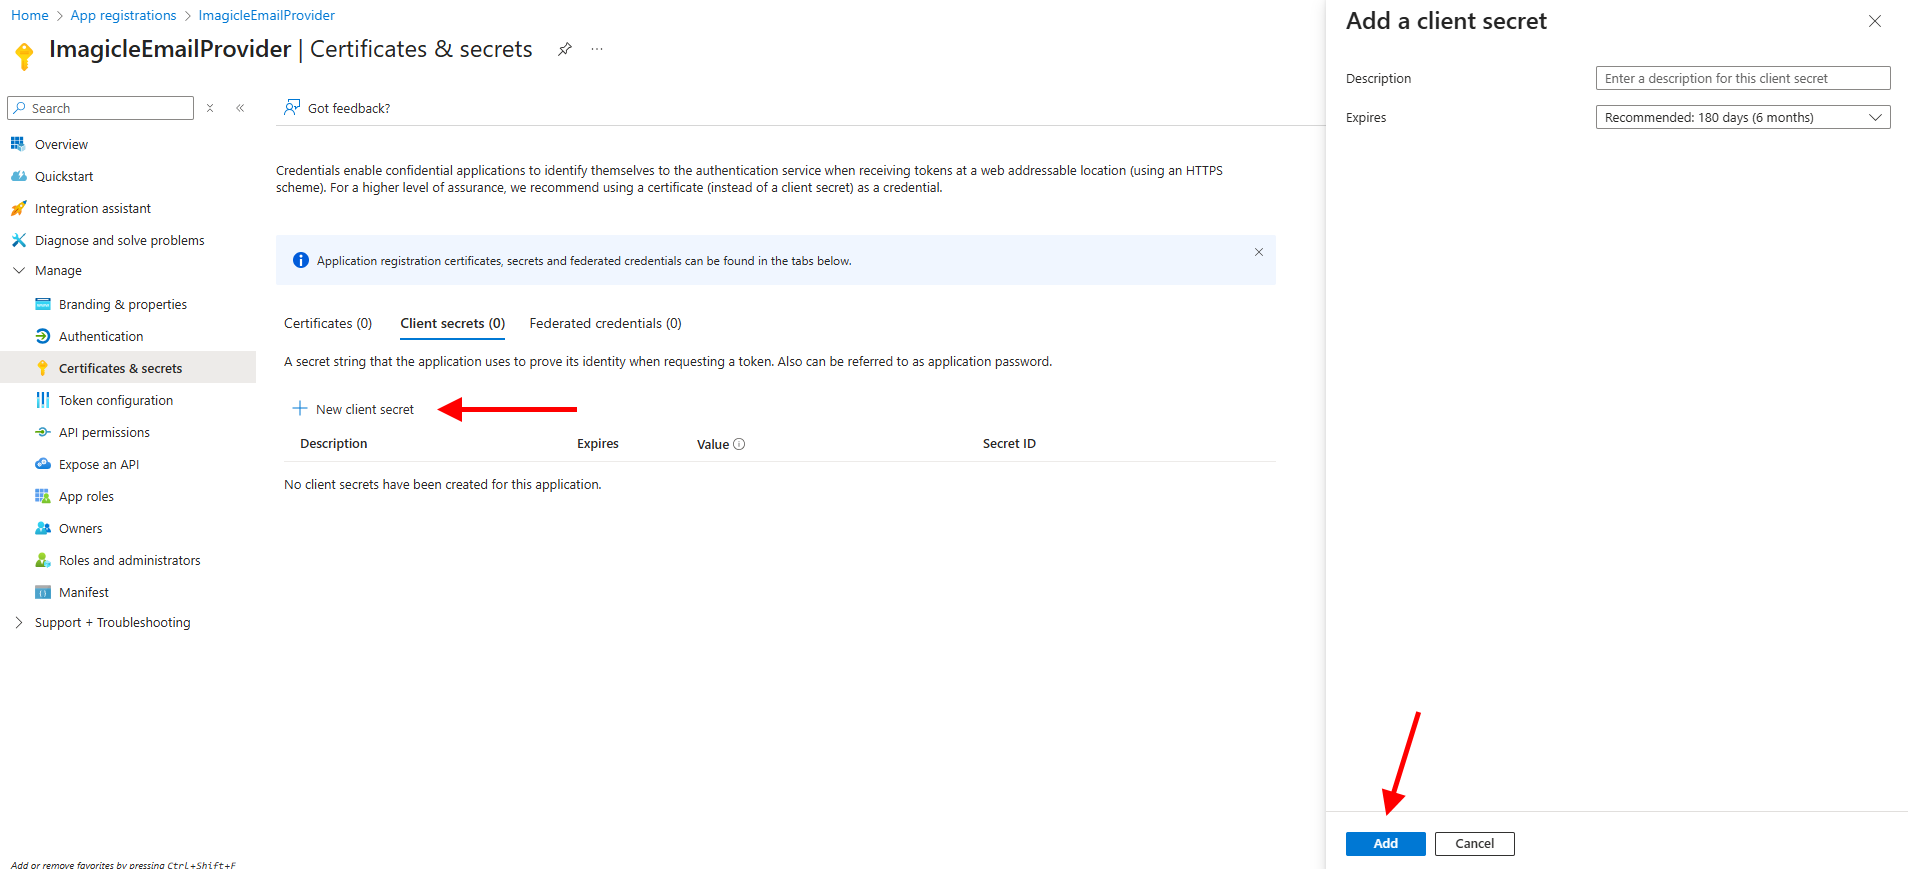
Now please click on "Certificates & secrets" option, included in left pane, and add a new "client secret" with the name of your choice and a long expiration period.
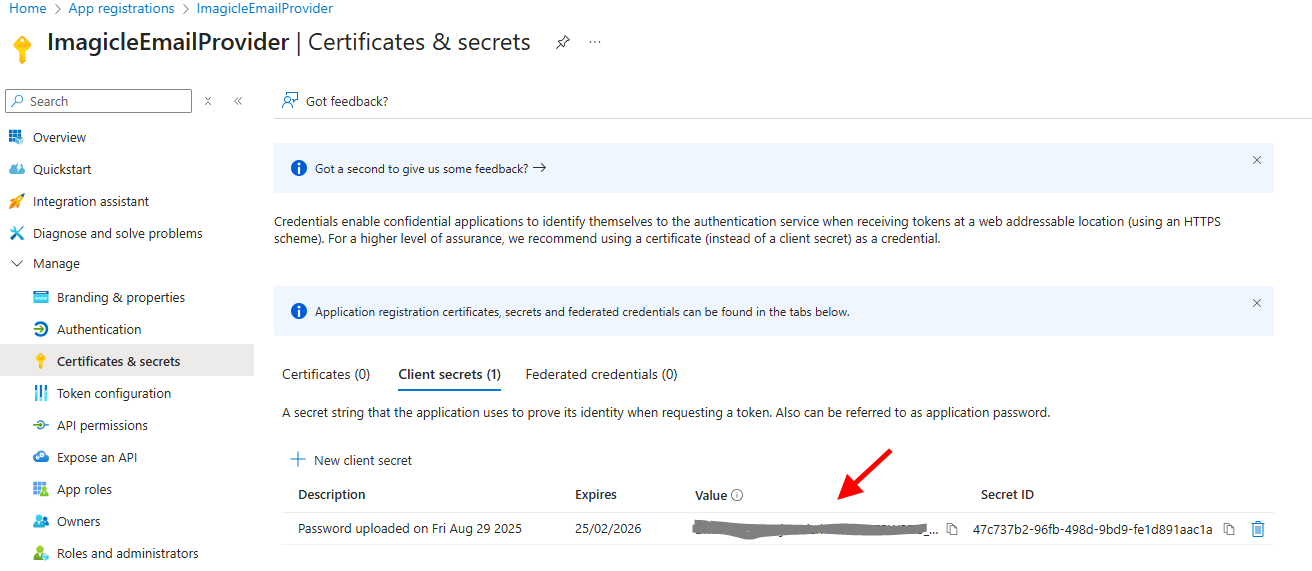
Once added, you'll get some data associated to it. Please copy "Value" field for later usage. Copy the field immediately after having created the client secret, because it will be automatically hidden after few minutes, for security reasons.
Now click on "Add permissions" and select "API’s my organization uses". Then search for "Office 365 Exchange Online".
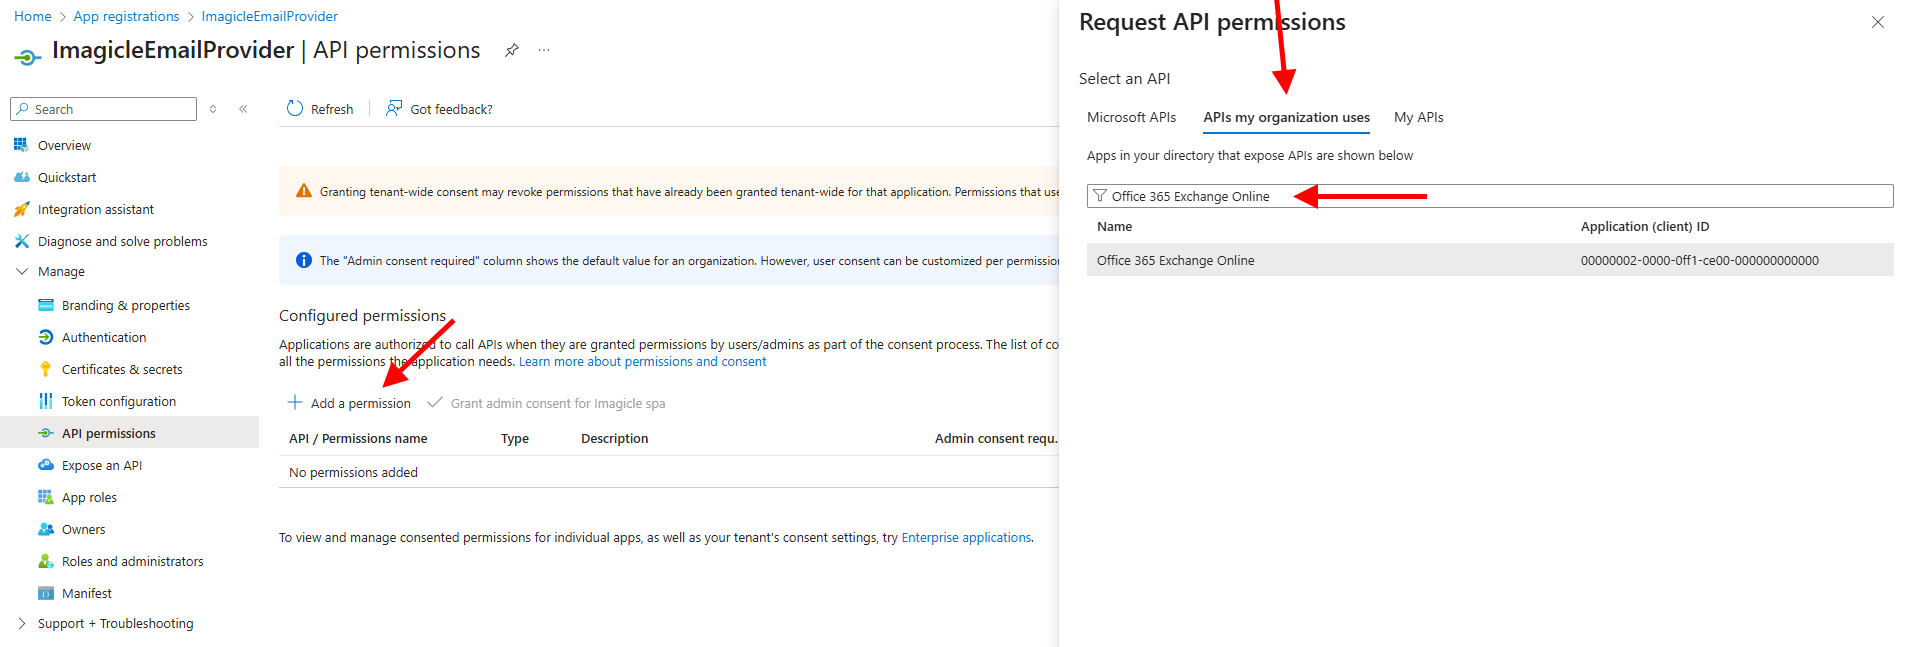
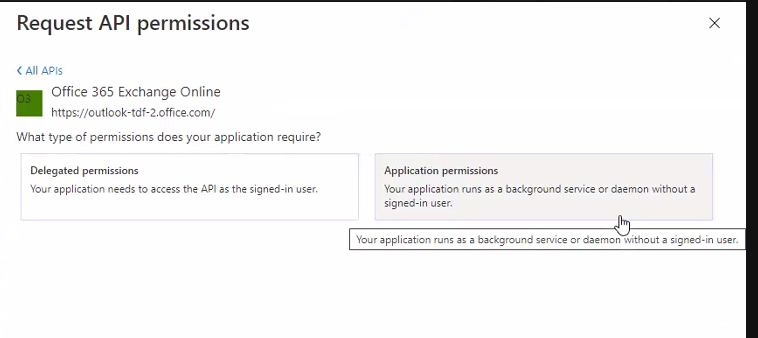
Select "Office 365 Exchange online" and then click on "Application Permissions"
From the list of available permission levels, please search for the following items:
IMAP.AccessAsApp
SMTP.SendAsApp
Once permission has been assigned, you must authorize them for your organization, by clicking on "Grant admin consent for <company_name>".

Now access to the list of Enterprise Applications and locate the "ImagicleEmailProvider" application:
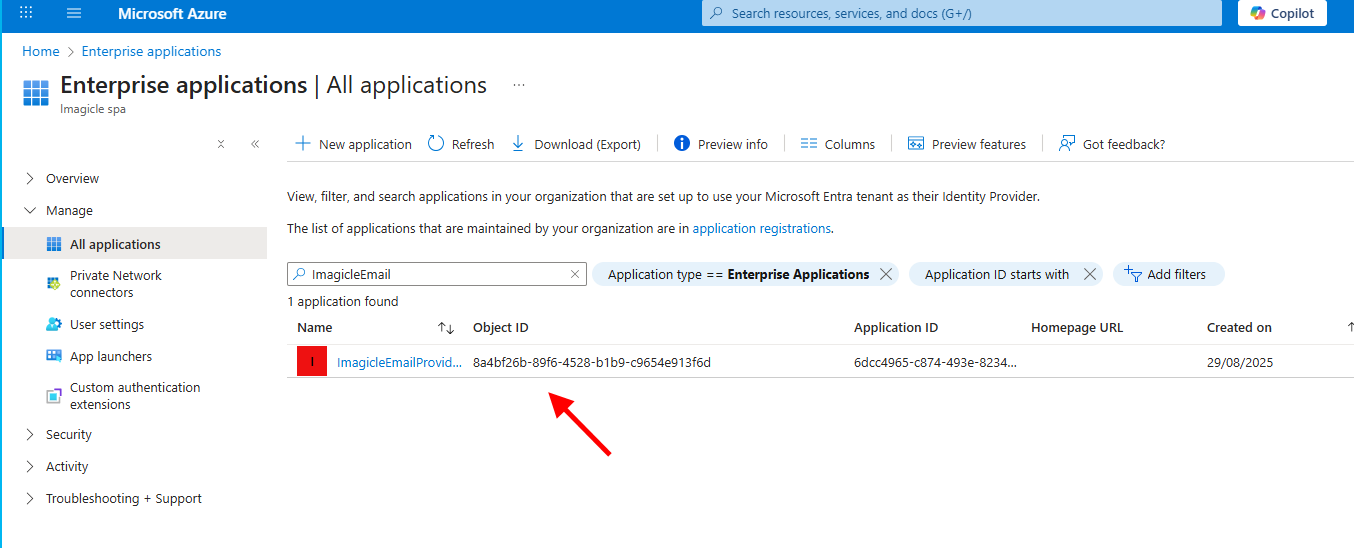
Copy the “Object ID” for later usage.
PowerShell configurations
Please run PowerShell as Administrator and execute the following commands to enter the Exchange administration powershell:
Set-ExecutionPolicy RemoteSigned
Install-Module ExchangeOnlineManagement
Connect-ExchangeOnline
Authenticate with your full admin Tenant account
Execute the following command to create a server principal linked to the Azure app above. This allows the app to operate within Exchange like a regular user:
New-ServicePrincipal -AppId <ApplicationID> -ServiceId <ObjectID> -DisplayName AnyNameYouLikewhere:
<ApplicationID>and<ObjectID>must be replaced with previously copied values;the DisplayName is something useful to identify the server principal, for instance “UCXSuiteMail“.
Grant the required permissions on the dedicated mailbox by executing the following command:
Add-MailboxPermission -Identity <email> -User <ObjectID> -AccessRights FullAccesswhere <email> should be replaced with the dedicated account to be used by Imagicle applications.
<ObjectID> is the previous one associated to the Enterprise App.
Finally, you need to enable SMTP Client Authentication.
You can do it either at organization level, executing the following command:
Set-TransportConfig -SmtpClientAuthenticationDisabled $falseor, alternatively, you can enable SMTP client authentication only for the specific email accounts used by Imagicle applications:
Set-CASMailbox -Identity <email> -SmtpClientAuthenticationDisabled $false where <email> should be replaced with the dedicated account to be used by Imagicle applications (for instance fax-notifications@acme.com).
Migration Path
If a customer is using the EWS|Deprecated authentication and wants to migrate to the new Microsoft 365 provider, it can use the old App Registration and just apply the required changes from the Azure portal, as highlighted in this KB article.
Troubleshooting
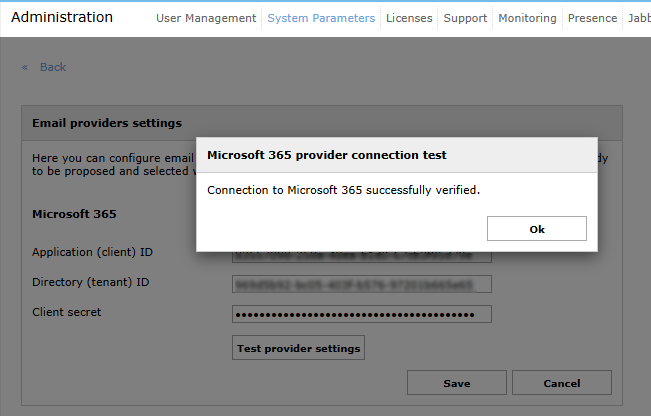
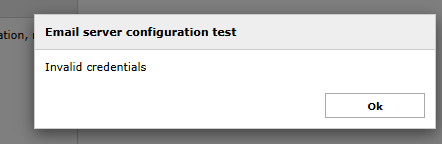
Execute the test in the Email provider settings panel of the Imagicle suite. If it fails, the data is invalid (check for typos or extraneous characters) or the secret has expired.
In such case, generate a new secret and enter it in the Imagicle suite.
Execute the test available in the Outgoing Email Parameters panel of the Imagicle suite.
If it fails, most probably, the SMTP protocol is not enabled at mailbox level or tenant level:
In such case, repeat the last configuration step explained above.
Connect to the Powershell ExchangeOnline console with administration rights, as explained above.
Execute the following command, to ensure the integration app is associated to a server principal:
Get-ServicePrincipal | Where-Object { $_.AppId -eq "<ApplicationID>" }Where <ApplicationID> must be replaced with your own application ID
A line like the following is expected to be printed:

Please, take note of the display name of the service principal for the next step.
Execute the following command to ensure the service principal has Full Access permissions over the mailbox you need to manage:
Get-MailboxPermission -Identity "<email>"after replacing <email> with the email address you need to manage for the Imagicle suite (fax-notifications@acme.com in our example above).
The command outputs the following:

Ensure a line includes the display name of the server principal identified in the previous step and associates it with FullAccess rights.
Ensure the SMTP client authentication is enabled (actually not disabled) either at system level or at single mailbox level:
Checking at system level:
Get-TransportConfig | Select-Object SmtpClientAuthenticationDisabledChecking at single mailbox level:
Get-CASMailbox -Identity "<email>" | Select-Object SmtpClientAuthenticationDisabledBoth commands should be return blank output or false.