Speed Dials local Directories
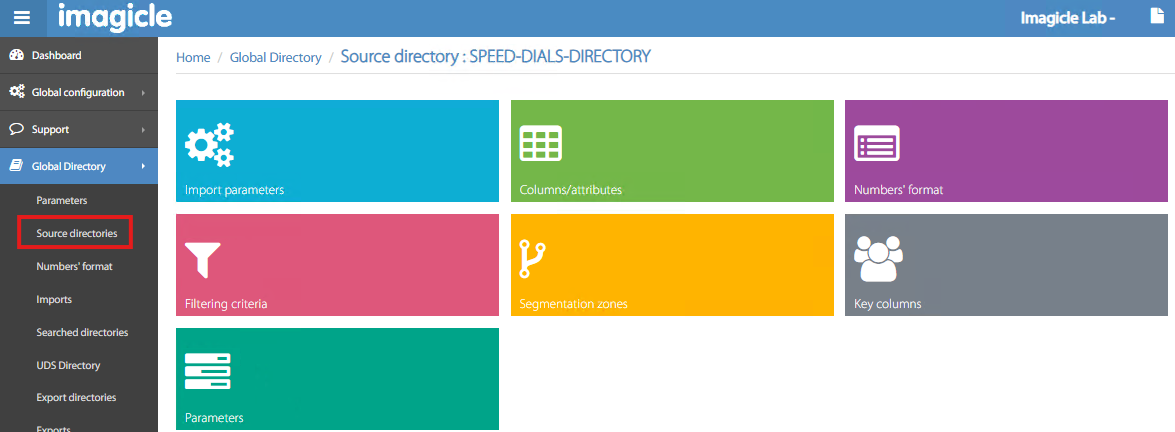
If you choose Speed Dials Directory, locally imported from a text file, when you hit ![]() you get the following new menu:
you get the following new menu:
Import parameters
Here you can configure automatic import interval, source file(s) and other rules. See below sample:
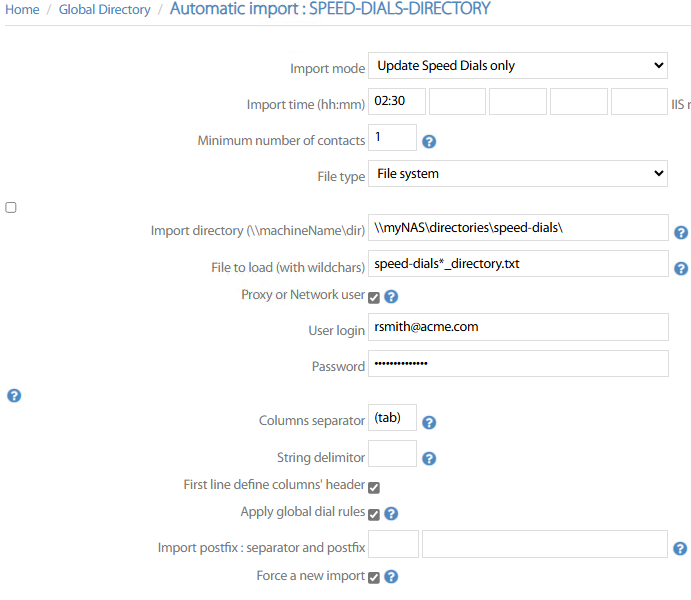
Import mode → Choose from pull-down menu how to feed data in the directory:
Update Speed Dials only → Speed dial directory is updated from source file at the configured import time.
After import → Directory is updated once previous import is completed.
Import time (hh:mm) → If above “Update Speed Dials only” is selected, then the automatic import is triggered up to five times per day, at the configured time slots.
Minimum number of contacts → This is the new/updated speed dial threshold to trigger the import. if speed dial changes are below this value, then automatic import is not performed and you can run the manual import instead.
File type → Two available options:
File system → Speed Dials are stored in a text file located in a Windows internal or external folder.
HTTP/HTTPS → Speed Dials are included into a web page
Import directory → This is the network path (internal or external) where the source Speed Dials text file is located. Does not appear when file type is HTTP/HTTPS.
File to load (with wildcards) → File name with optional ‘*' wildcard, to upload one or multiple text files sharing same name’s prefix or suffix.
Proxy or Network user → If checked, you are invited to enter the required User login/Password to access text file directory path. Typically needed for external folders only.
Column separator → this is the column separator between each field. You can use ‘,' or ‘;’ or '(tab)’
String delimiter → Delimit the value of the string to import. Can be useful to detect the end of a Speed Dial record.
Apply global dial rules → If checked, phone numbers normalization is applied, as per global Numbers' Format table.
Import postfix : separator and postfix → Here you can add a postfix to the imported columns and, if a delimiter is defined, you can replace the value after the delimiter with the configured postfix value.
Force a new import → If checked, a full Speed Dials import is performed at scheduled time, replacing the whole directory with data coming from text file. Any previous data is lost.
Columns/attributes
In this section, you can define the field mapping of your Speed Dial directory, which includes a fixed record structure. See below:
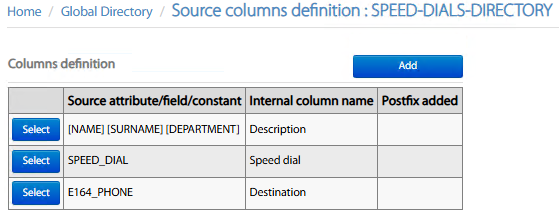
You can Select any existing row and modify field mapping. For each row, the following setting must be applied:
Internal column name → Pull-down menu including three fixed Speed Dial fields.
Three different mapping options:
Free attribute/field → Add here the field name(s), as included in text file’s top header. This option also allows to concatenate multiple fields, like “[NAME] [SURNAME]”.
Constant → Just fill the field with a fixed value.
Empty → Field is blanked.
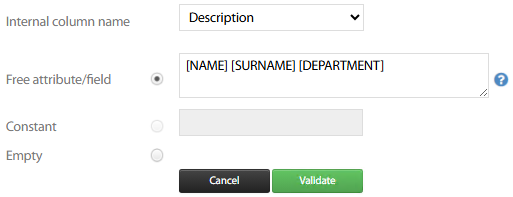
Hit Validate to save new/amended attribute. Once all fields have been added, you can Save.
Numbers' format
Please read Numbers' Format dedicated KB article for more details.
Filtering criteria
This section allows to apply filters while importing Speed Dials from source text file.
Two different filter types are available:
Include criteria → Import contacts which are fulfilling all criteria in the list.
Exclude criteria → Import contacts which are NOT fulfilling criteria in the list.
For each filter item, you can select the attribute to match, the criteria expression and the matching field value. Hit Validate to add each filter.
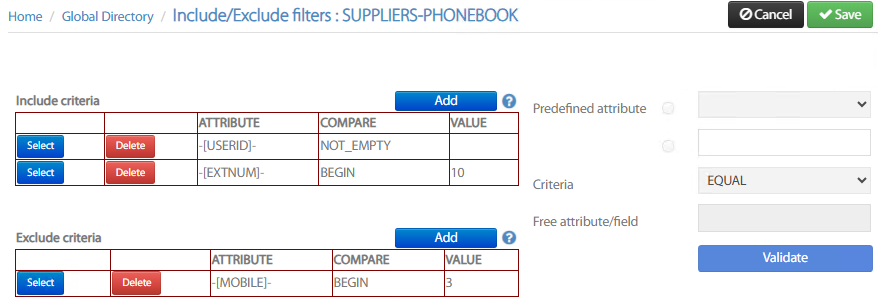
Once all filters have been added, hit Save.
Segmentation zones
If you wish to limit the access to Speed Dial directory to specific phone devices configured in your CUCM, then you can apply the segmentation. For this purpose, you can select how your segmentation is applied from pull-down Type menu: Device Pool, Calling Search Space, Locations, IP Addresses range. See below:
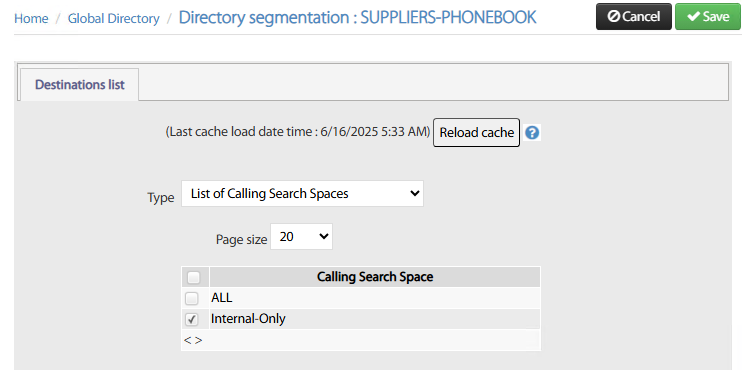
If you have applied recent changes to your CUCM config, please hit Reload cache button prior to apply segmentation.
Once segmentation rule is applied, hit Save.
Please remember that segmentation is applied to one type only. For example, you can’t apply segmentation based on CSS + DP.
Key columns
It might happen that different import sources include some duplicated contacts. To avoid same contact duplication in Imagicle ConMan Entp. directories, you can define the “Distinct Column(s)” including key data, which should not be duplicated.
Up to five contact fields can be used to avoid duplications, even if we recommend to leverage just one contact field to avoid performances issues (i.e. UserID). The Distinct treatment pull-down menu allows to select how duplicated contacts are merged or just discarded:
Keep only first contact → First contact found is saved. Any following duplicates are ignored.
Merge phone columns → First contact found is saved. If following duplicates include additional phone attributes, they are added in the first entry.
Merge all columns → First contact found is saved. If following duplicates include additional attributes, they are added in the first entry.
Left Join → First contact found is saved. If same contact is included into a second directory, you can merge all missing attributes in the first entry.
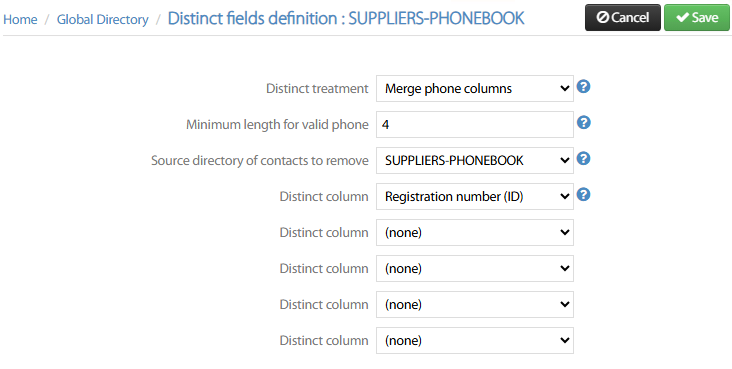
Source directory of contacts to remove → Choose from pull-down menu which directory should be considered as master for duplicated contacts. If you keep (none) default setting, then above treatment is applied as per import sequence. If a specific directory is selected, then duplicated contacts are remove from other directories but master one.
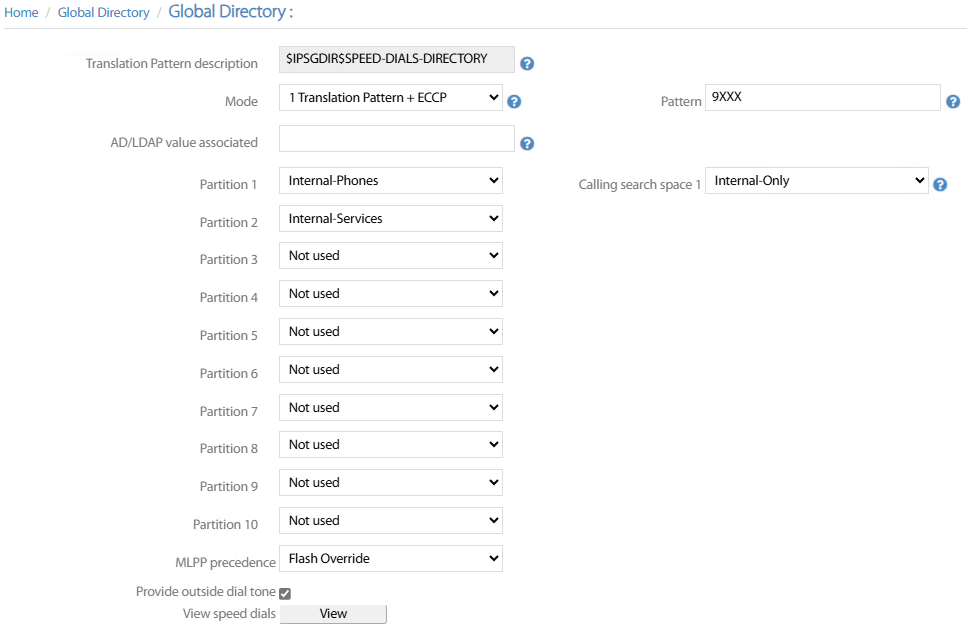
Parameters
Imagicle Contact Manager Enterprise converts Speed Dials into standard E.164 phone numbers by leveraging a Translation Pattern (TP) and an External Call Control Profile (ECCP).
You just have to select relevant Mode accordingly and add the pattern to identify speed dials (9XXX in below sample).
You can select up to 10 CUCM partitions including phone users who can leverage speed dials, with the correct CSS used to dial out to PSTN.
If MLPP precedence is in use in your CUCM, you can also decide which priority to assign to outbound calls triggered by Speed Dials.
Finally, a View button allows to display the Speed Dial directory list.