Cisco Built-in Bridge gateway forking additional configurations
Additional configurations for Built-in Bridge gateway forking (Network Based Recording)
Cisco Network Based Recording (also known as Gateway Recording) is available since UCM 10.0 and has some additional requirements if compared to the basic Built-In Bridge phone forking recording described in this KB article.
Specific configuration is required in all the routers/CUBEs that relay incoming/outgoing calls.
Hardware and Software Requirements
Accordingly with Cisco documentation, network based recording requires:
UCM 10.0 or higher
Supports both Voice Gateways and Unified Border Elements (CUBE) as long as they interface with Unified CM using SIP and the Router platform supports the UC Services Interface (not supported for H.323 or MGCP based calls). The word "Gateway" is used here interchangeably to refer to Voice gateways and CUBE devices
The Gateway has to be directly connected to the Unified CM using a SIP trunk. No support for SIP Proxy servers
ISR-G2 Gateways (29XX, 39XX Series) running release 15.3(3)M or later are supported. 15.3(3)M was released on CCO in July / 2013
ASR-100X Gateways running release XE 3.10 or later are supported. XE 3.10 was released on CCO in July / 2013
VG224 is not currently supported
Configurations on Cisco CUBE/GW
IOS Commands
The following IOS configuration must be applied to each CUBE/VG enabled for network based recording:
uc wsapi
message-exchange max-failures 100
response-timeout 1
source-address 192.168.204.52  << replace this with the actual voice LAN router IP address
probing interval negative 20
probing interval keepalive 255

provider xmf
remote-url 1 http://192.168.100.115/ucm_xmf  << Create a similar URL for each CallManager node running the SIP trunk
remote-url 2 http://192.168.100.115:8090/ucm_xmf  << Create a similar URL for each CallManager node running the SIP trunk
Then, check the registration is successfully, by invoking the command:
show wsapi registration allThe following command allows debugging the call media forking when call recording is triggered:
show call media-forkingEnsure that the internal HTTP server of the Cisco router is enabled, by issuing the following IOS command:
ip http serverSIP Trunk Configuration
The SIP Trunk connecting Cisco CUBE/GW to CUCM should have the “Recording Information” set in the following way:

CUCM additional configurations to record Remote Destinations
Network recording allows to record incoming calls answered by remote (off-cluster) devices. This allows to handle some particular scenarios, including:
Single Number Reach: the user can answer his office incoming calls from his/her mobile (GSM) phone.
On-call duty for critical services.
Incoming calls transferred to another CUCM cluster.
Incoming calls transferred to off-net destinations (remote call-centres, IVR,etc.).
This section describes how to configure CUCM to record this kind of calls.
Single Number Reach users
To record phone calls of users that are already enabled on CUCM for single number reach (Mobile Connect):
Configure CUCM for Network Recording, as described above.
In the Remote Destination Profile, select the associated DN and enable it for recording like a regular phone line:

DN properties:

Other remote destinations
If you need to record calls answered by remote destinations that are not associated to a user for Single Number Reach, the following configuration settings must be done on CUCM.
Just as an example, suppose you have an operator pool working in a Hunt Group (or QME agent group), normally being recorded. Suppose the Hunt Group escalates the call to a remote branch (calling a landline PSTN number) in the case no operators are available.
In order to record the calls forwarded to the remote branch, you need to create a dummy user with an "ad-hoc" extension enabled for the Single Number Reach and associated to the remote destination you need to record.
If you want to record such forwarded calls, you need to go through the following configuration steps.
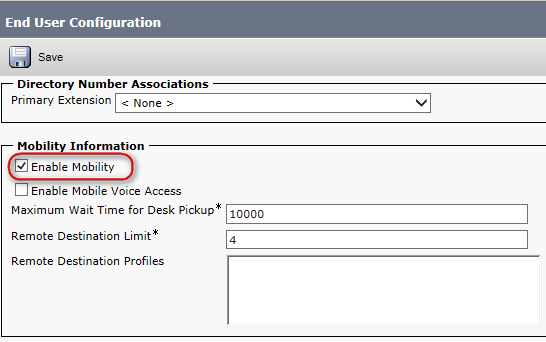
Define a new end-user (even a generic dummy user, like rec.user1) enabling the checkbox "Enable Mobility":
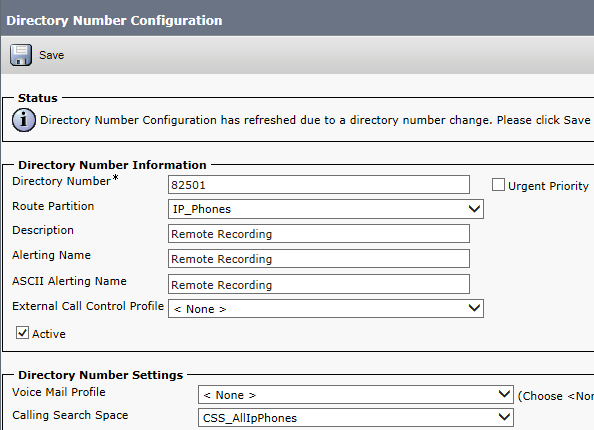
Create a new DN, just for recording purpose. This DN will trigger the outgoing call to the remote destination. Add the DN in the last position of the Hunt Group, for escalation purposes (e.g. 82501, in picture below).
Create a new Remote Destination Profile (Device => Device Settings => Remote Destination Profile) with the following properties:
Name and description: whatever you want, for instance: "RDP Employee Mobile Phone"
UserID: the end-user created at the step 1 (rec.user1)
CSS: a valid CSS enabled to place calls to the remote destination
Device Pool: a convenient device pool. This device pool should contain at least a transcoding resource if the outgoing call leg is established with an unsupported codec.
Save the Remote Destination Profile:
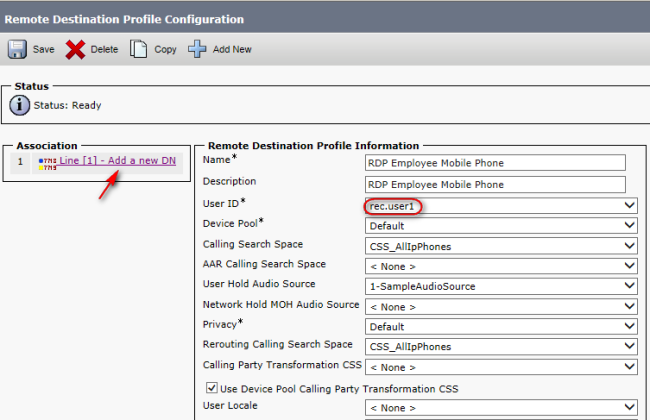
Go back to the Remote Destination Profile, then click on "Add a New Remote Destination"

Insert the remote destination number (the mobile remote branch number in the example above), including the off-net prefix, if required. Also, enable the Single Number reach checkbox and make the remote phone immediately rings as soon as the 82501 DN rings:
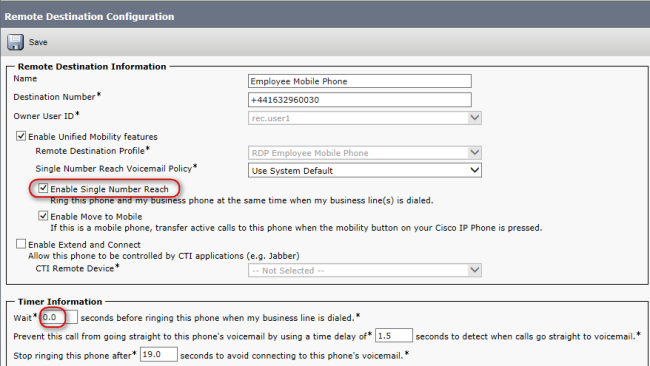
Save the remote destination, associate it to the DN defined above (82501) and save again:
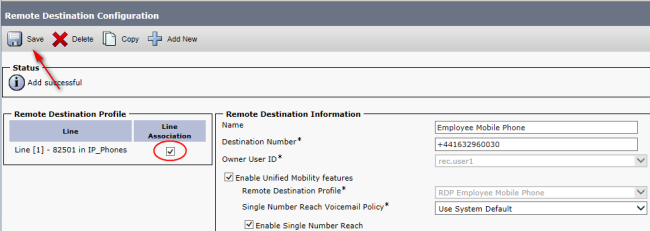
Go back to the Remote Destination Profile, select the associated DN (82501) and enable it for the network recording (Automatic Call Recording Enabled, Imagicle Recording Profile, Gateway Preferred):
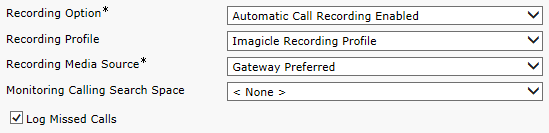
Save and apply the new settings.
Configure in the Imagicle UCX Suite a real or dummy user with the DN defined above (82501) as primary extension number and enable it for Call Recording application.
Test: place a call to the DN defined above (82501). The remote phone should ring after a few seconds. As soon as the call in answered by the remote phone, the media forking should be triggered automatically and the conversation should be recorded by Imagicle Call Recording.
10) Test the real scenario you need to handle (the hunt group escalation in the example above).