Welcome to the Digital Fax KB
Traditional fax machines are outdated and they do not offer the level of privacy required by today's regulations like GDPR and MIFID-II.
Imagicle Digital Fax is a software-based solution including a robust fax server engine based on Imagicle unique Fax to IP driver, directly interfaced to any Calling Platform or Media Gateway supporting SIP or H.323 trunking, leveraging T.38 or G.711 PassThrough fax-over-IP protocols.
A professional fax server grants substantial savings and it improves customer service and company image; the process of sending a fax is faster and incoming faxes are automatically integrated with a web portal, email system and CRM/ERP workflows.
Digital Fax delivers a complete IP fax server solution, allowing users to directly send and receive faxes in many different ways, as shown in below diagram:
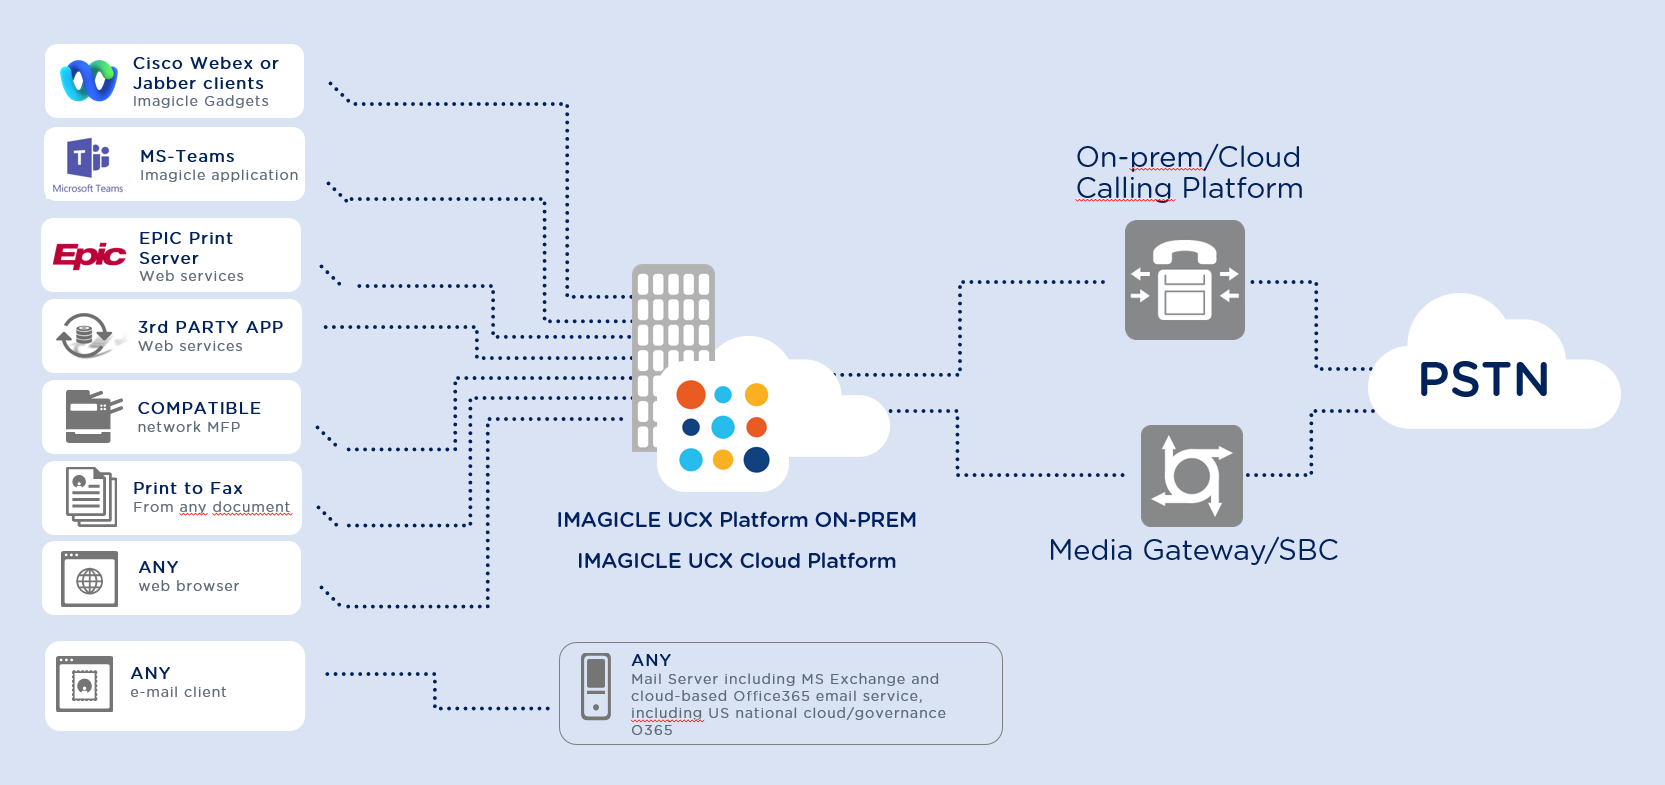
Digital Fax can be seamlessly integrated with any on-prem e-mail server or Cloud-based email service by leveraging SMTP or OAuth2 protocols for fax notifications delivery; IMAP4, POP3, EWS or OAuth2 for fax sending, without enforcing specific infrastructure requirements.
Digital Fax can automatically route incoming faxes in TIFF or PDF formats to each user's mailbox and personal web interface, picking out the right recipient by the Called Line Identifier (fax extension) or by the line on which the fax is received.
This enables users to check faxes from anywhere in the world using either:
An email client (i.e.: Outlook, Lotus Notes...). This is the Email-to-fax feature
A web browser (Edge, Chrome, Firefox,...). This is the Web-to-fax feature
Imagicle gadgets for Jabber, Webex and MS-Teams
To send a fax, each user can either:
Create a new standard email message from own email client (any)
Upload mixed documents via dedicated web portal
Upload mixed documents via dedicated gadget for Jabber, Webex and MS-Teams
Directly print from any application to the Digital Fax virtual printer ⇒ Print To Fax feature
Scan a paper document on MFP and send it out as fax.
Leverage native EPIC integration, for healthcare entities.
Leverage REST APIs from any third-party application
Whatever is the adopted method for fax sending, the user receives a transmission notification report in own inbox.
Digital Fax automatically manages the outgoing queue, including a configurable number of retries if not succeeding.
Fax reception provides the following user's options to retrieve inbound documents:
Email notification with PDF fax attachment on personal/group mailbox
Document download from web portal's own fax Inbox
Document download from dedicated gadget for Jabber, Webex and MS-Teams
Network printer/MFP ⇒ Fax to Printer feature
Leveraging REST APIs from any third-party application
Together with the other apps included in Imagicle UCX Suite, Digital Fax completes the Unified Messaging Solution for multiple Calling Platforms.
Licensing
Imagicle Digital Fax is licensed per channels, meaning the number of concurrent inbound/outbound fax transactions, regardless the number of users.
Digital Fax subscription license includes 1 channel. It is possible to purchase multiple licenses, up to 90 channels per server. If more than 90 channels are required, a Digital Fax multi-nodes cluster can be deployed, reaching up to 720 channels.