
This article describes how to configure your Active Directory Federation Services (ADFS) to enable Imagicle users to login to web portal, gadgets and Attendant Console with Single Sign-on based on SAML protocol.
This procedure has been tested with ADFS 3.0.
Prerequisites
In order to successfully configure your ADFS, you should have the following data:
-
User Pool ID
-
Redirect URI
More details are available here.
Procedure
-
Connect to the Windows Server instance where you have installed ADFS as an Administrator via RDP
-
Open the ADFS console
-
Go to "Trust Relationships" > "Relying Party Trusts" > "Add relying party trusts". This will start a wizard
-
On the Welcome tab select "Claims aware", then click "Next"
-
On the Data Source tab select "Enter data about the relying part manually", then click "Next"
-
On the Display Name tab set "Imagicle UCS" as "Display name" (or whatever you prefer), then click "Next"
-
On the Configure Certificate tab do not configure anything and click "Next"
-
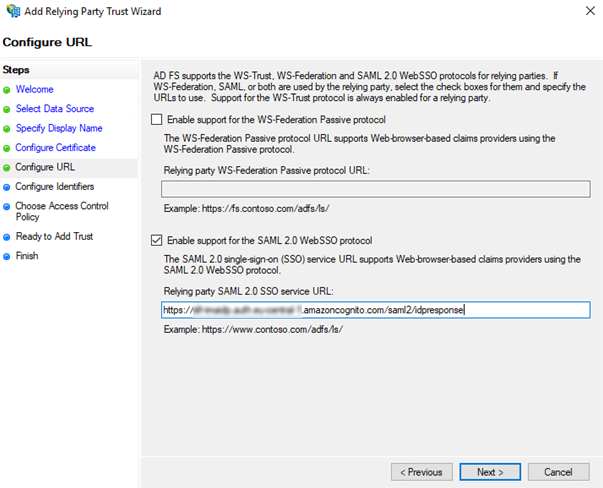
On the Configure URL tab select "Enable support for the SAML 2.0 WebSSO protocol" and set the Redirect URI as a "Relying party SAML 2.0 SSO service URL", then click "Next"
-
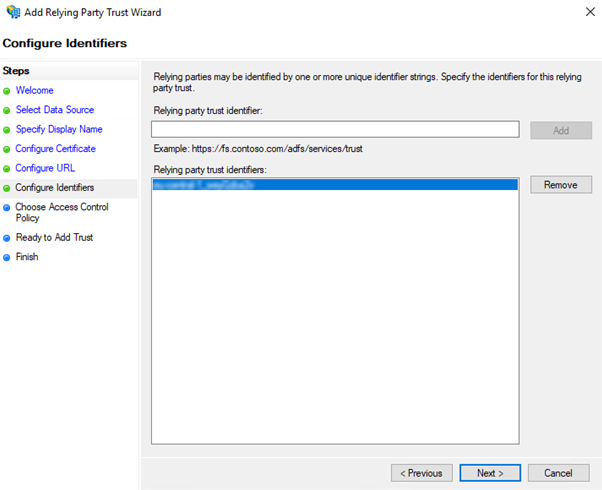
On the Configure Identifiers tab add the User Pool ID as a "Relying party trust identifier". It must be in the format urn:amazon:cognito:sp:<User Pool ID> (e.g., urn:amazon:cognito:sp:eu-central-1_xxxxxxxxx). Then click "Next"
-
On the Access Control Policy select "Permit everyone", then click "Next"
-
On the Ready to Add Trust do not change anything and click "Next"
-
On the Finish tab enable "Configure claims issuance policy for this application", then click "Close"
-
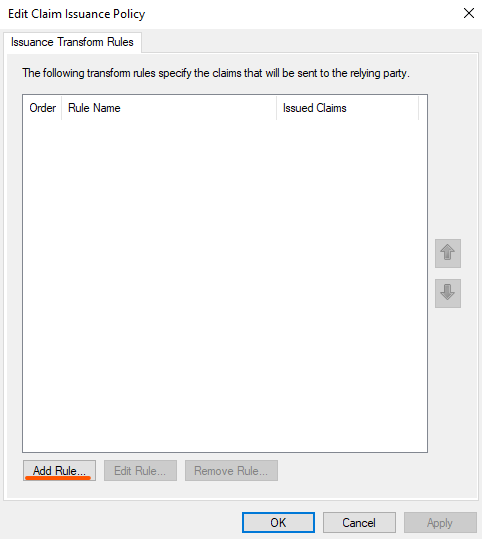
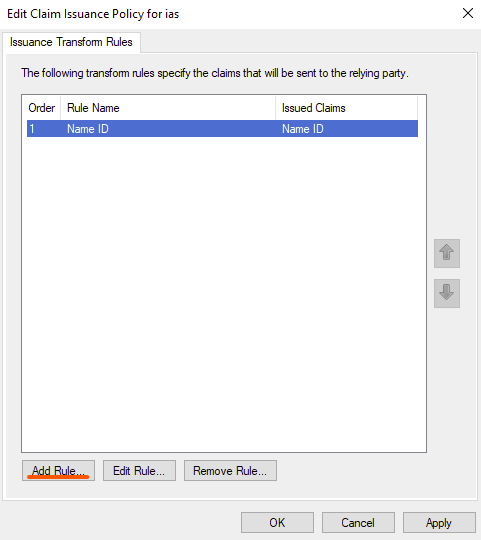
On the Edit Claim Issuance Policy click on "Add Rule"
-
On the Add Transform Claim Rule Wizard select "Send LDAP Attributes as Claims" as a "Claim rule template", then click "Next"
-
On the Configure Claim Rule:
-
set "Name ID" as a "Claim rule name"
-
set "Active Directory" as an "Attribute store"
-
-
On the Mapping of LDAP attributes:
-
set "SAM-Account-Name" as an "LDAP Attribute”
-
set "Name ID" as an "Outgoing Claim Type"
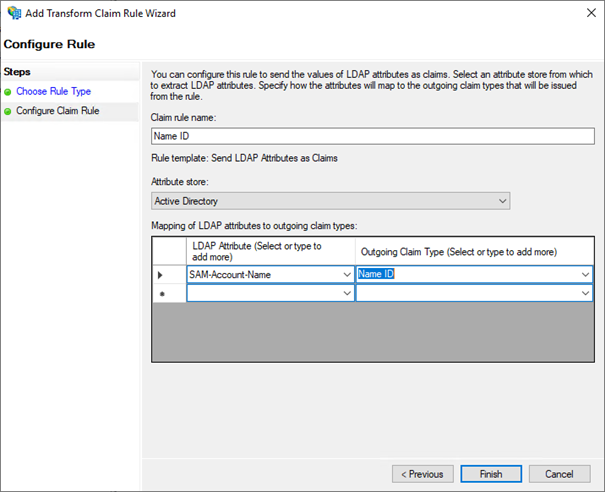
then click on "Finish"
-
Click again on "Add rule"
-
On the Add Transform Claim Rule Wizard select "Send LDAP Attributes as Claims" as a "Claim rule template", then click "Next"
-
On the Configure Claim Rule:
-
set "E-Mail" as a "Claim rule name"
-
set "Active Directory" as an "Attribute store"
-
-
On the Mapping of LDAP attributes:
-
set "E-Mail-Addresses" as an "LDAP Attribute"
-
set "E-Mail Address" as an "Outgoing Claim Type"
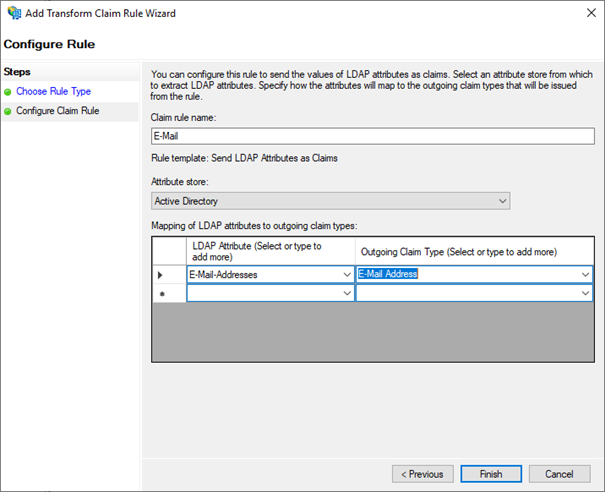
then click on "Finish"
-
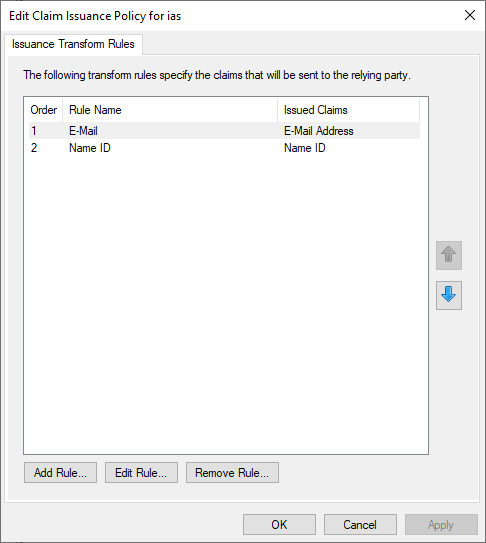
Click now on "OK" to complete the configuration
-
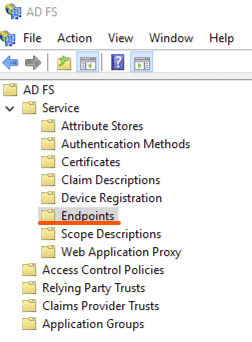
Last thing to do is download the Federation Metadata xml file. This can be found by clicking on "AD FS" > "Service" > "Endpoints" then locate the URL path in the "Metadata" section. The path is typically /FederationMetadata/2007-06/FederationMetadata.xml as shown below:
-
To download the file, load the URL in the browser on the server (e.g., https://<hostname>/FederationMetadata/2007-06/FederationMetadata.xml)
-
Please send downloaded file to Imagicle Team to complete the SSO federation.