Main concepts
MCP (Model Context Protocol) is an open standard that allows AI assistants to connect directly to external tools, data sources, and business systems in a structured, secure way. Instead of building a custom integration for every single system, an MCP-compatible AI assistant can discover and use any system that exposes an MCP connector — making integrations faster to set up and easier to scale.
MCP support in Imagicle AI Receptionist
Imagicle AI Receptionist, within own Autonomous prompts, does support MCP, allowing it to connect with a wide range of internal business systems and tools beyond the platforms it integrates with natively. This means the AI Receptionist can be extended to interact with additional line-of-business applications — such as CRMs, ticketing systems, ERPs, or custom internal databases — without requiring a bespoke integration for each one.
Availability
Generic MCP support for Imagicle AI Receptionist is being rolled out starting from Summer 2026 release. Additional MCP-based capabilities are also planned, including native integration with Microsoft Teams and Webex presence for smarter, availability-aware call routing, and native calendar integration for scheduling, modifying, and managing appointments — both targeted for a later release.
The Imagicle MCP
Providing your AI Receptionist license includes MCP integrations, a complimentary Imagicle MCP connector is supplied by default.
If you click on the relevant button, you can browse the list of all embedded tool:
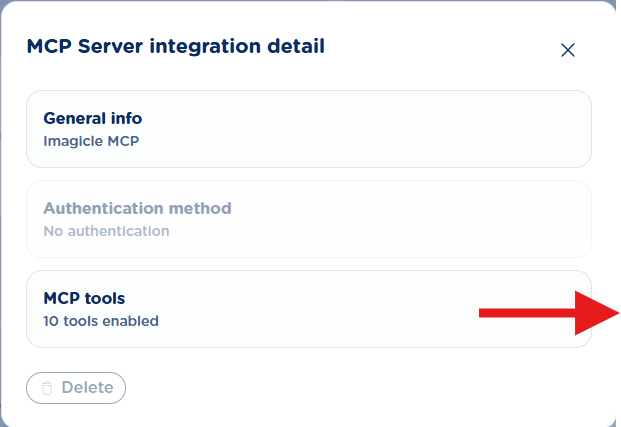
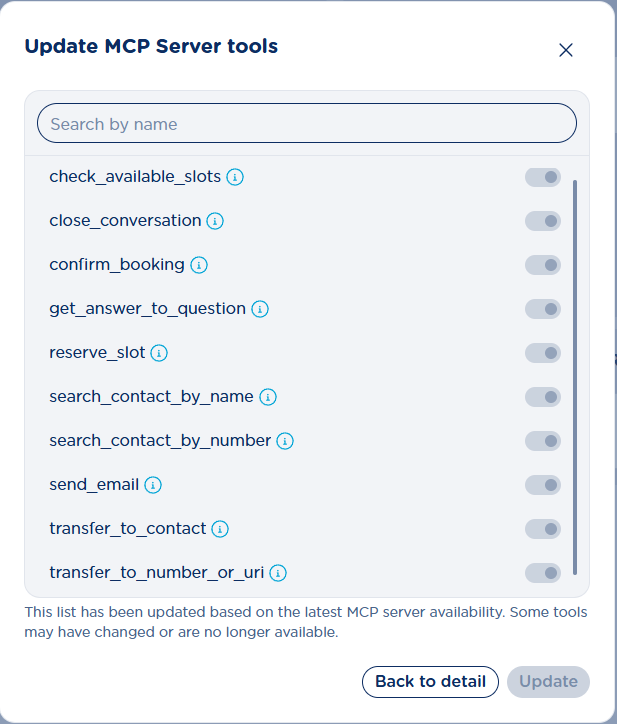
as seen in above list, the Imagicle MCP includes must-have tools for checking calendars, add a new booking and ask for confirmation. Moreover, you can search for a contact and transfer the call or send emails and finally end the conversation.
Add a new MCP Integration
Please click on Create button to add a new MCP Server:
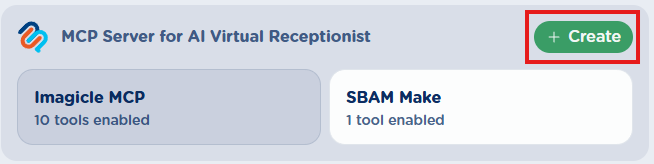
The following window pops-up:
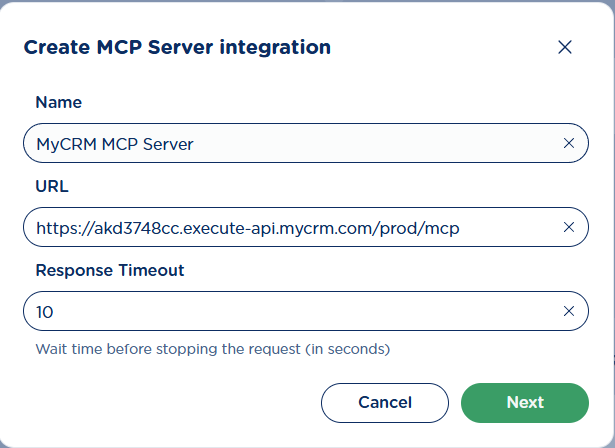
Fill the window with these data:
-
Name: A name of your choice identifying the MCP connector
-
URL: Specific MCP URL supplied by your MCP Provider
-
Response Timeout: You can leave the default 10 seconds timeout, unless specified by the MCP Provider.
Hit Next to proceed with additional configurations:
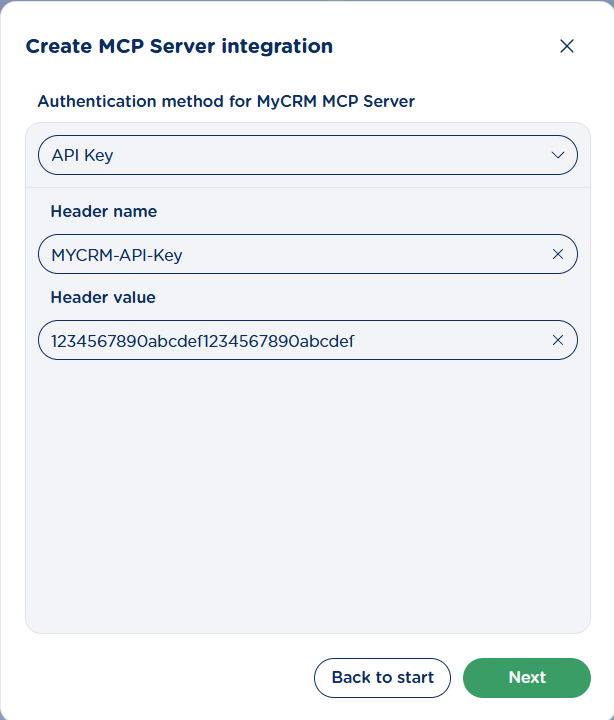
Fill above window with these data:
-
Authentication method: You can choose between “No authentication” or “API Key”. If you choose the latter, the following additional parameters must be filled.
-
Header name: Specific MCP’s https header name to be included into each request toward MCP.
-
Header value: Specific MCP’s https header value to be included into each request toward MCP. This is typically a complex alphanumeric string, similar to a compliant password.
Hit Next to test the MCP connection. After few seconds, if the test is successful, a new window pops-up where you can enable the required MCP tools
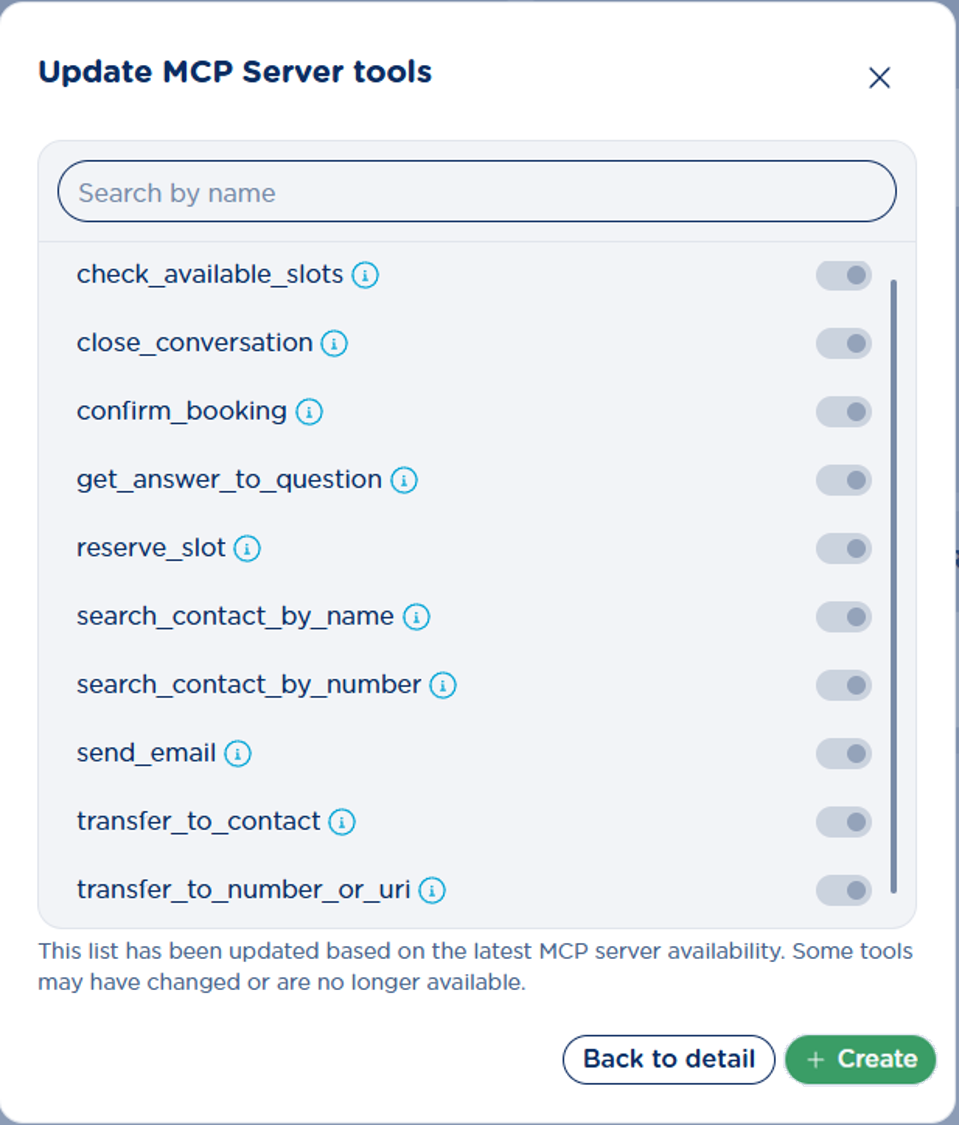
Once done, just click on